If your bike pulls to one side, check for misaligned or bent wheels, uneven tire pressure, or loose components like the headset or axle. Inspect the rim for wobbling, ensure tires are properly inflated and wear evenly, and verify the front fork and suspension are aligned. Tighten spokes and hub bearings as needed. Proper maintenance and systematic checks help correct pulling issues. For detailed steps, continue exploring the complete alignment checklist to make sure your bike handles smoothly.
Key Takeaways
- Check for wheel true and ensure rims are straight, free of dents or bends.
- Verify tire pressure is even and at recommended levels for balanced contact.
- Inspect and tighten hub bearings and spokes for proper tension and alignment.
- Confirm handlebar, stem, and fork are properly aligned with the front wheel.
- Regularly maintain and adjust steering components to prevent play and ensure stability.
Why Does My Bike Pull to One Side When I Ride?

If your bike pulls to one side while riding, it often indicates an alignment issue or uneven component wear. This imbalance may stem from misaligned wheels, which cause uneven rolling resistance. It can also result from worn or damaged components such as the fork, headset, or spokes, leading to inconsistent handling. Tire pressure discrepancies between the two tires can exacerbate the pull, as uneven inflation affects contact patch and traction. Additionally, a bent or warped wheel rim can create friction asymmetry, pulling the bike toward one side. Mechanical issues like loose or improperly adjusted headset bearings can also contribute to instability, causing the frame to shift slightly and influence directional control. Regularly checking your bike’s alignment and inspecting for signs of component wear can help prevent such issues and maintain smooth handling. Understanding how wheel setup impacts bike stability is crucial for addressing these problems effectively, especially since proper maintenance ensures all parts work harmoniously.
How Do I Check If My Bike’s Wheels Are Properly Aligned?

Begin by visually inspecting the wheels for any noticeable bends or irregularities in the rims. Next, perform a test ride to observe if the bike pulls or handles unevenly, indicating misalignment. Finally, check the rim alignment against the brake pads or frame to verify the wheels are centered and true. Incorporating a visual assessment of wheel condition can also help identify subtle issues that might affect alignment. Additionally, ensuring the proper wheel installation according to manufacturer specifications can prevent future misalignment problems. Regularly checking for wheel balance can further improve riding smoothness and longevity.
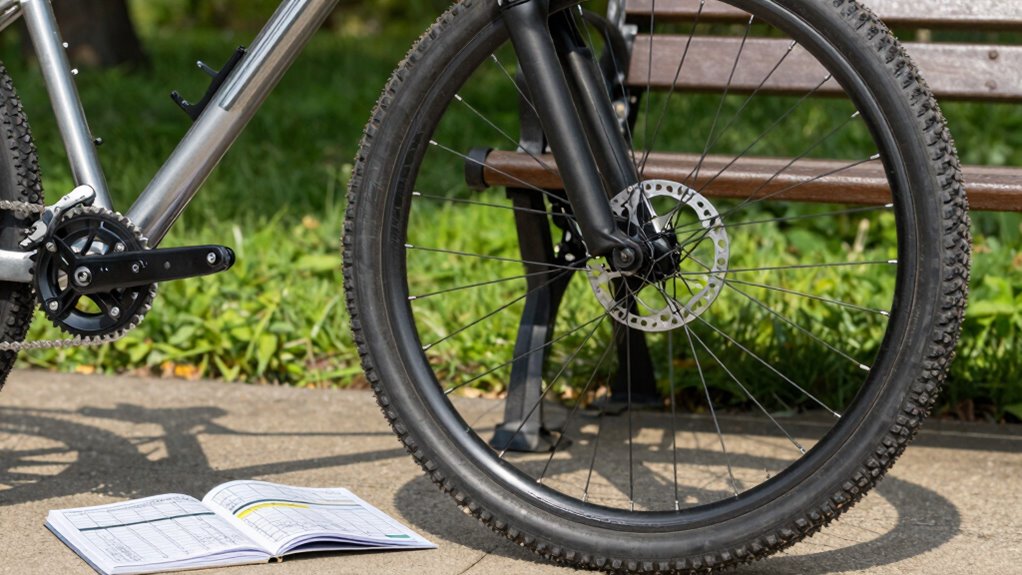
Visual Wheel Inspection
How can you quickly determine if your bike’s wheels are properly aligned? Conduct a visual inspection by examining the rim-to-tire interface along the entire wheel circumference. Look for any side-to-side deviations or uneven gaps between the tire and fork or frame. Confirm that both wheels are centered within the dropouts or frame mounts; misalignment here indicates possible skew. Check for lateral wobble by spinning each wheel and observing for side-to-side movement. Also, inspect the spoke tension—unequal tension can cause misalignment over time. Ensure the rims are straight without visible bends or dents. A precise visual assessment combined with these checks helps identify obvious misalignments, serving as a preliminary step before more detailed measurements or test rides.
Test Ride Assessment
To accurately assess wheel alignment, take your bike for a controlled test ride on a flat, straight surface. Focus on maintaining a steady throttle and a consistent riding position. Observe the bike’s handling: if it pulls consistently to one side, this indicates misalignment. Pay close attention to steering input; you should not need to exert extra force to keep the bike straight. Track the bike’s path carefully, noting any deviations or veering tendencies. A properly aligned wheelset will track straight without constant correction. Keep your hands light on the handlebars to avoid introducing bias into the assessment. Document any drift or resistance, as these signs point to potential misalignment issues requiring further adjustment or professional inspection.
Check Rim Alignment
Are your bike’s rims properly aligned? To verify, position your bike upright on a flat surface. Using a ruler or a rim alignment gauge, measure the distance between the rim and the brake pads or frame at multiple points around the wheel. Rotate the wheel incrementally, noting any discrepancies in spacing. Consistent measurements indicate proper alignment; uneven gaps suggest misalignment. Pay particular attention to the runout, which is the lateral deviation of the rim from a true circle. Use a spoke wrench to tighten or loosen spokes evenly, aiming to reduce visible wobble. Confirm the rim’s true position by spinning the wheel and observing its path relative to the fork and frame. Additionally, understanding rim trueness can help you better identify subtle deviations. Proper rim alignment ensures efficient riding and prevents uneven tire wear.
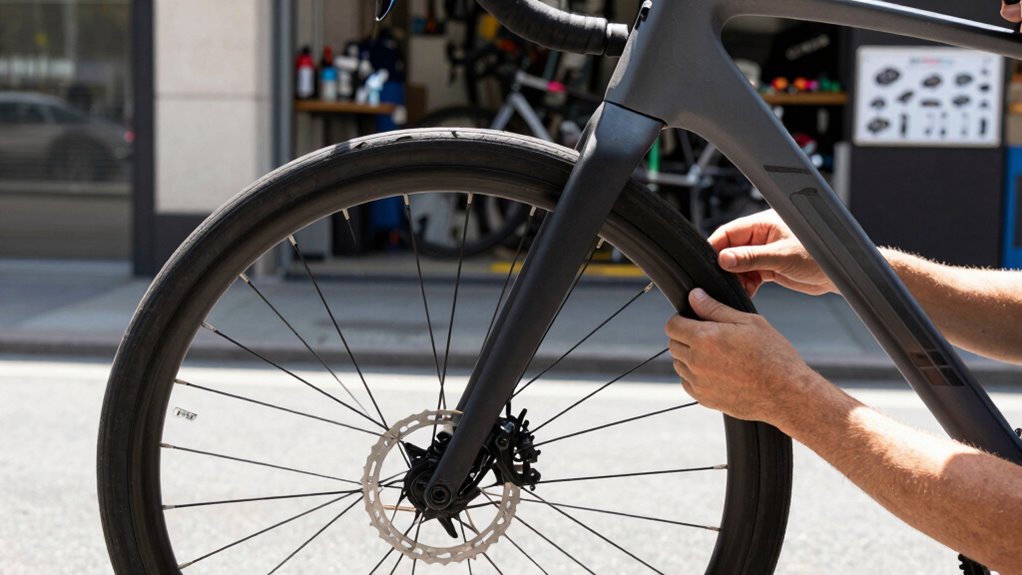
Are My Tires Inflated and Worn Evenly?
Ensure your tires are properly inflated to manufacturer specifications, as incorrect pressure affects handling and wear. Examine tire tread patterns for uneven wear, which indicates alignment or suspension issues. Verify air distribution across the tires to prevent irregular wear and maintain ideal contact with the road. Additionally, inspecting your tires with at-home technology devices can help detect early signs of uneven wear or damage, aiding in timely maintenance. Regularly monitoring tire pressure with a reliable gauge can further prevent issues caused by improper inflation. Incorporating wheel alignment checks into your routine can also help maintain even tire wear and improve overall vehicle safety. Paying attention to tire wear patterns can provide early indications of underlying issues that need addressing, especially when combined with backyard transformation essentials like landscaping and outdoor maintenance to keep your vehicle in optimal condition.
Tire Pressure Checks
Proper tire pressure is essential for ideal bike performance and safety, as under- or over-inflated tires can lead to uneven wear and compromised handling. Use a calibrated pressure gauge to verify your tires match the manufacturer’s recommended PSI, which guarantees maximum contact with the road surface and maintains proper load distribution. Consistently check pressures before each ride, especially after temperature fluctuations, as air volume varies with temperature changes. Uneven wear often correlates with improper inflation; both under- and over-inflation can cause localized degradation. Confirm valve stems are secure and free of leaks. Regularly inspecting tire pressure maintains consistent rolling resistance, prevents pinch flats, and supports accurate steering, contributing to the overall alignment and performance of your bike. Additionally, monitoring your tire inflation and condition helps prevent equipment failure and extends the lifespan of your tires. Staying aware of your tire condition is also part of maintaining wave and wind conditions for a smoother ride. Checking your tires for wear patterns can reveal early signs of misalignment or suspension issues that could affect handling. Ensuring your tires are properly inflated and evenly worn contributes to better traction and safety during rides. Incorporating regular maintenance routines can further optimize your bike’s overall performance and longevity.
Tread Wear Patterns
Tread wear patterns provide critical insights into your tire’s inflation status and overall alignment. Uneven wear, such as excessive wear on one side, indicates misalignment or improper tire pressure. Centered wear suggests correct inflation, while scalloped or cupped patterns may point to suspension issues or inconsistent pressure. Look for feathering edges or ridges along the tread, which often signal alignment deviations or wheel imbalance. Consistent, even tread wear across the entire surface confirms proper inflation and alignment. Additionally, home security systems can be useful in monitoring your vehicle when parked or in the garage, providing an extra layer of safety. Regularly analyzing tread wear helps prevent uneven deterioration, ensuring optimal contact with the road surface and maintaining safe handling characteristics. Accurate assessment of wear patterns is essential for diagnosing and correcting alignment issues effectively. Understanding tire wear patterns can also assist in scheduling timely maintenance and prolonging the lifespan of your tires. Recognizing the importance of balance and rotation can further enhance tire longevity and vehicle safety. A thorough inspection of your tires, including visual cues, can help you identify subtle signs of misalignment before they become more serious issues. Being aware of alignment correction options can help you address issues promptly before they cause further tire damage.
Even Air Distribution
Uneven air distribution across your tires can lead to inconsistent wear patterns and compromised handling. To guarantee ideal performance, verify that both tires are inflated to the manufacturer’s recommended pressure, which is usually indicated on the sidewall or in the owner’s manual. Use a precise pressure gauge for accuracy. Underinflation causes increased contact patch size, accelerating wear and reducing responsiveness, while overinflation results in a smaller contact patch, decreasing grip and causing irregular tread wear. Inspect tires for signs of uneven wear, such as cupping or feathering, which can indicate pressure imbalance. Regularly checking and maintaining correct tire pressure promotes even tread wear, enhances handling stability, and prolongs tire lifespan. Proper inflation is critical for safe, predictable riding dynamics. Additionally, understanding tire maintenance can help prevent issues and ensure optimal performance.
How Can I Make Sure My Wheel Is Truly Straight?
To guarantee your wheel is truly straight, start by inspecting it visually for any warping or misalignment. Check the rim for dents, bends, or irregularities, especially near the spokes or braking surface. Spin the wheel slowly and observe its rotation; a true wheel should rotate smoothly without wobbling. Use a static truing stand or a fixed reference point, such as a brake pad or alignment tool, to identify lateral deviations. Measure side-to-side runout with a dial indicator placed against the rim, ensuring it stays within manufacturer specifications. Confirm that the rim’s edges remain parallel to the hub and that the bead seat is uniformly aligned. Precise visual and measurement checks are essential to verify that the wheel is straight before proceeding with further adjustments.
How Do I Inspect and Adjust My Bike’s Hub and Axle?
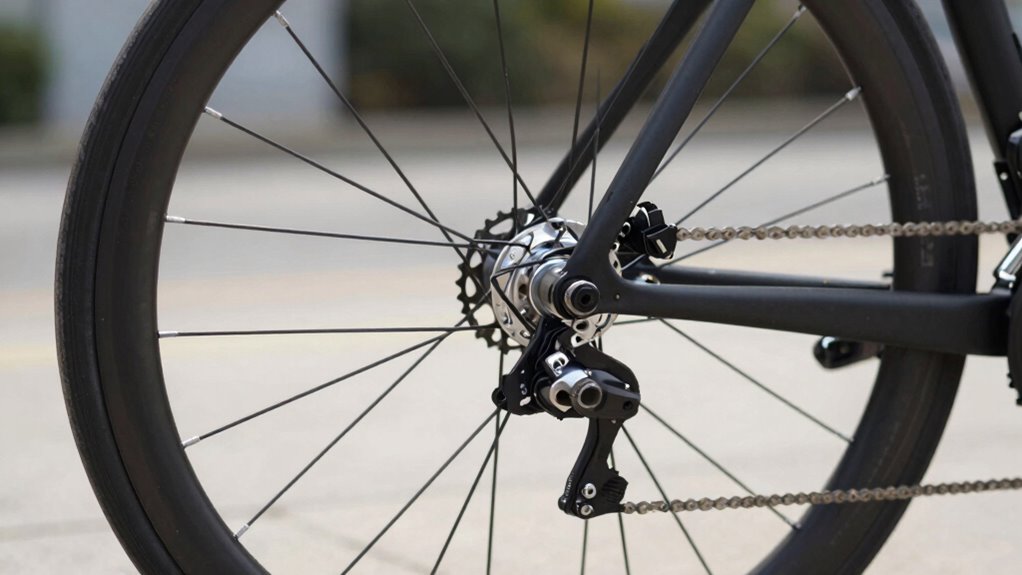
Begin by checking your hub for lateral play, ensuring there’s no unwanted movement that could affect wheel alignment. Next, inspect the axle for proper alignment and signs of bending or damage, which can compromise stability. Finally, adjust the tension on the hub bearings to eliminate play while maintaining smooth rotation.
Check Hub for Play
When inspecting your bike’s hub for play, it’s essential to determine if the axle has any lateral movement that could affect ride stability. Grip the wheel at the rim or tire, then attempt to wiggle it side to side. Excessive lateral movement indicates play in the hub bearings or axle. Use a wrench to loosen the locknuts and cone adjusters if necessary, then rotate the bearings to detect looseness. Check for tightness by observing whether the wheel moves independently of the hub shell. If play persists, you’ll need to adjust the bearing preload or replace worn bearings. Precise adjustment ensures the hub spins freely without side-to-side wobble, maintaining alignment and stability. Always re-tighten locknuts securely after adjustments to prevent future play.
Inspect Axle Alignment
Inspecting axle alignment involves carefully checking that the axle runs straight through the hub and frame. Begin by removing the wheel if necessary to access the axle directly. Use a straightedge or alignment gauge to verify that the axle is parallel to the frame’s centerline. Examine the axle for any bending, warping, or signs of damage that could skew alignment. Confirm that the axle sits flush within the dropouts and that there’s no lateral movement. Check for uneven spacing between the axle and dropout surfaces on both sides. Measure the distance from the frame’s dropout to the axle ends to ensure symmetry. Proper inspection guarantees the axle’s straightness and secure fit, which are critical for maintaining proper wheel alignment and preventing pulling or steering issues.
Adjust Tension Properly
How can you guarantee your bike’s hub and axle are properly tensioned? First, check for smooth rotation without play or resistance. Securely tighten the axle nuts or quick-release skewer, ensuring even torque on both sides. Use a torque wrench if available, referencing manufacturer specifications to prevent over-tightening, which can cause misalignment or damage. Inspect the bearings for any looseness or binding; if present, adjust bearing preload or replace worn components. Confirm that the axle is centered and evenly seated within the dropouts. After tightening, spin the wheel to verify it remains true and free of wobble. Proper tension ensures lateral stability, reduces uneven wear, and optimizes riding performance. Regularly inspecting and adjusting tension maintains alignment and prolongs component lifespan.
How to Check and Correct Handlebar and Stem Alignment

To make certain proper handling and control, you need to verify that your handlebars and stem are correctly aligned. Begin by placing the bike on a level surface and ensuring the front wheel points straight ahead. Visualize a straight line from the front axle through the handlebars and stem. Check if the handlebars are parallel to the front wheel; if they aren’t, loosen the stem bolts and rotate the handlebars until they are aligned with the wheel. Next, tighten the bolts securely in a crisscross pattern to ensure even pressure. Confirm the handlebars remain straight relative to the front wheel by rechecking alignment visually or using an alignment tool. Properly aligned handlebars and stem improve stability and steering precision, preventing unwanted pulling during rides.
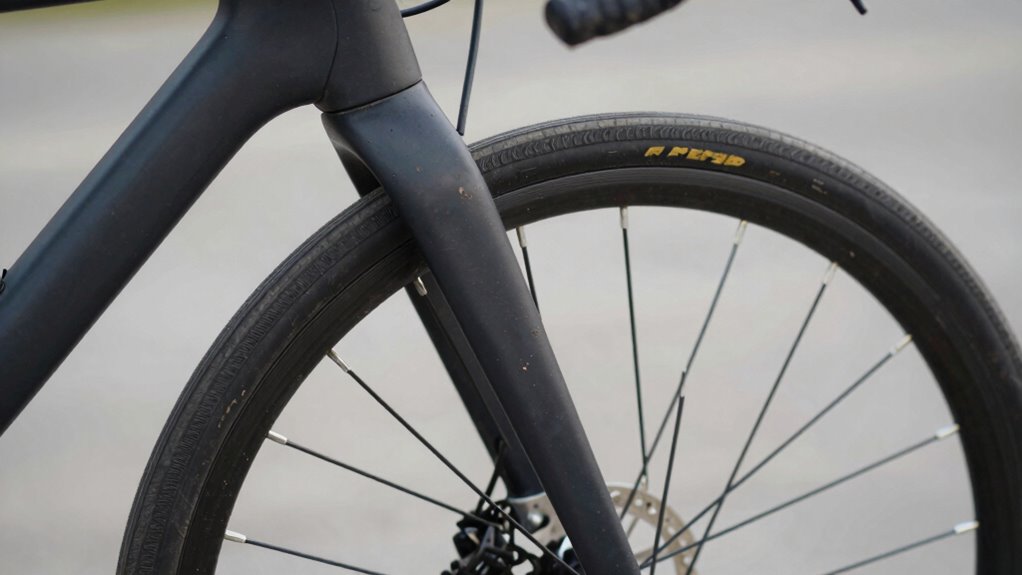
Are Fork and Suspension Components Properly Aligned?
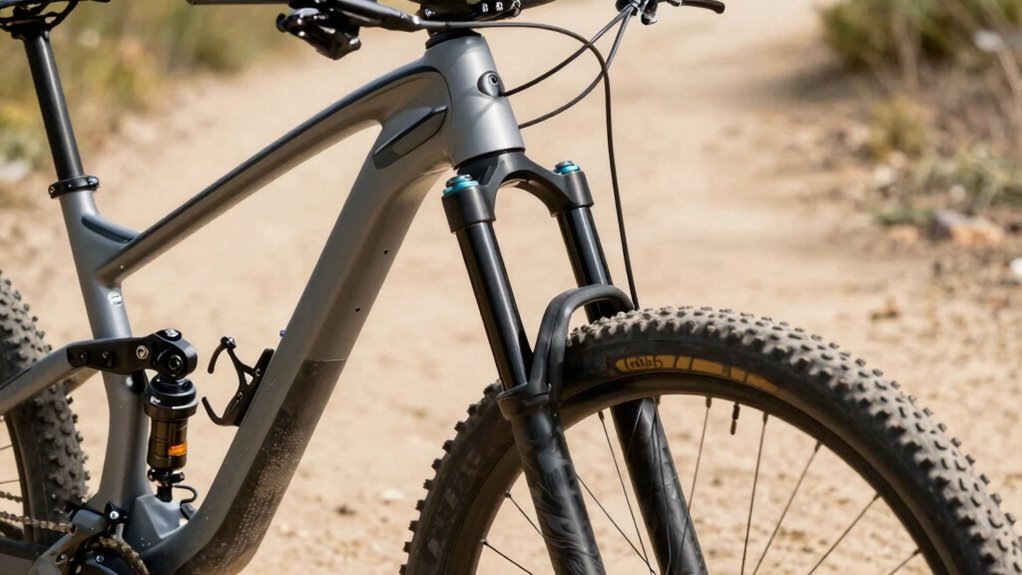
Ensuring that your fork and suspension components are properly aligned is essential for ideal handling and safety. Misaligned forks can cause unwanted steering effects, uneven tire wear, and compromised shock absorption. Begin by inspecting the fork crown race and ensuring it sits flush against the head tube. Check the alignment of the fork legs, verifying they are parallel and symmetric. Use a straightedge or alignment tool to confirm the fork’s steerer tube axis matches the frame’s head tube. For suspension components, examine the fork and rear shock mounts for proper seating and alignment. Confirm that suspension pivots and linkage points are free of play and correctly positioned. Proper alignment prevents handling inconsistencies and optimizes suspension performance, ensuring a stable, predictable ride.
What Should I Do If My Bike Still Pulls After These Checks?
If your bike continues to pull despite verifying fork and suspension alignment, the issue may stem from other components affecting steering precision. First, inspect the headset for tightness or play; loose or uneven bearings can cause misalignment under load. Use a torque wrench to guarantee the stem bolts are properly tightened to manufacturer specifications. Next, examine the wheel hubs for play or uneven wear, which can cause steering drift. Check spoke tension for uniformity, as imbalances can influence bike tracking. Additionally, verify the tire pressure and inspect for irregular wear patterns or damage. These factors can all contribute to persistent pulling, even after initial alignment checks. Addressing these elements systematically ensures precise steering and stabilizes your ride.
When Is It Time to Seek Professional Bike Repair Help?
Recognizing when to seek professional bike repair help is essential for maintaining ideal safety and performance. If your bike continues to pull after basic adjustments, it indicates underlying issues requiring expert diagnosis. Signs include persistent misalignment despite routine checks, unusual tire wear patterns, or difficulty steering despite correct tire pressure and spoke tension. Additionally, if you experience creaking, grinding noises, or abnormal vibrations, these may point to frame damage, bearing failures, or complex component misalignments. Complex issues such as fork or headset misalignment, frame defects, or suspension problems should only be addressed by trained technicians. Attempting repairs beyond your skill level risks compromising safety and bike integrity. When these symptoms persist despite your efforts, it’s time to consult a professional bike shop for precise diagnostics and safe resolution.
Tips to Keep Your Bike Aligned and Riding Smoothly in the Future
Maintaining proper bike alignment requires consistent attention to detail and proactive adjustments. Regularly inspect your front and rear wheels for true alignment, checking for uneven tire wear or wobbling. Proper tire pressure ensures even contact with the road, reducing misalignment risks. Keep your steering components tight and lubricated, especially after rough rides or impacts. Use the following checklist to stay on track:
| Maintenance Step | Frequency | Key Point |
|---|---|---|
| Wheel trueness check | Monthly | Prevent wobble and uneven wear |
| Tire pressure verification | Before each ride | Maintain ideal contact |
| Steering component inspection | Quarterly | Ensure tightness and lubrication |
| Brake alignment adjustment | As needed after impacts | Avoid pulling during braking |
Adopting these practices helps preserve alignment, ensuring safe, smooth riding performance.
Frequently Asked Questions
How Often Should I Check My Bike’s Alignment?
You should check your bike’s alignment every 500 to 1,000 miles or after any significant impact, such as a crash or rough ride. Regular inspections guarantee ideal handling and prevent uneven tire wear. Prioritize checking before long rides or racing events. Use a precise alignment gauge or consult a professional if you notice steering issues, wheel wobble, or uneven tire contact, maintaining bike safety and performance.
Can Bike Pull Due to Wrong Gear Setup?
Yes, a wrong gear setup can cause your bike to pull. When the derailleur or chain isn’t properly aligned, it creates uneven tension, affecting steering and causing pulling in one direction. This misalignment can make riding feel unstable and tiresome, increasing your risk of accidents. Regularly check and fine-tune your gear system, ensuring smooth shifts and balanced tension, to maintain ideal control and prevent pulling caused by gear misconfiguration.
Does Riding Style Affect Bike Alignment?
Yes, your riding style can influence bike alignment over time. Aggressive cornering, frequent braking, or uneven weight distribution stresses the frame and components, potentially causing subtle misalignments. Regularly riding on rough terrain or leaning heavily to one side increases strain on specific areas, which may shift alignment. To maintain ideal performance, you should inspect your bike periodically, ensuring balanced weight distribution and proper technique to prevent alignment issues.
What Tools Are Needed for Alignment Adjustments?
You’ll need a set of precise tools to fine-tune your bike’s alignment. Start with a torque wrench to ensure proper bolt tightness, a bubble level to verify frame angles, and a truing stand or quick-release skewers for wheel alignment. Calipers help measure spacing accurately, while a alignment gauge guarantees the fork and frame are true. These tools act as your mechanical compass, guiding your bike back to perfect balance.
How Does Weather Impact Bike Wheel Alignment?
Weather impacts bike wheel alignment primarily through temperature fluctuations and moisture. Rapid temperature changes cause expansion or contraction of metal parts, potentially misaligning the wheel. Moisture can lead to corrosion of the hub or spokes, compromising structural integrity and alignment accuracy. You should regularly inspect your bike after extreme weather conditions, ensuring that the spokes, hub, and fork remain true, and adjust your alignment if you notice any shifts or irregularities.
Conclusion
Think of your bike as a finely tuned instrument; even minor misalignments can throw off its harmony. By systematically checking and adjusting each component, you guarantee a smooth, straight ride. When you maintain proper alignment, you’re fundamentally fine-tuning the strings of your bicycle’s orchestra, preventing discord and ensuring ideal performance. Stay vigilant with regular inspections, and your bike will continue to perform like a precision instrument, delivering reliable, effortless rides every time.