If you skip setting a proper suspension baseline, your clickers won’t respond correctly because the internal mechanisms depend on consistent initial settings like sag, preload, and pressure. Without this foundation, adjusting rebound and compression becomes ineffective, often causing sticking or improper damping. Ensuring your preload, sag, and initial settings are accurate is vital for clickers to function smoothly. Keep going for detailed steps to establish your baseline and prevent future issues.
Key Takeaways
- Neglecting to properly set and verify initial suspension sag can cause clickers to respond incorrectly.
- Failing to establish a correct baseline pressure affects the clickers’ ability to function properly.
- Ignoring consistent measurement and adjustment of preload can lead to clicker sticking or malfunctioning.
- Not resetting or confirming the baseline after making initial adjustments can cause clicker inconsistencies.
- Overlooking regular suspension maintenance and cleanliness can impair clicker operation and responsiveness.

Traxxas 1/18 TRX-4M F-150 High Trail Crawler Truck
Traxxas 97044-1-BRWN - TRX-4M Ford F-150 Ranger XLT 1/18 4X4 Crawler RTR, Brown
As an affiliate, we earn on qualifying purchases.
Why Setting a Proper Suspension Baseline Is Essential
Establishing a proper suspension baseline is essential because it provides a consistent reference point for tuning and adjustments. Without it, any changes you make with clickers or dials lack context, leading to inconsistent handling and unpredictable performance. A well-defined baseline ensures that you know the initial setup, including sag, rebound, and compression settings, which are critical for ideal ride quality. This initial setup acts as a stable foundation, allowing precise modifications based on riding conditions and personal preferences. If you skip this step, you risk over- or under-adjusting, which can cause poor traction, instability, or excessive wear on components. Proper suspension setup is fundamental to achieving optimal bike control and comfort. Additionally, understanding suspension dynamics can help you better interpret how adjustments affect ride characteristics. Recognizing the importance of initial calibration helps ensure that all subsequent modifications are meaningful and effective, leading to a more enjoyable riding experience. Being aware of component wear can also inform your adjustments, ensuring your suspension remains responsive over time. Regularly checking the suspension components can help catch issues early and maintain proper performance. Ultimately, a clear baseline enhances your ability to fine-tune your suspension accurately, improving safety, comfort, and overall bike control.

BEEZRC FMS 1/18 FCX18S Sierra S Brushless RC Crawler, Officially Authorized, RTR Off-Road 4x4 with LED Lights mini RC Truck, Two-Speed Switch, Remote Control Car for Adults
【Official Licensing, Mini Pickup Realism】 The FMS FCX18S Sierra S 1/18 scale rc crawler perfectly replicates the pickup...
As an affiliate, we earn on qualifying purchases.
How to Find and Set Your Suspension’s Starting Point
To find and set your suspension’s starting point, you need to measure and adjust specific parameters systematically. Begin by guaranteeing your bike is on a level surface with the suspension fully extended, then mark the sag point—usually about 25-30% of total travel for the fork and shock. Use a ruler or sag gauge to measure the distance from the axle to a reference point on the frame when you sit on the bike with your gear. Adjust preload or air pressure accordingly to reach this sag measurement. Confirm the settings by bouncing the bike to settle the suspension and re-measure. This baseline ensures your suspension responds predictably and provides a consistent foundation for further tuning. Accurate initial setup is vital for peak performance. Additionally, understanding your suspension’s adjustment capabilities allows for more precise tuning tailored to your riding style and conditions.

Traxxas 1/18 TRX-4M F-150 High Trail Crawler Truck
Factory Installed Long Arm Lift Kit and larger tires raise the center ground clearance for a dramatic lifted...
As an affiliate, we earn on qualifying purchases.
Common Mistakes That Sabotage Your Suspension and How to Avoid Them

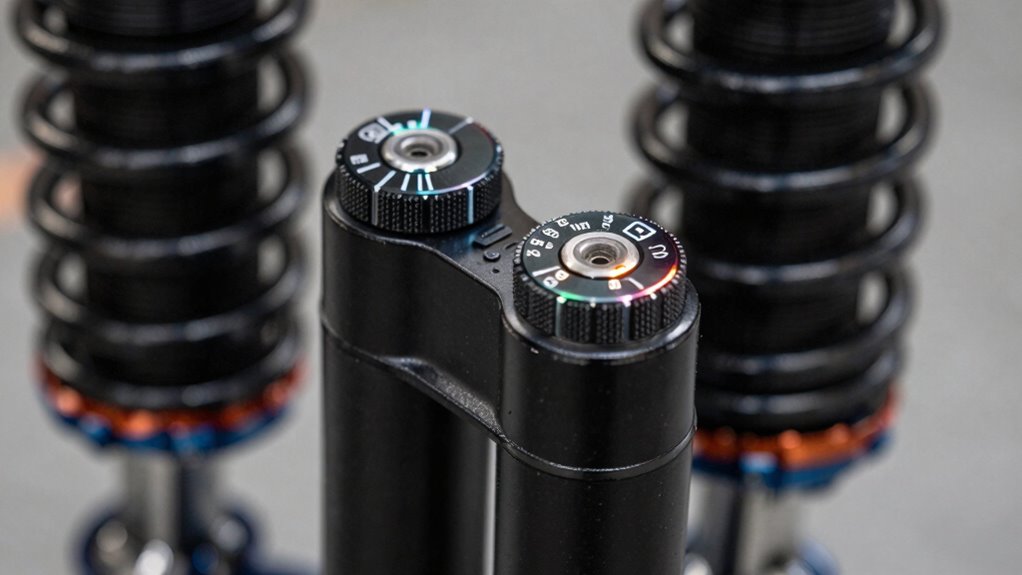
One common mistake that can sabotage your suspension performance is neglecting to double-check and correctly set your preload and air pressure after establishing your initial sag. Incorrect settings cause inconsistent response, reduced traction, and increased wear. To avoid this, regularly verify these parameters with a precise pump and pressure gauge. Use the table below to understand their importance:
| Parameter | Purpose | Adjustment Tips |
|---|---|---|
| Preload | Sets initial sag and bike stance | Use spacers or turn preload collar |
| Air Pressure | Controls overall suspension firmness | Adjust based on rider weight |
| Sag | Critical for proper suspension travel | Measure with a sag tool |
| Rebound | Affects shock recovery after compression | Fine-tune for better control |
Maintaining proper color temperature adjustments can also improve overall suspension feel and performance. Properly adjusted settings are essential for consistent handling and comfort. Consistently maintain these settings; neglecting them disrupts suspension behavior and negates clicker adjustments.
BEEZRC FMS 1/24 RC Crawler FCX24M Tacoma Toyota Official Licensed ABS Hard Body 4WD Off-Road RC Rock Truck,2-Speed Transmission, Hobby Grade Remote Control Car for Adults RTR Grey
FCX24M – The Ultimate Small-Scale Toyota Tacoma RC Truck: Officially licensed by Toyota, this FCX24M mini RC pickup...
As an affiliate, we earn on qualifying purchases.
Fine-Tuning Your Suspension After the Baseline
After setting your baseline suspension parameters, fine-tuning becomes essential to optimize performance for specific riding conditions and personal preferences. Begin by adjusting rebound damping to control how quickly the suspension returns after compression; too fast can cause instability, too slow can lead to a sluggish feel. Next, refine compression damping to manage how the suspension absorbs impacts; softer settings improve comfort on rough terrain, while firmer settings enhance pedaling efficiency and control. Use small incremental changes—about a quarter turn—testing each adjustment under similar conditions. Keep track of your settings and note how each change affects handling. Remember, fine-tuning is a process of elimination, so adjust one parameter at a time to isolate its impact and achieve a balanced, responsive suspension tailored to your ride.
Troubleshooting Clicker Problems Caused by Skipping the Baseline
Skipping the baseline suspension setup often leads to clicker issues such as inconsistent damping, harsh sensations, or clicker stiction. When the initial baseline isn’t properly established, your clickers lack a reference point for correct operation, causing uneven response. Troubleshoot by first verifying the baseline pressure and rebound settings, ensuring they match manufacturer specifications. Next, check the clicker’s internal components—look for dirt, debris, or damage that could cause sticking or inconsistent clicks. Adjust the compression and rebound damping to see if the clicker’s feel improves, noting any changes in responsiveness. If problems persist, reset the clicker to factory settings, then re-establish the baseline calibration. Proper baseline setup ensures internal parts are correctly aligned, preventing misadjustments that lead to these common clicker issues. Additionally, regular maintenance of your suspension components helps keep your clickers functioning smoothly over time.
Frequently Asked Questions
How Often Should I Recheck My Suspension Baseline?
You should recheck your suspension baseline every 3 to 6 months, or whenever you notice changes in ride quality or handling. Regular testing guarantees your suspension remains properly calibrated for peak performance and safety. Before each check, ensure your vehicle is on a level surface, tires are properly inflated, and the suspension components are cold. Consistent re-evaluation helps catch issues early, preventing uneven wear or potential suspension failure.
Can Incorrect Baseline Settings Cause Suspension Damage?
Incorrect baseline settings can definitely damage your suspension system. When you set the baseline improperly, it forces the suspension to work harder, causing premature wear, leaks, or even component failure. Precise, consistent calibration ensures ideal operation, prevents unnecessary stress, and prolongs lifespan. Regular rechecks keep your suspension setup sharp, safeguarding against damage caused by inaccurate baselines. Properly calibrated settings promote smooth, stable performance and protect your suspension from costly, avoidable breakdowns.
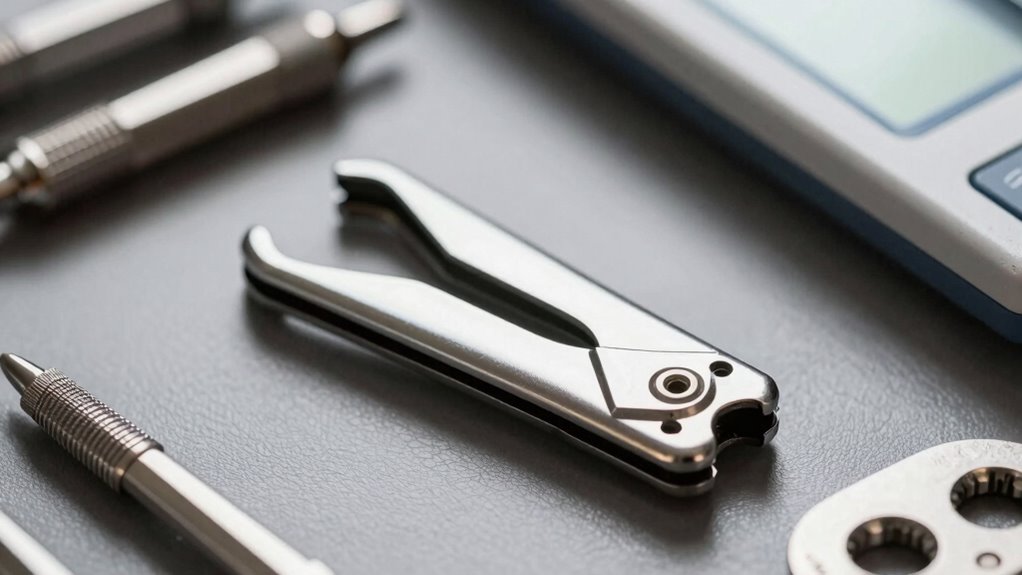
What Tools Are Needed to Set a Proper Suspension Baseline?
You need a reliable set of suspension measurement tools, including a digital or dial caliper for precise sag measurements, a suspension stand or jack to lift and stabilize the vehicle, and a torque wrench to guarantee proper tightening of components. Additionally, use a suspension compression tool or spring compressor if working on coil springs, and a notebook or digital device to record baseline settings accurately, securing consistent adjustments and ideal suspension performance.
How Does Rider Weight Affect Suspension Baseline Adjustments?
Think of rider weight as the anchor for your suspension setup. Heavier riders compress the suspension more, requiring increased air pressure or preload to maintain proper sag. Lighter riders need less, preventing harshness. Adjust your baseline accordingly: add pressure for heavier weight, and reduce for lighter. Precise measurements ensure peak performance, handling, and comfort, especially on rough terrain. Always recheck your settings after weight changes to keep suspension balanced and responsive.
Is It Necessary to Remeasure Baseline After Every Ride?
You don’t need to remeasure your baseline after every ride, but it’s advisable if you notice changes in ride quality or terrain. Environmental factors like temperature and trail conditions can affect suspension performance, so rechecking guarantees ideal setup. After particularly demanding rides or modifications, reassess to maintain precise tuning. Regularly verifying your baseline helps prevent issues and keeps your suspension responsive, especially if your riding style or weight distribution shifts.
Conclusion
Skipping the baseline setup is like trying to steer a starship without navigation—your suspension clickers won’t perform reliably. By diligently establishing your starting point with precise measurements and avoiding common pitfalls, you guarantee responsive, predictable performance. Remember, even in the era of digital dashboards, a proper suspension baseline remains the cornerstone of effective tuning. Take this step seriously, and your clickers will work flawlessly—no more guesswork, just smooth, controlled rides.