To avoid neck strain with helmet cameras, focus on proper mount placement that evenly distributes weight and minimizes wobble. Position the camera high and centered on your helmet for stability, ensuring it doesn’t shift during movement. Use accessories like padding and anti-slip pads for a secure fit, and adjust the angle for comfort. Properly tested setups improve stability and reduce fatigue, so keep exploring to learn more about optimizing your helmet camera experience.
Key Takeaways
- Position the camera mount evenly on the helmet to distribute weight and reduce neck strain during extended use.
- Use low-profile, adjustable mounts that allow customization for activity-specific angles and minimize bulk.
- Place mounts at the front or top of the helmet for stability, avoiding high or off-center spots that shift weight.
- Regularly check and tighten straps and mounts to maintain secure, balanced placement and prevent wobbling.
- Incorporate padding and anti-slip accessories to cushion pressure points and enhance stability while reducing fatigue.

Tactical Helmet Camera Mount Multi-Angle Adjustable ARC Rail Fixed Adapter Compatible with GoPro Hero 1-5 Black
Universal Action Camera Compatibility: This tactical helmet mount is designed to support a wide range of popular action…
As an affiliate, we earn on qualifying purchases.
As an affiliate, we earn on qualifying purchases.
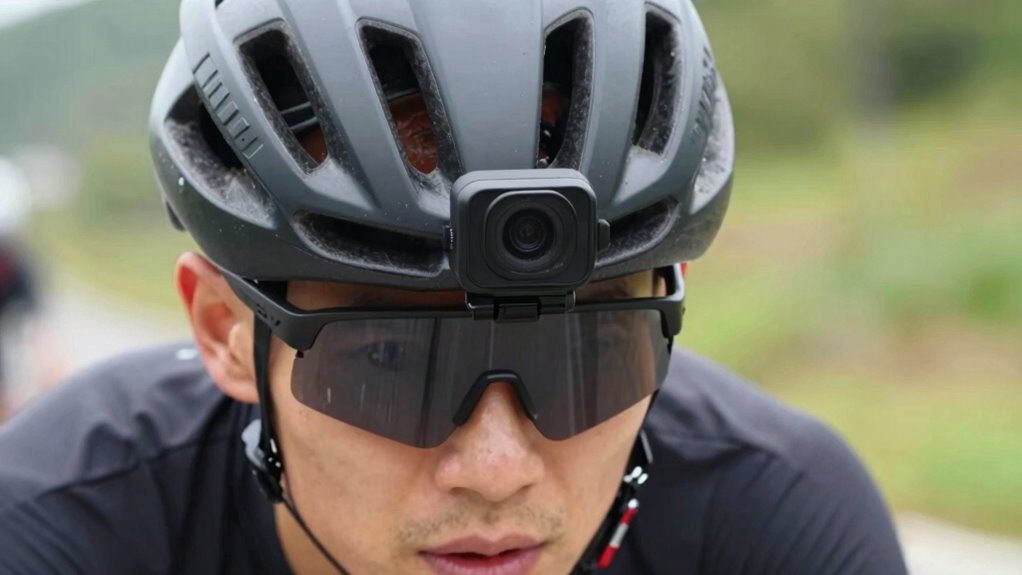
How Mount Placement Affects Neck Comfort and Stability
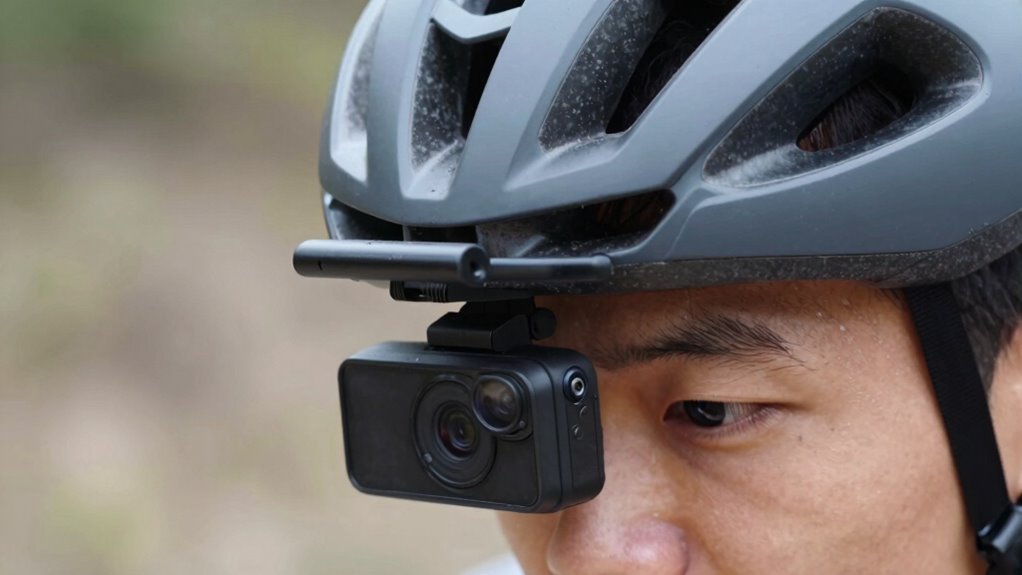
The placement of a helmet camera considerably impacts your neck’s comfort and stability during use. If you mount the camera too high or off-center, it shifts the helmet’s weight, making your neck work harder to stabilize your head. This can lead to discomfort and strain over time. Ensuring the helmet weight is evenly distributed helps reduce undue pressure. Additionally, strap tension plays a vital role; if the straps are too tight, they can increase strain on your neck and shoulders, but if too loose, the camera may wobble, compromising stability. Find a balanced strap tension that keeps the camera secure without adding unnecessary tension on your neck. Proper placement and adjustment help maintain comfort, making your recording experience smoother and less fatiguing. Using appropriate mounting accessories can also help minimize strain and improve overall comfort during extended use. Being mindful of weight distribution ensures that your neck remains comfortable during prolonged activities. Moreover, selecting lightweight camera models can significantly reduce neck fatigue, enhancing overall comfort during extended filming sessions. Incorporating ergonomic mounting options designed for extended wear can further help prevent discomfort. Additionally, choosing a position that keeps the camera close to your center of gravity can further enhance stability and reduce strain.
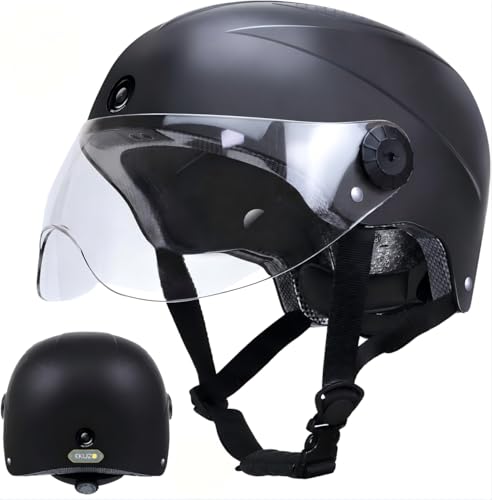
DC Smart Bike Helmet with Cameras Dual HD Front & Rear Video Recorder for Ebike & Electric Scooter, Bluetooth App Control Action Cam Helmet, CPSC Certified (Black)
Upgraded Dual Front & Rear Sport Cameras : Enjoy smooth HD capture of every scenic ride and unexpected…
As an affiliate, we earn on qualifying purchases.
As an affiliate, we earn on qualifying purchases.
Factors That Influence Camera Stability and Neck Strain
Several factors directly influence how stable your helmet camera remains and how much strain your neck endures during use. Key among these are helmet weight and vibration control, which affect both stability and comfort. Heavier helmets increase the load on your neck, causing fatigue, while poor vibration control can lead to shaky footage and added strain. To minimize issues, consider:
- Using lightweight camera gear
- Choosing mounts with shock absorption
- Distributing weight evenly
- Securing the camera firmly
- Avoiding excessive vibration sources
Additionally, implementing thermal management techniques can help prevent heat buildup that may loosen mounts or cause equipment malfunction. Proper mount placement also plays a crucial role in reducing vibrations and ensuring stability, which directly impacts neck strain. Properly balancing your setup ensures longer comfort and steadier footage, making your activity safer and more enjoyable. Paying attention to these elements optimizes your helmet camera experience without extra neck fatigue, especially by understanding how vibration control impacts both stability and comfort. Incorporating smart stabilization techniques can further enhance footage quality and reduce physical discomfort during extended use. Regularly checking and adjusting jewelry measurements of your gear can also help prevent unnecessary movement that contributes to vibration and fatigue.

AOUTACC Universal Airsoft Helmet Pads, Helmet Replacement Foam Padding Kits Set Accessories Mats for Fast-Style/Mich/ACH/PASGT Helmet (EVA Foam, Black)
Package Includes: 9 pcs of foam pads + 10 sticky Hook Loop circles.
As an affiliate, we earn on qualifying purchases.
As an affiliate, we earn on qualifying purchases.
Best Helmet Camera Mount Positions for Your Helmet and Activity
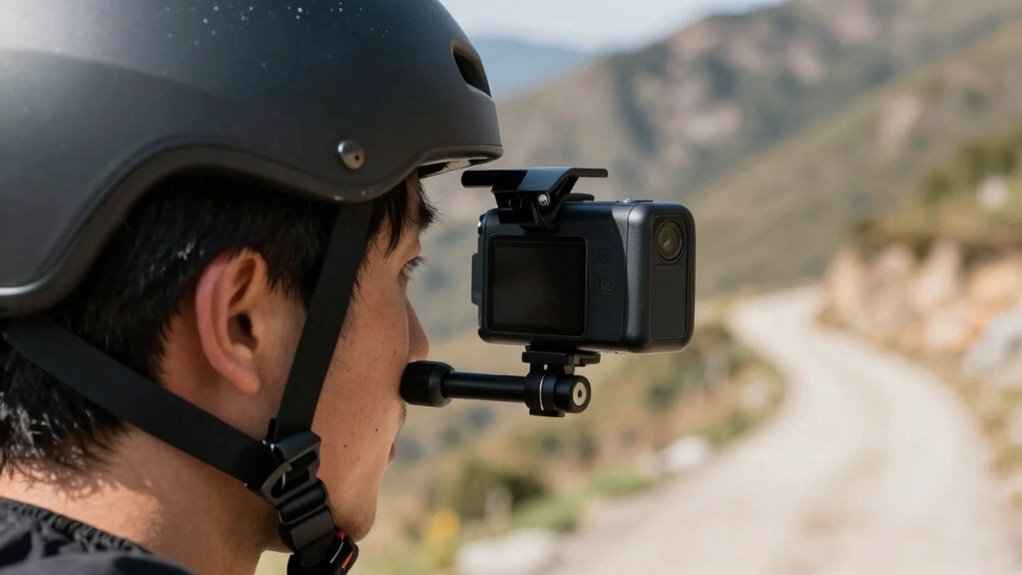
Choosing the right mount position on your helmet is essential to match your activity and capture ideal footage. For lightweight helmets, a front or top mount works well, keeping the camera stable without adding extra weight that could cause neck strain. If you’re engaging in high-wind activities like mountain biking or motorcycling, position the camera slightly back or lower to improve wind resistance, reducing turbulence and noise. A side mount can offer a balanced view while minimizing the impact of wind, but it may affect helmet weight distribution, so verify it doesn’t cause discomfort. The goal is to find a spot that maintains stability, minimizes wind interference, and keeps your helmet’s weight balanced, helping you record clear footage without putting unnecessary strain on your neck. Incorporating innovative European cloud servers can also facilitate real-time footage sharing and backup, ensuring your recordings are securely stored and easily accessible. Proper mount placement is crucial to prevent unnecessary neck strain and ensure comfortable, stable recording during your activities. Additionally, considering ergonomic helmet design can enhance comfort and reduce fatigue during prolonged use. Distributing the camera weight evenly across the helmet can further reduce neck fatigue during extended use, making your recording experience more comfortable and sustainable.

Kewig Universal Motorcycle Helmet Chin Camera Mount with Bendable Mounting Base & Strong Adhesive Pads, Quick-Release Design, Angle Adjustable, Compatible with GoPro/DJI OSMO/Insta360 Action Camera
Universal Design: Features a flexible mounting base compatible with most full-face motorcycle helmets on the market. Compatible with…
As an affiliate, we earn on qualifying purchases.
As an affiliate, we earn on qualifying purchases.
How to Adjust Your Camera Angle for Better Footage and Comfort
Adjusting your camera angle is key to capturing better footage while maintaining comfort during your activity. Proper mounting techniques help you find the right angle that reduces neck strain and improves footage quality. To optimize camera ergonomics, consider these tips:
- Position the camera just above eye level for natural perspective
- Tilt the camera slightly downward to avoid excessive movement
- Use adjustable mounts for quick angle changes
- Avoid mounting too close to your face to prevent obstruction
- Make sure the mount is secure to prevent shifts during activity
- Be mindful of ergonomic principles to minimize neck strain and fatigue, especially when using wellness technology devices that promote comfort and safety. Incorporating proper mounting techniques can also enhance overall safety and stability during use. Additionally, selecting correct mount placement supports better posture and reduces the risk of discomfort over extended periods. Paying attention to mount positioning helps prevent awkward angles that could lead to discomfort or injury over time.
Common Mounting Mistakes That Cause Discomfort: and How to Fix Them
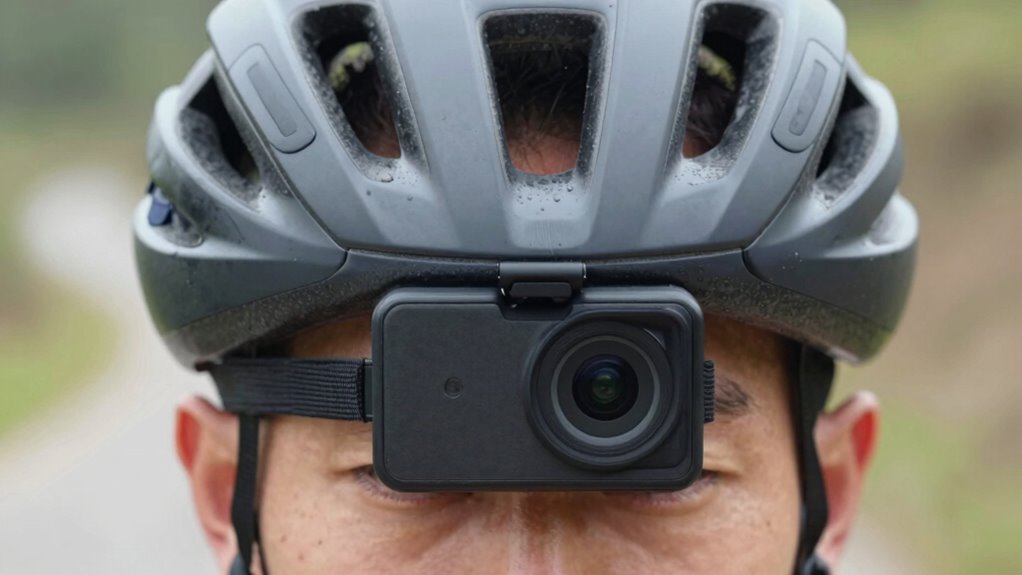
Poor mounting techniques can lead to discomfort and fatigue during extended use, undermining both your footage quality and overall experience. One common mistake is choosing an improper mounting position, which can cause unnecessary neck strain. If the camera is mounted too high or off-center, you may find yourself constantly adjusting your head, leading to tension and fatigue. Similarly, mounting the camera too tight can restrict movement, increasing discomfort. To fix this, position the mount so the camera sits comfortably on your natural line of sight, avoiding excessive weight on your neck. Make sure the mount is secure but not overly tight. Proper placement distributes the camera’s weight evenly, reducing neck strain and allowing you to focus on capturing great footage without discomfort.
Essential Tools and Accessories for Comfortable, Secure Mounting
Having the right tools and accessories can make all the difference in ensuring your helmet camera stays secure and comfortable during your activities. Choosing the proper mounts, padding, and straps helps manage helmet weight and camera size, reducing neck strain. To optimize comfort and security, consider these essential accessories:
- Lightweight mounts that distribute weight evenly
- Adjustable straps for a snug fit
- Padding inserts to cushion pressure points
- Anti-slip pads for stability
- Compact, low-profile camera housings
These tools help balance your camera’s size and weight, preventing discomfort. Selecting accessories that suit your helmet type and activity ensures your camera stays secure without adding unnecessary strain. Proper mounting accessories and techniques Proper mounting techniques are also crucial for minimizing strain and ensuring a stable shot. Additionally, choosing mounts with adjustable features allows for better customization to your specific helmet and activity. Incorporating ergonomic mounting solutions can further enhance comfort by reducing pressure points and accommodating different head shapes. Furthermore, understanding helmet weight distribution can aid in selecting accessories that help balance the overall load for extended wear.
Tips for Testing and Fine-Tuning Your Helmet Camera Setup
Once your camera is mounted, it’s important to adjust the angle so your footage captures the right view. Test your setup while moving to make sure it stays steady and doesn’t shake or shift unexpectedly. Also, check for any obstructions that could block the shot or distract from your footage.
Adjust Camera Angle
To make certain your helmet camera captures the best footage, start by adjusting the camera angle so it points directly forward and slightly downward. This ensures your shots are level and centered, avoiding skewed or unusable footage. Keep in mind that helmet weight and strap tension can affect your camera’s stability, so check that everything feels balanced. Fine-tune the angle by testing during brief movements, not just static positions. Remember:
- Slight downward tilt prevents sky or ground dominance
- Adjust to match your natural line of sight
- Ensure strap tension keeps the camera steady
- Confirm the helmet weight doesn’t shift the angle
- Recheck after any adjustments for stability
This approach helps prevent unnecessary neck strain and guarantees clear, focused footage.
Test During Movement
Testing your helmet camera during movement is crucial to guarantee it stays stable and captures smooth footage. As you move, pay attention to how vibration damping affects stability—loose mounts can amplify vibrations, resulting in shaky videos. Adjust your mount to optimize vibration absorption, reducing unwanted jarring effects. Equally important is proper weight distribution; if the camera feels front-heavy or uneven, it can strain your neck and cause instability. Ensure the mount is balanced so the camera stays aligned with your line of sight without tugging or shifting. Take your camera for a test run, observing how it responds to rapid motions and bumps. Fine-tune the setup as needed, focusing on minimizing vibrations and achieving a comfortable, balanced weight distribution for steady, high-quality footage.
Check for Obstructions
Before you start capturing footage, it’s vital to check for any obstructions that could block your camera’s view or interfere with its operation. Obstruction awareness helps guarantee clear footage and smooth functionality. Perform a thorough clearance check by inspecting the mount and surrounding areas. Look out for items like straps, loose wires, or protrusions that could block the lens or cause vibrations. Adjust the camera’s angle if needed to avoid potential obstructions. Keep in mind that even small objects can disrupt the shot or damage equipment. Regularly revisit your setup during activity to catch new obstructions. Remember, a well-maintained setup prevents interruptions and guarantees high-quality footage. Always prioritize a clear view to maximize your helmet camera’s effectiveness and your comfort.
Expert Tips for Safe and Comfortable Helmet Camera Mounting
Finding the right mounting position is key to staying safe and comfortable. You want your camera to capture your experience without causing discomfort or risking injury. Let’s explore the best spots and tips to achieve a secure, strain-free setup.
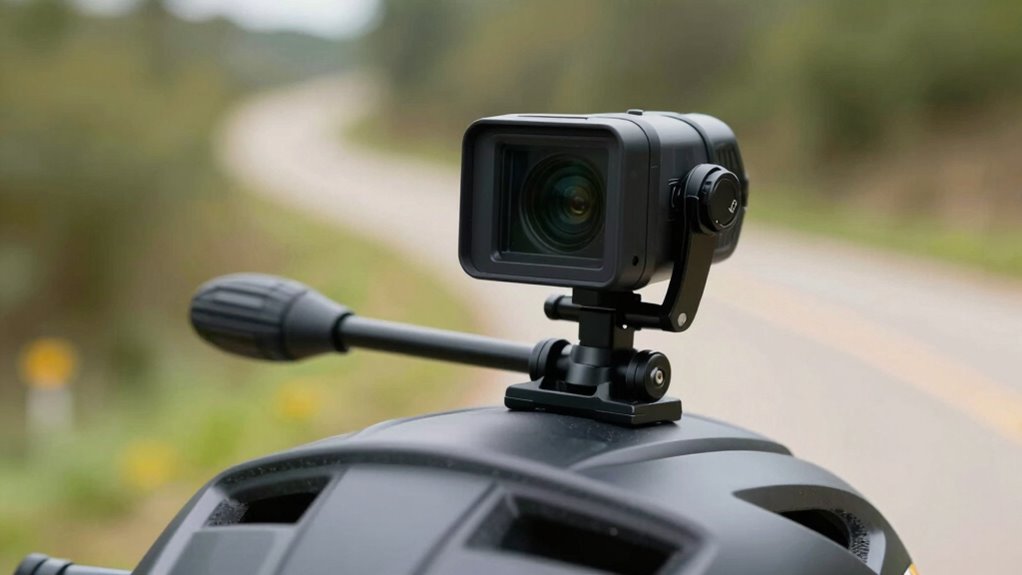
Optimal Mounting Positions
Choosing the right mounting position for your helmet camera is vital to guarantee both safety and comfort during your activities. The ideal spot minimizes added helmet weight, prevents obstructing ventilation, and reduces neck strain. Mounting the camera on the front provides a clear view but can add weight unevenly, affecting balance. The top-center offers stability and keeps the camera low, reducing neck strain. Side mounts are less intrusive but may obstruct airflow. When selecting a position, consider:
- Distributing helmet weight evenly
- Keeping the camera within helmet ventilation zones
- Avoiding excessive forward or backward shifts
- Ensuring the mount doesn’t interfere with your field of vision
- Maintaining balance to prevent neck strain
Proper placement ensures your helmet stays comfortable and functional, preventing unnecessary neck fatigue.
Ensuring Comfort and Safety
To guarantee your helmet camera is both safe and comfortable, start by selecting a secure yet lightweight mounting position that doesn’t interfere with your movements or field of vision. Keep the helmet weight balanced to prevent neck strain and fatigue, especially during prolonged use. Adjust strap tension carefully—tight enough to secure the mount but not so tight that it causes discomfort or restricts circulation. Regularly check that the camera remains firmly in place without shifting, which could distract or compromise safety. Avoid adding unnecessary accessories that increase weight or bulk. Prioritize a mount that distributes weight evenly and allows quick removal if needed. By staying mindful of helmet weight and strap tension, you’ll ensure a safer, more comfortable experience without sacrificing footage quality.
Frequently Asked Questions
How Does Helmet Material Affect Camera Mount Stability?
Your helmet material substantially impacts camera mount stability. Durable, rigid materials like polycarbonate or fiberglass provide a solid base, reducing vibrations and wobbling during activity. Softer or flexible materials, like foam or certain plastics, may cause instability, making your footage shaky. Choose a helmet with a sturdy, stable surface to guarantee your camera stays secure, captures clear footage, and minimizes the strain on your neck caused by unwanted movement.
Are There Specific Helmet Designs Better Suited for Mounting?
You’ll find that streamlined helmets with flat, smooth surfaces are best suited for mounting, making helmet aesthetics sleek and unobtrusive. These designs often come with mount color options that blend seamlessly, reducing distractions. While full-face helmets offer better stability, hybrid or modular styles with flat tops provide ideal mounting spots. Choosing a helmet with a dedicated mount area ensures both style and function, keeping your camera secure without sacrificing comfort or look.
What Weight Limits Should Mounts Have for Prolonged Use?
You should look for mounts with a weight limit of at least 100 grams for prolonged use, ensuring they can securely hold your camera without wobbling. Pay attention to the mount’s weight capacity and stability, as excessive weight can cause discomfort or strain on your neck over time. Choosing a lightweight, stable mount helps maintain comfort and performance during extended activities, reducing fatigue and enhancing footage quality.
Can Custom Mounts Improve Comfort and Footage Quality?
Sure, custom mounts can actually boost your comfort and footage quality—ironic, right? By tailoring mounts with ergonomic padding and ensuring perfect mount compatibility, you reduce strain and capture smoother videos. You’ll find that a personalized fit keeps your neck relaxed, even during long shoots. So, investing in custom mounts isn’t just about better footage; it’s about making your experience more comfortable and enjoyable.
How Do Weather Conditions Impact Mount Durability and Security?
Weather conditions can greatly influence your mount’s durability and security. Harsh elements like rain, snow, or humidity can cause mount corrosion if not properly protected. To prevent this, make sure your mount has weatherproof coatings that shield it from moisture and corrosion. Regularly check the mount’s condition, especially after extreme weather, to keep your helmet camera secure and functioning at its best, no matter the weather.
Conclusion
By choosing the right mount placement and making small adjustments, you can enjoy steadier footage without feeling like you’re carrying the weight of the world on your shoulders. Don’t overlook the little details, because they can make a big difference in comfort and stability. Remember, a well-placed camera isn’t just about capturing great shots—it’s about keeping your neck happy and your adventures smooth sailing. When it comes to helmet cams, a balanced setup is worth its weight in gold.