TL;DR

Get garage and car supplies delivered free — and shop member deals
- Fast, free delivery on millions of items
- Access to Prime Big Deal Days deals on October 6–7
- Prime Video, Amazon Music and more included
An off-road vehicle LED light bar is a row of LEDs mounted to a vehicle to light trails and work areas, but useful performance depends on beam shape, optics, installation, and measured output—not headline lumens alone. Match spot, flood, or combo coverage to your terrain, wire and mount the bar safely, aim it to limit glare, and check local laws before using it on public roads.
A bright light bar can turn a black trail into a clear ribbon of dirt—and can also bounce a wall of glare off your hood if you mount it poorly. The difference isn’t just brightness. It’s beam shape, placement, wiring, and aim.
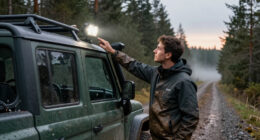
An off-road LED light bar is a row of light sources mounted to a vehicle to illuminate trails, work areas, or other dark surroundings. You’ll find them on bumpers, grilles, roof racks, and purpose-built brackets. LEDs use less power than many older auxiliary-light technologies and switch on quickly, but real-world performance varies with optics, heat management, housing, and build quality.
This guide explains how to choose a beam for your terrain, judge output claims, pick a sensible mounting spot, and avoid electrical and road-use mistakes. You’ll also get practical checks you can make before you buy, so your road vehicle LED setup helps you see the trail instead of dazzling everyone around you.
Pick spot, flood, or combo coverage based on how fast you drive and whether you need distance or near-side visibility.
Treat advertised lumens as a starting point; seek credible test data such as lux readings at a stated distance.
Measure the mounting space and account for beam angle, glare, airflow, vibration, and wiring access before buying.
Use the correct circuit protection and protected wire routing; consult a qualified automotive technician if electrical work is beyond your experience.
Check local road rules and use a clear, separate switch to prevent accidental public-road use.
What an Off-Road LED Light Bar Actually Does
An off-road vehicle LED light bar is a row of LEDs and optics mounted to a vehicle to put extra light on trails or work areas beyond the reach of standard headlights. The bar’s shape, lenses, and reflectors direct light where you need it; the LEDs themselves are only one part of the system. A good unit turns darkness into usable detail without wasting light in your eyes.
Think of the bar as a garden hose with a shaped nozzle: the source supplies the energy, but the optics decide where it goes. A bar with strong components and poor beam control can scatter light across nearby dust, the hood, or tree branches. That bright splash may look impressive from outside the vehicle, yet make it harder for you to see the track ahead.
For example, a driver crawling along a rocky trail may value light on the ground beside the front tires more than a distant beam. Someone checking a fence line from a stopped pickup may prefer a wider pool that illuminates a work area. Those are different jobs, even if both drivers buy a similar-sized bar.
Common light sources mounted to a vehicle include bars fitted to a bumper, grille, roof rack, or dedicated bracket. Each location changes the beam angle, exposure to damage, and chance of reflections. Decide what you need to illuminate first; then look for a bar and mounting position that serve that job.
As an affiliate, we earn on qualifying purchases.
Choose a Beam That Matches Your Trail
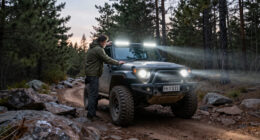
An off-road LED light bar works best when its beam pattern matches your speed and surroundings: spot beams reach farther, flood beams spread light nearby, and combo beams balance both. This is a tradeoff between distance and field of view. A narrow beam concentrates light into a smaller area, helping reveal obstacles farther away, but leaves less peripheral terrain illuminated. A wider beam makes nearby hazards easier to spot, but spreads its light and may not reach as far with the same output.
Picture a slow crawl through a wooded trail after rain. A narrow spot beam may light a tree trunk in the distance while leaving the muddy rut beside your front wheel dim. A flood pattern puts more light across the near field, where you need to pick your line. At low speeds, that wide coverage can give you more time to judge rocks and ruts immediately ahead, though it may not help as much when you need to see a distant turn. On an open desert track, the opposite tradeoff may suit you: distance matters more, and light scattered close to the vehicle can feel distracting.
A combo beam blends a wider near field with a narrower reach. It can reduce the need to choose between seeing the trail edges and looking farther ahead, which is useful when your routes vary. The compromise is that a combo may not provide the strongest long-distance focus of a dedicated spot or the even, broad coverage of a dedicated flood. Before buying, compare beam photos or independent tests taken in similar conditions; camera exposure can make a beam look brighter or wider than it appears to the driver, so prioritize examples that show the actual pattern.
Start with your normal use: crawling, open trails, camp chores, or a mix. Then ask whether you need to see farther ahead or more of what’s beside you. If you frequently switch between those jobs, a combo may be worth the compromise; if one task dominates, a purpose-matched beam may serve you better. This simple question often narrows the field more effectively than comparing a dozen headline lumen figures.
Read Output Claims Without Getting Blinded by Big Numbers
An advertised lumen number alone cannot tell you how well a bar will light your route; it may describe theoretical LED output rather than the completed product’s usable light. The lenses, reflectors, heat control, and electrical design all affect what comes out. Look for credible test data, especially lux readings that name the distance and testing method. That information helps reveal whether the bar produces concentrated light where you need to see ahead or spreads it across a wider area.
Lumens describe the total amount of light emitted, while a lux reading indicates how much light reaches a surface at a given location. A tightly focused beam can produce a strong reading at a distance, while a broad beam may spread light over a larger area with a lower reading in one spot. Neither number tells the whole story: a single lux measurement can favor a narrow hotspot and miss useful side coverage, while total lumens don’t show how effectively the optics direct light. Use both, alongside beam images or tests, to understand what the light will do.
Say two bars each claim 30,000 lumens. One may throw a concentrated beam down a straight fire road; the other may spread light across a wider area for slow trail work. The same advertised figure therefore doesn’t mean they perform the same job—or that either claim represents measured output from the finished unit. If the seller provides no meaningful test information, treat the number as a marketing claim, not a guarantee of performance. Independent beam shots and lux data help you compare like with like, especially when the test distance and conditions are consistent.
Color temperature deserves the same care. Many bars use cool white light, while a warmer tone may feel more comfortable to some drivers in dust, fog, or snow. But color temperature alone does not determine visibility; weather, beam optics, and your eyes all affect what you can see. Choose based on tested performance and the conditions you actually face.
Check the Mount, Weather Protection, and Warranty
A durable road LED light needs more than a tough-looking shell: its housing, lens, seals, connectors, heat management, and mounting hardware must all handle the conditions you drive through. An IP rating describes protection against dust and water under specified tests, not guaranteed survival in every storm, wash, or muddy crossing. Treat the rating as one clue, not a promise; it doesn’t tell you how well the bar withstands impacts, vibration, or aging seals.
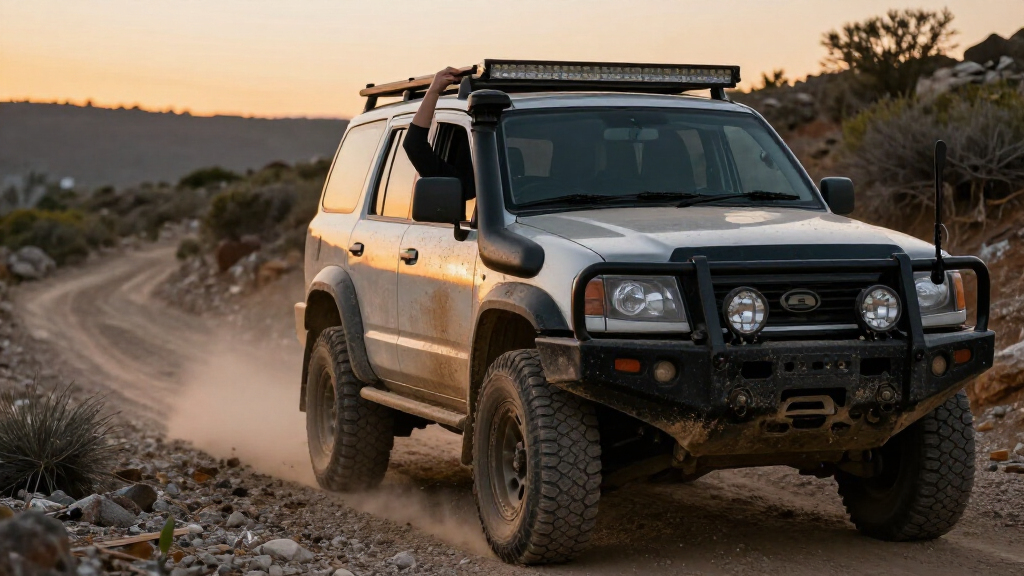
For instance, a roof-mounted bar on a high-clearance 4×4 may face branches, vibration, wind noise, and road grime. Its higher position can give a broad view, but it can also expose the bar to more branches and create extra wind noise. A bumper-mounted bar may sit lower and be easier to protect from wind, but it may take more direct hits from stones and mud and can cast a shorter, closer pool of light. In either spot, a loose bracket can slowly shake the beam out of alignment, while water entering a connector can cause intermittent operation long after the trail dries.
Check the mounting hardware for a secure fit and look for corrosion-resistant materials if you regularly drive near salt or wet conditions. Inspect the lens and seals for damage, and ask whether the manufacturer sells replacement parts. Some bars are sealed units that become difficult or uneconomical to repair after a damaged lens or failed component. A replaceable connector or bracket may be more valuable than a small difference in advertised output if you expect to keep the vehicle for years.
Warranty terms and customer support matter most after something goes wrong. Compare the warranty length, exclusions, and the process for getting help—not just the brand name on the box. A modestly priced bar with clear specifications, sound construction, and useful support can make more sense than a flashy unit with no credible test data or repair options. The tradeoff is not simply cost versus brightness: dependable hardware and parts can reduce downtime and the chance that a minor failure means replacing the whole bar.
Install the Bar Without Creating an Electrical Problem
Install a light bar with a secure bracket, correctly sized wiring, suitable circuit protection, and protected cable routing. The bar’s voltage and current draw must work with the vehicle’s electrical system; a rushed connection can cause voltage drop, overheated wires, or electrical faults. Wire that is too small for the load can heat up, while an unsuitable fuse may fail to protect the wiring if a fault occurs. If you’re unsure how to size or connect the circuit, ask a qualified automotive technician to handle the installation.
- Check fitment first. Measure the mounting space and confirm the bracket suits your vehicle. Leave room for airflow and access to wiring.
- Confirm electrical requirements. Check voltage, current draw, fuse guidance, relay or controller details, and the vehicle’s charging capacity. The fuse and wiring should follow the manufacturer’s guidance because protection depends on the circuit, not just the bar.
- Route and protect the wires. Keep them away from hot exhaust parts, sharp edges, and moving components; secure them so vibration cannot rub through insulation. A grommet where wiring passes through metal helps prevent abrasion and possible shorts.
- Test and aim the bar. Verify that the switch works as intended, then direct light at the intended area without creating distracting reflections.
Consider a weekend installation on a pickup: the bracket bolts in easily, but the wiring must pass safely through the engine bay. A cable draped near a hot exhaust manifold may soften or fail; a poor ground may make the bar flicker when the engine vibrates. Those are avoidable problems when you follow the manufacturer’s wiring instructions and protect every run. A relay, where specified, also lets a low-current switch control the higher-current light circuit, reducing the load carried through the cabin switch wiring.
A light bar draws power while switched on, so battery impact depends on current draw, run time, battery condition, and charging-system capacity. A short check at a campsite is different from leaving several lights on for hours with the engine off. If the vehicle’s charging system cannot keep up with the added load during use, the battery may gradually lose charge even with the engine running. Use a separate, clearly controlled switch so you don’t accidentally run auxiliary lights when you don’t need them.
Aim It Carefully and Keep Public-Road Use Legal
A properly aimed light bar helps you see off-road while reducing glare for other drivers; an improperly aimed one can make a trail harder to read and create a hazard on public roads. Laws differ by location and vehicle type, so a bar that’s useful off-road may need to stay off or be covered on public streets. Check the rules where your vehicle is registered and driven. Aiming matters even on a legal off-road route: light directed into dust, fog, or snow can reflect back toward you and reduce contrast, making obstacles harder to distinguish.
Before a night drive, test the beam in a safe, permitted area. Look for light bouncing off the hood, roof rack, dust, or nearby snowbanks. If the hood glows like a white sheet, adjust the angle or mounting position; the reflected brightness can compete with the trail instead of helping you see it. Also check that the beam doesn’t create a bright hotspot that makes the surrounding ground seem darker by comparison.
Use a dedicated switch that’s easy to identify and hard to activate by accident. If your route connects to a public road, switch the bar off before joining traffic and follow local requirements for covers, aiming, and permitted equipment. A bright bar is not a substitute for legal headlights or careful driving; using auxiliary lighting where it is not allowed can also create glare for other road users even if you believe the beam is aimed low.
Take a dusty two-track as an example. A high-mounted bar can light the haze hanging in front of the windshield, while a lower mount may reduce that reflection. There isn’t one perfect position for every vehicle; test the actual beam on the terrain you drive and adjust for useful coverage without glare. If dust or weather makes the beam reflect back, reducing or switching off the bar may improve visibility more than adding brightness.
Use This Quick Checklist Before You Buy
The right off-road LED light bar fits your vehicle, terrain, electrical system, and local rules—not simply the largest space you can fill. Use this checklist to compare products before checkout. It can help you avoid paying for a beam you don’t need or discovering that your preferred mounting spot blocks airflow or makes wiring difficult.
- Terrain: Do you need distance, broad side coverage, or both?
- Measured performance: Can you find test data with a stated distance, rather than only a theoretical lumen claim?
- Fit and placement: Have you measured the space and considered glare, wind noise, airflow, and impact exposure?
- Electrical details: Do the voltage, current draw, fuse, wiring, and switch match your vehicle and the manufacturer’s instructions?
- Durability and support: Are the seals, connectors, hardware, warranty, and replacement options clearly described?
- Legal use: Have you checked local rules for auxiliary lights on public roads?
Imagine choosing between a long roof bar with an impressive lumen claim and a shorter bumper bar with a tested combo beam. If most of your driving involves slow, narrow trails, the shorter bar’s near-field coverage may help more—and its lower position may reduce wind noise. But the bumper location can expose it to stones and mud, while the roof bar may give a longer view and broader perspective at the cost of more wind noise and branch exposure. Compare the tradeoffs against your vehicle and routes rather than assuming either location is best.
Current products may add compact housings, integrated controls, selectable beam or color modes, and wireless or app features. Those extras change by model and market, so confirm current specifications and compatibility rather than buying based on a trend. More features can add convenience, but they may also add setup complexity or components that need support. Start with light quality, safe installation, and support; treat convenience features as a bonus.
Frequently Asked Questions
How many lumens do I need for an off-road light bar?
There’s no single lumen target that suits every driver. Beam pattern, measured output, mounting height, and terrain matter more than a headline figure. Compare credible test data and ask whether you need distance or broad nearby coverage.
Should I choose a spot, flood, or combo beam?
Choose spot for longer reach, flood for wider nearby coverage, or combo for a blend of both. A slow, rocky trail often rewards flood coverage near the tires, while open terrain may call for more distance. Your usual route should guide the choice.
Can I use an LED light bar on public roads?
It depends on local law, vehicle category, installation, and how you operate the light. Check the rules where your vehicle is registered and driven; some places restrict use or require the bar to be covered or switched off on public roads.
Will an LED light bar drain my battery?
The bar draws power while it’s on, and the effect depends on current draw, run time, battery condition, and charging-system capacity. A brief trail check is different from running auxiliary lights for hours with the engine off. Follow the product’s electrical guidance and avoid leaving the bar on unintentionally.
Are IP-rated light bars waterproof in every situation?
No. An IP rating describes performance under specified dust and water tests, not every real-world exposure. Seals, connectors, vibration resistance, materials, and build quality also affect durability, so check those details as well.
Conclusion
Choose an LED light bar by the job it needs to do: match its beam to your terrain, look for trustworthy performance data, and plan the mount and wiring before you buy. A well-aimed, safely wired bar can make a dark trail easier to read; a poorly chosen one can turn dust, glare, and electrical trouble into part of the trip.
Check your local rules, test the beam where use is permitted, and let the trail—not the biggest number on the box—tell you what works.
Halloween Picks
halloween
As an affiliate, we earn on qualifying purchases.