Performing a quick pre-ride bolt check is essential for preventing up to 80% of trail breakdowns caused by loose or damaged fasteners. Focus on tightening critical bolts like those on your stem, handlebars, saddle, crankset, and brakes to manufacturer-recommended torque levels. Visually inspect for corrosion, cracks, or wear, and use a torque wrench for precision. Maintaining these standards reduces safety hazards and mechanical failures, and if you continue exploring, you’ll discover the step-by-step process to maximize your bike’s reliability.
Key Takeaways
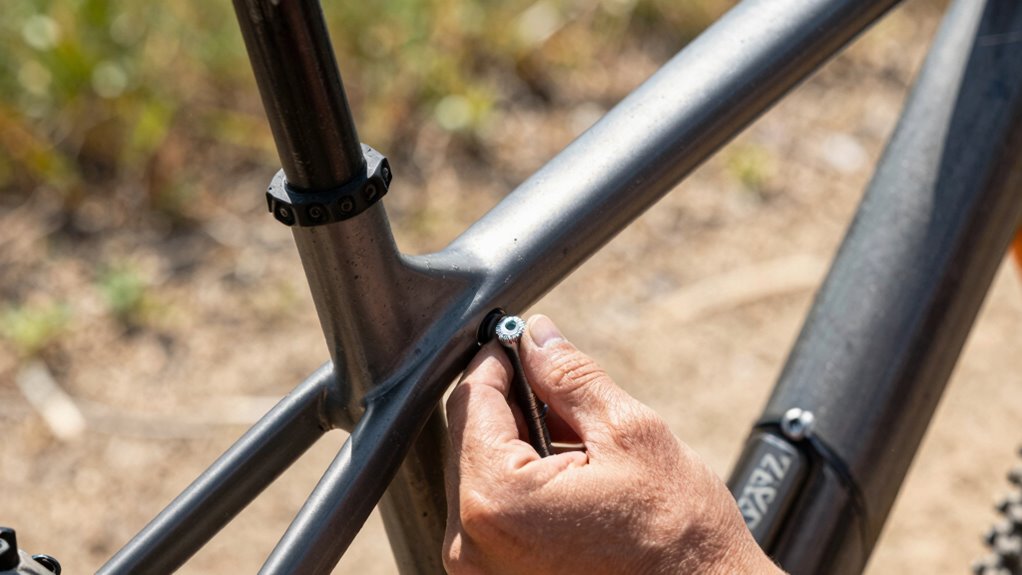
- Conduct a quick visual inspection for loose, corroded, or damaged bolts before each ride.
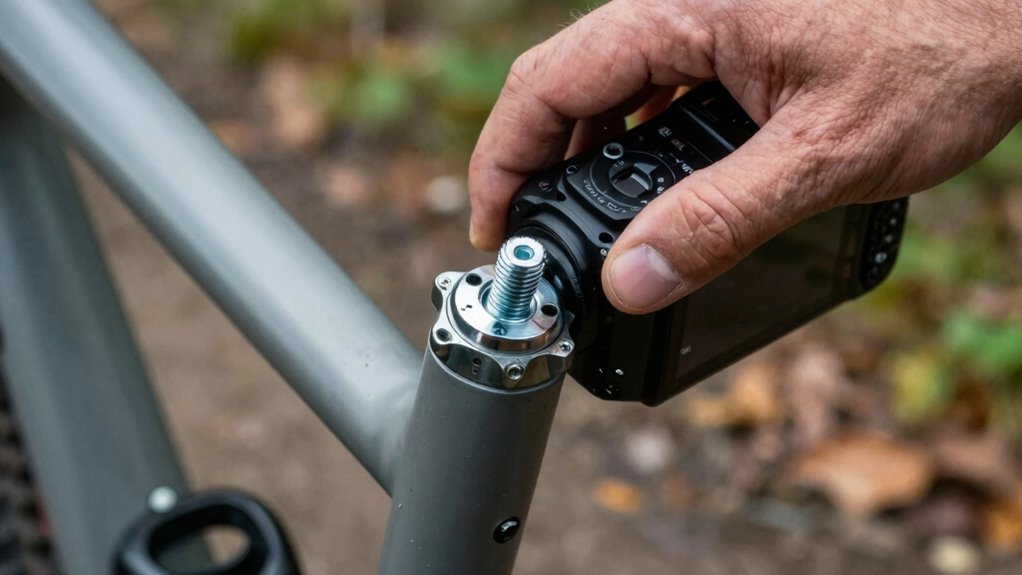
- Use a torque wrench to tighten critical bolts to manufacturer specifications, ensuring proper load distribution.
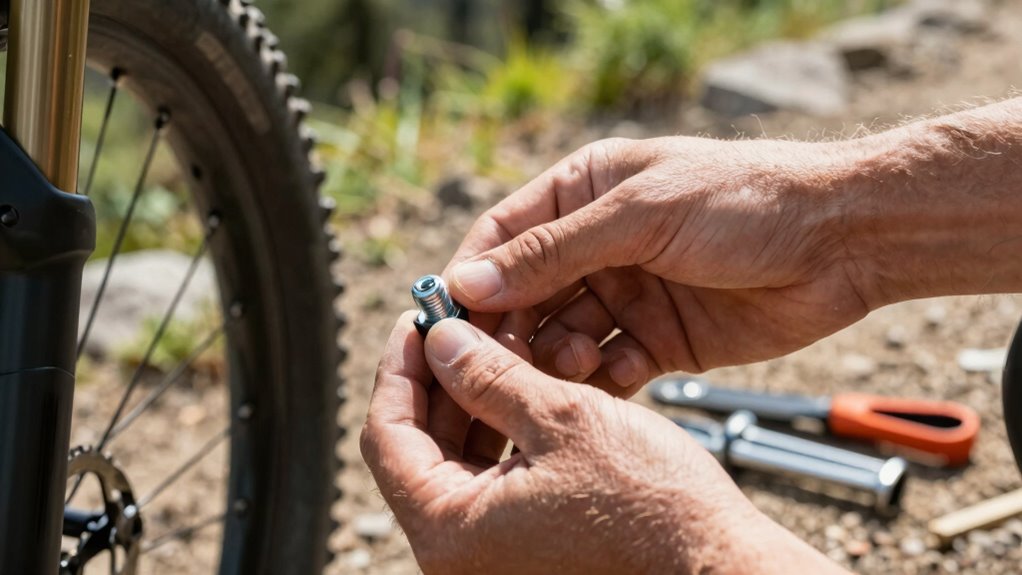
- Check for signs of wear, such as stripped threads or corrosion, and replace damaged bolts immediately.
- Ensure locking mechanisms like thread lockers or washers are secure to prevent vibration loosening.
- Regularly log and recheck bolt tightness over time to catch gradual loosening and maintain safety.

Auxbeam Motorcycle Auxiliary Lights Fog Lights LED Driving Light Spotlight with Halo DRL, White/Amber 8 Modes Dual-Color Strobe LED Offroad Work Lights for Motorcycle SUV ATV Trucks
【8 LIGHTING MODES FOR EVERY ADVENTURE】Conquer the night with motorcycle auxiliary lights' 8 powerful lighting modes! Blaze through...
As an affiliate, we earn on qualifying purchases.
Why Checking Your Bike Bolts Before Every Ride Matters
Regularly checking your bike bolts before each ride is essential to guarantee safety and peak performance. Over time, vibrations, impacts, and thermal expansion cause bolts to loosen incrementally. Loose bolts can compromise critical components like the stem, handlebars, and suspension mountings, leading to sudden failure or loss of control. Tightening bolts to manufacturer-recommended torque specifications prevents thread stripping and ensures proper load distribution. Using a calibrated torque wrench helps you achieve consistent tightness, avoiding under-tightening or overtightening. Regular inspection also allows early detection of corrosion or thread damage, which could weaken fastening points. Properly maintaining your bike’s mechanical integrity is crucial for ensuring reliable performance and safety during rides. Incorporating proper bolt tightening techniques can significantly reduce the risk of component failure. This proactive approach minimizes the risk of component failure mid-ride, preserves bike integrity, and extends the lifespan of your equipment. Consistent bolt maintenance is an important part of preventive bike care, and understanding the importance of proper torque can further enhance safety and durability. Additionally, recognizing signs of thread damage or corrosion can help prevent unexpected failures during critical moments.

Kewig Motorcycle Auxiliary LED Light Kit Driving Spotlights White/Amber Fog Light with Mount Brackets Wire Harness Waterproof 60W Offroad Work Lights Compatible with Motorcycle J-eep Car Truck (Black)
Scientific Design Concept: Kewig motorcycle led light is scientifically designed with high quality chips and high borosilicate optical...
As an affiliate, we earn on qualifying purchases.
Which Bike Bolts Should You Inspect and Tighten?

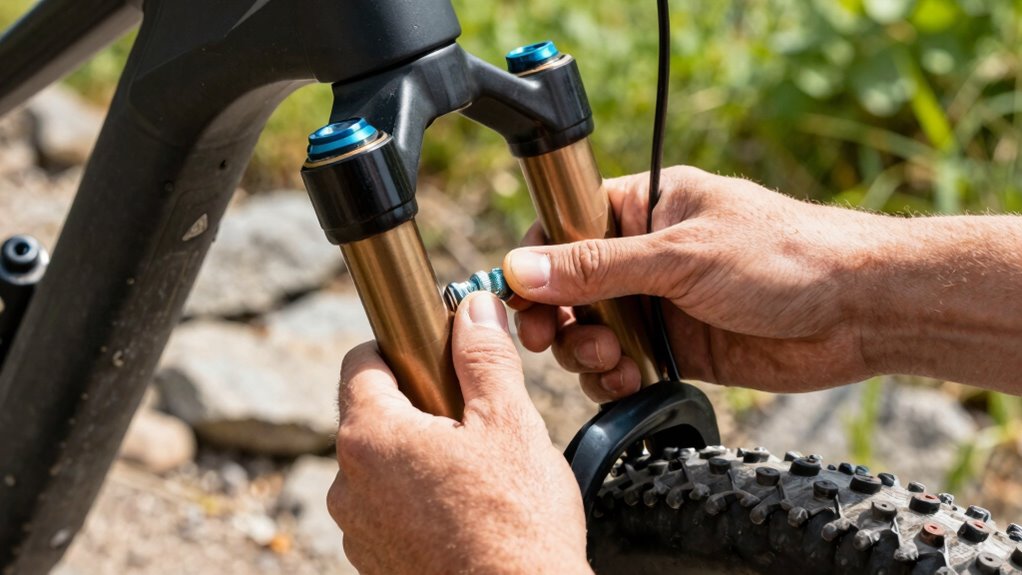
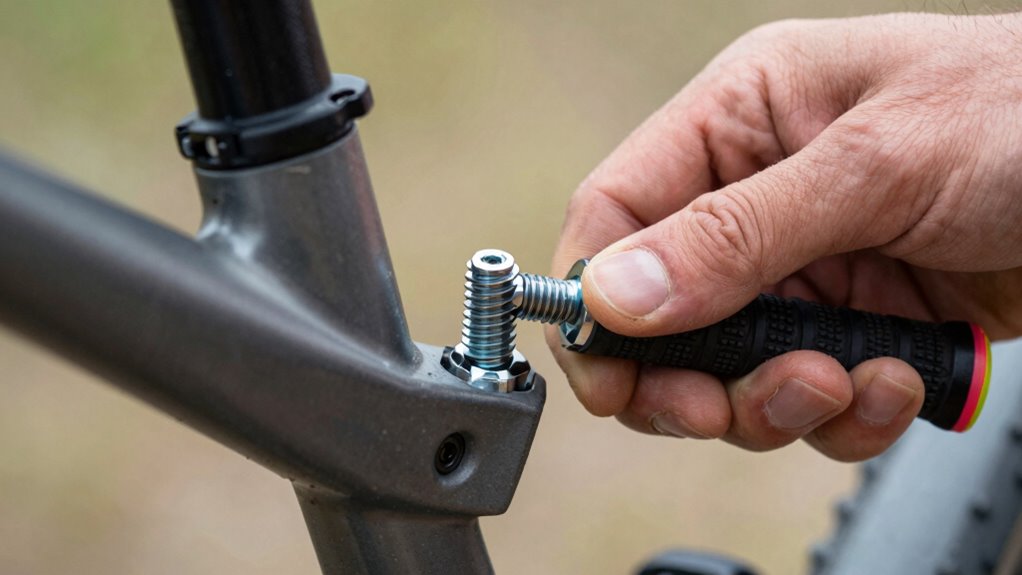
To guarantee peak safety and performance, you should focus on inspecting and tightening all critical connection points on your bike, particularly those that bear significant loads or experience frequent movement. Key bolts include stem bolts securing the handlebar, headset bolts maintaining steering integrity, and seat post bolts ensuring proper saddle height. Crankset bolts, chainring fasteners, and pedal bolts are essential for drivetrain stability. Frame-to-fork bolts, especially at the crown and head tube junction, prevent misalignment. Also, check brake caliper bolts and rotor mounting screws to avoid compromised braking. Rear suspension linkage bolts and derailleur mounting screws are vital for smooth shifting and suspension function. Prioritize fasteners made of high-strength materials, and ensure each bolt is torqued to manufacturer specifications to prevent loosening under stress. Using high-quality, energy-efficient components can further enhance your bike’s durability and performance.

LEDOPPO Motorcycle Fog Lights LED Kit Auxiliary Driving Lights with Switch Wiring Harness Brackets 50W Hi-Low Combo Beam for R1200GS Adventure Touring Cruiser Sport Motorcycle E-bike ATV UTV Trike
【HIGH LOW BEAM LED MOTORCYCLE FOG LIGHTS】LEDOPPO D7 Motorcycle Fog Lights Has High/Low/Combo Beam Lighting:High Beam (Spot) for...
As an affiliate, we earn on qualifying purchases.
Essential Tools for Bike Bolt Inspection and Tightening

Having the right set of tools is essential for accurately inspecting and tightening bike bolts to guarantee safety and peak performance. Precise torque application prevents over-tightening or loosening during rides. Key tools include a high-quality torque wrench, which ensures bolts are tightened to manufacturer specifications. You’ll also need:
- Allen (hex) wrenches in various sizes for different bolt types
- Socket wrenches with appropriate attachments for quick adjustments
- A flat-head and Phillips screwdriver for specialized bolts
- A thread locker applicator to prevent loosening due to vibration
- A digital or analog torque meter for precise measurement of applied force
Using these tools correctly allows you to assess bolt integrity, achieve accurate torque levels, and maintain consistent preload—critical for avoiding component failure and ensuring ideal bike performance. Regularly checking your bolts with the right tools can significantly reduce the risk of trail breakdowns caused by loose components, as maintaining proper bolt integrity is essential for safety and reliability on the trail. Additionally, understanding the proper torque specifications for each bolt type helps prevent damage from over-tightening. Incorporating routine inspections and proper tool use into your maintenance schedule can further enhance your bike’s durability and safety.

Future Eyes LED Motorcycle Fog Lights, 360° Adjustable Auxiliary Lights, Waterproof Off-Road Driving Light for Night Riding, Amber/White High & Low Beam, Compatible with Motorcycles, ATVs, and UTVs
🔦【Enhanced Nighttime Visibility and Safety】: The Future Eyes Motorcycle LED Lights feature high-transmittance optical lenses that ensure precise...
As an affiliate, we earn on qualifying purchases.
How to Perform a Quick and Effective Bolt Check
Performing a quick and effective bolt check requires a systematic approach to make certain all critical fasteners are properly tightened without over-torquing. Begin by visually inspecting each fastener for signs of loosening, corrosion, or damage. Use a torque wrench set to the manufacturer’s recommended specifications for each bolt—this prevents under- or over-tightening. Focus on key areas: headset, stem, handlebar clamps, brake mounts, derailleurs, and wheel axles. Tighten bolts in a crisscross pattern to ensure even load distribution and use a calibrated torque wrench for precision. Confirm each fastener’s tightness with a quick manual check, feeling for resistance without excessive force. Regular inspection practices are essential to maintaining safety and performance. Incorporating a visual inspection routine can help catch potential problems early. Being aware of common fastener issues can help you identify problems before they cause failure during your ride. Paying attention to fastener wear and tear can also improve your preventive maintenance efforts. This method ensures fasteners are secure, reducing the risk of failure during your ride.
How Loose Bolts Can Lead to Mechanical Failures and Safety Hazards
Loose bolts compromise the structural integrity of your bike, increasing the risk of mechanical failures that can lead to accidents. When bolts loosen, critical components such as the handlebars, stem, or brake calipers can shift unexpectedly, causing loss of control. This can result in catastrophic failures including wheel detachment, brake failure, or frame damage. Gold IRA Markets highlight the importance of proper maintenance and security of essential components. To understand the risks better, consider these points:
- Reduced clamping force allows parts to shift under load.
- Vibration-induced loosening accelerates bolt fatigue.
- Uneven stress distribution causes metal fatigue or cracks.
- Component misalignment hampers proper function and safety.
- Potential for sudden failure during high-stress maneuvers.
- Proper torque application is crucial to ensure bolts stay secure under various riding conditions.
- Regular inspection and tightening of bolts can greatly reduce the likelihood of these issues occurring.
- Additionally, preventative maintenance such as applying thread-locking compounds can help keep bolts secure over time.
- Implementing a pre-ride bolt check as part of your routine can significantly prevent these issues before they happen.
Ensuring bolts are tight prevents these issues, maintaining both your safety and bike performance.
Recognizing Signs of Wear or Damage on Your Bike Bolts
While inspecting your bike’s bolts, it’s essential to identify any signs of wear or damage that could compromise their integrity. Look closely at the bolt heads for rounding, stripping, or corrosion, which weaken grip and may cause failure. Check the threads for cross-threading, deformation, or embedded debris that hinder proper tightening. Examine the shank for elongation, cracks, or corrosion, as these indicate material fatigue. Pay attention to any discoloration or pitting, which signal corrosion or chemical degradation. Verify washers and locking mechanisms aren’t deformed or missing. Use a torque wrench to confirm bolts are within manufacturer specifications; over-tightening or under-tightening can cause damage or loosening. Recognizing these signs early helps prevent sudden failures during rides, maintaining safety and performance. Regular inspections are crucial for ensuring long-term bolt integrity and bike reliability.
Preventing Bolts From Loosening During Rides: Tips and Tricks
To prevent bolts from loosening mid-ride, you should perform regular torque checks with a calibrated torque wrench to guarantee proper tightness. Applying locking agents like thread lock or adhesive can secure fasteners against vibration-induced loosening. Additionally, follow correct assembly procedures, including cleaning threads and tightening bolts in a sequence that distributes load evenly, to maintain bolt integrity during rides. Ensuring proper fastener maintenance can further prolong the lifespan of bolts and prevent failures during your ride, especially considering the importance of yarn weight and stitch type for related projects.
Regular Torque Checks
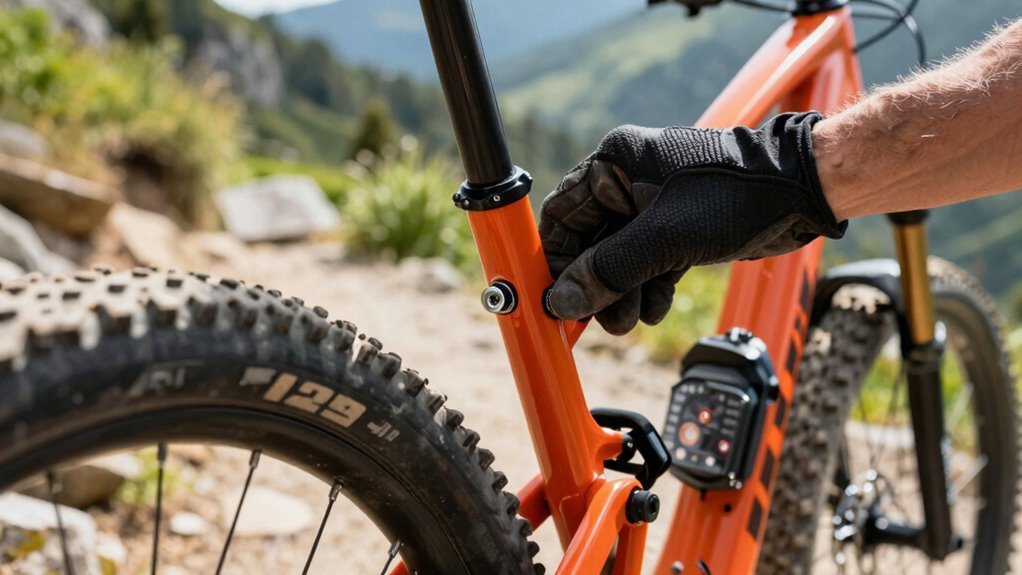
Regular torque checks are essential for maintaining ride safety and preventing bolts from loosening during your rides. Consistently verifying torque values ensures that fasteners remain within manufacturer specifications, reducing the risk of failure under load. Use a calibrated torque wrench to measure each critical bolt, paying close attention to components like the stem, crankset, and derailleur mounting points. Keep a detailed log of torque readings to track any gradual loosening over time. Focus on these key areas:
- Frame-to-fork joints
- Bottom bracket bolts
- Seat post clamp
- Handlebar clamps
- Brake caliper mounts
Applying proper torque prevents overstressing components and avoids the uneven distribution of forces that can lead to failure. Regular, precise checks are integral to a proactive maintenance routine, safeguarding your ride and extending component lifespan.
Use Locking Agents
Applying locking agents to critical bolts is an effective method to prevent loosening caused by vibrations and dynamic loads during rides. Use a high-quality threadlocker, such as anaerobic adhesives, designed for bicycle components. Clean the bolt threads thoroughly with a degreaser before application to guarantee ideal adhesion. Apply the locking agent sparingly—just a small drop on the threaded portion—avoiding excess that could contaminate surrounding surfaces or interfere with assembly. Once applied, tighten the bolt to the specified torque to activate the locking properties. Locking agents resist shear and vibrational forces, maintaining bolt tension over time. Regularly inspect these bolts during pre-ride checks, especially after rough terrain, to verify the integrity of the lock. Proper application minimizes the risk of loosening without compromising future disassembly.
Proper Assembly Techniques
Proper assembly techniques are *vital* to ensuring bolts stay secure throughout a ride. To achieve this, follow precise torque specifications using a calibrated torque wrench, ensuring each bolt is tightened to manufacturer-recommended settings. Always clean mating surfaces thoroughly to remove debris, grease, or old threadlocker, which can compromise grip. Apply an appropriate threadlocker, such as medium-strength, to prevent vibration-induced loosening. Use the correct tools—preferably a torque wrench and the right bit—to avoid over-tightening or stripping threads. Additionally, stagger bolt tightening in a crisscross pattern to distribute load evenly. Check and re-tighten bolts after initial assembly, especially if components are new or recently serviced. These meticulous steps reduce the risk of bolts loosening during rides, preventing breakdowns and ensuring ride safety.
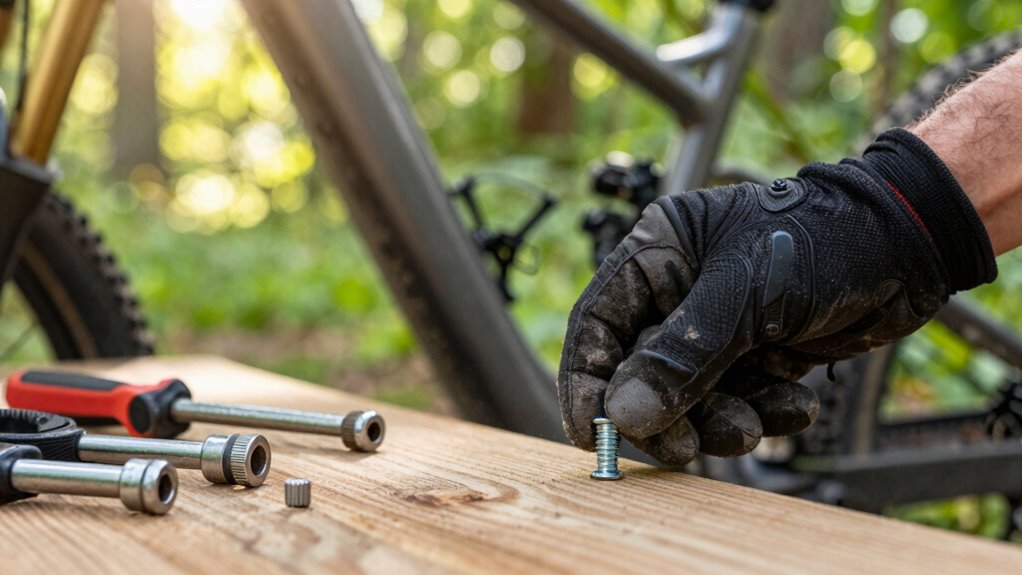
What to Do If You Find Damaged or Worn Bolts
If you discover that a bolt is damaged or shows signs of excessive wear during your pre-ride inspection, it’s crucial to address the issue immediately to maintain safety and structural integrity. First, remove the compromised bolt using the appropriate tools, ensuring no debris or residual material remains. Inspect the bolt threads and surrounding components for corrosion, cross-threading, or cracks. If the bolt is metal, replace it with an exact match in size, grade, and threading specifications—never reuse a damaged or worn bolt. For plastic or composite parts, consult manufacturer guidelines for suitable replacements. Apply a thread-locking compound if recommended, and torque the new bolt to manufacturer specifications using a calibrated torque wrench. Confirm that the replacement is secure, free of defects, and properly seated before proceeding.
Benefits of Regular Bolt Checks for Your Bike’s Performance and Longevity

Regular bolt checks guarantee that all fasteners maintain ideal torque, reducing the risk of component failure during rides. Properly secured bolts enhance your bike’s safety by preventing unexpected detachments and malfunctions. Additionally, consistent maintenance minimizes wear on critical parts, extending their service life and preserving overall performance.
Enhanced Bike Safety
Maintaining tight and secure bolt connections is essential for guaranteeing your bike’s safety and ideal performance. Properly torqued bolts prevent component failure during rides, reducing the risk of accidents. Regular bolt checks help identify signs of loosening, corrosion, or fatigue before they compromise structural integrity. This proactive approach minimizes mechanical failures that could lead to crashes or injuries.
- Prevents sudden component detachment during rides
- Reduces the risk of frame or fork failure
- Ensures brake and shifting systems function reliably
- Minimizes vibrations caused by loose parts
- Maintains overall handling stability and rider confidence
Prolonged Component Life
Consistently checking and tightening bolts extends the lifespan of critical bike components by preventing undue stress and wear caused by loosening or vibration. Loose bolts generate micro-movements that accelerate metal fatigue, compromising parts like the crankset, derailleur, and suspension linkage. Regular torque checks ensure each fastener remains within manufacturer specifications, reducing the risk of fatigue fractures and catastrophic failures. Properly torqued fasteners distribute loads evenly, minimizing uneven stress concentrations that can cause premature component degradation. By maintaining ideal tightness, you prevent the buildup of wear-inducing micro-movements, prolonging the functional integrity of moving parts and preventing the need for costly replacements. Ultimately, this disciplined approach preserves your bike’s mechanical health, ensuring consistent performance and extending the service life of essential components.
Frequently Asked Questions
How Often Should I Perform a Pre-Ride Bolt Check?
You should perform a pre-ride bolt check every time before hitting the trail, ideally within 10 minutes of starting your ride. Focus on critical components like the stem, handlebars, seat post, brake calipers, and derailleur mounts. Tighten any loose bolts to manufacturer torque specifications using a torque wrench. Regular checks guarantee safety and peak performance, preventing failures caused by fatigue or vibration-induced loosening during your ride.
Can I Tighten Bolts With Just My Hands?
Yes, you can tighten bolts with just your hands initially, but it’s crucial to follow up with the proper tools. Hand-tightening ensures the bolt is snug without risking over-tightening. Afterward, use a torque wrench to apply the manufacturer’s recommended torque settings, guaranteeing maximum safety and performance. Relying solely on hand-tightening can leave bolts loose or over-tightened, increasing the risk of mechanical failure during your ride.
What Are the Risks of Over-Tightening Bike Bolts?
Over-tightening bike bolts is like squeezing a sponge too hard—you risk damaging the material or stripping threads. When you tighten bolts beyond recommended torque, you can warp components, cause cracks, or weaken the connection, leading to potential failure. Use a torque wrench to apply precise pressure, ensuring secure fitment without risking damage. Proper tightening maintains safety, preserves component integrity, and prevents costly repairs or accidents during your ride.
Are There Specific Brands Recommended for Bike Bolts?
You should look for reputable brands like Shimano, FSA, and Ritchey, known for precision manufacturing and high-quality materials. These brands offer bolts made from durable alloys with consistent threading and corrosion resistance, ensuring reliable performance. Avoid generic or off-brand bolts that may lack proper specifications, as subpar materials can lead to stripping or failure under stress. Always verify compatibility with your bike’s components before installation.
How Do Environmental Conditions Affect Bolt Maintenance?
Environmental conditions greatly impact bolt maintenance, especially through moisture, temperature, and debris. You’ll want to routinely inspect and tighten bolts after riding in rain or mud, as corrosion and expansion can loosen them. High temperatures cause metal fatigue, requiring more frequent checks. Salt and dirt accelerate corrosion, so cleaning and applying anti-seize compounds help. By staying attentive to these factors, you prevent failures and guarantee your bike remains dependable in all conditions.
Conclusion
By making a quick bolt check part of your pre-ride routine, you greatly reduce the risk of catastrophic mechanical failures — potentially saving you from a trail-side catastrophe that could ruin your ride. Regular inspections guarantee your bike maintains peak performance, safety, and longevity. Don’t let loose bolts turn your ride into a disaster; a few minutes of vigilance can prevent the kind of breakdowns that could cost you hours and hundreds in repairs. Stay proactive, stay safe.