To get road tar off your car, start by gathering supplies like a tar remover, microfiber cloths, and car wash soap. Choose a cool, shaded area to work. Wash the affected areas to remove dirt, then apply your tar remover and let it sit for about 10 to 30 minutes. Gently scrape the tar with a plastic scraper or credit card, wipe clean with a microfiber cloth, and rinse with warm water. Afterward, apply a protective wax to shield against future buildup. By following these steps, your car can stay tar-free, and there's more you can discover on maintaining that shine.
Key Takeaways
- Begin by washing the affected areas with car shampoo and warm water to remove surface dirt before applying a tar remover.
- Use a specialized tar removal product like Stone Car Care Tarminator, following the instructions for effective application.
- Allow the tar remover to sit for 10 to 30 minutes, then gently scrape off the tar with a plastic scraper or credit card.
- After removal, wipe clean with a microfiber cloth and rinse with warm water, ensuring no residue remains.
- Apply a high-quality wax afterward to protect the paint and prevent future tar adhesion.
Understanding Road Tar
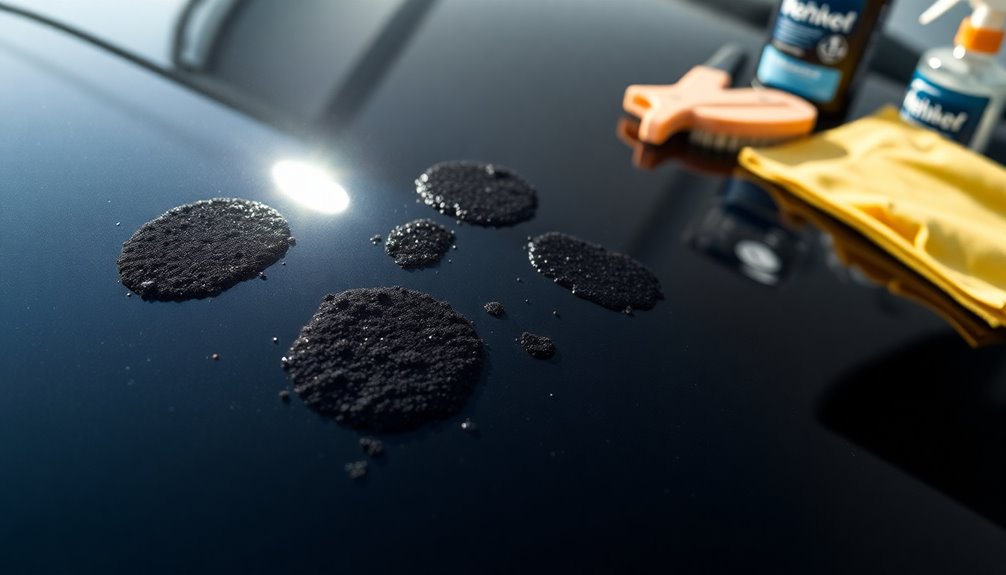
Road tar is a pesky nuisance that can cling to your car's surface, mainly because it's made from asphalt used in road construction. Once it settles on your vehicle, it can harden and cause long-term damage to your car's paint if you don't remove it promptly.
You'll often find road tar in common areas like wheel wells, doors, and quarter panels, appearing as small black speckles.
To effectively remove tar from your car, you need the right approach. Using tar removal products specifically designed for this purpose is essential. These products break down the sticky substance without harming your paint finish.
Always pair these products with a clean microfiber cloth to guarantee you're lifting the tar away gently, reducing the risk of scratching.
Regular maintenance can also help. Waxing your car creates a protective barrier that makes it harder for road tar to adhere in the first place.
This way, when you notice those annoying speckles, you'll find it easier to deal with them. Understanding road tar and how it interacts with your vehicle's paint will help you keep your car looking its best.
Preparation for Removal
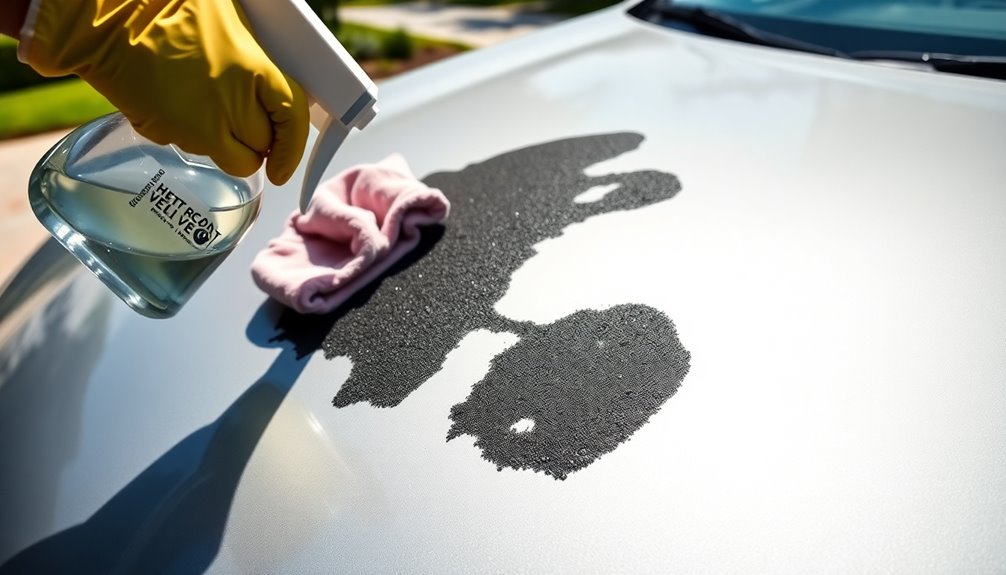
Before you tackle the tar removal process, it's crucial to gather all necessary supplies to guarantee a smooth experience. Start by acquiring a reliable tar remover, which will be your primary tool for lifting the sticky residue.
You'll also need microfiber cloths to gently wipe away the tar without scratching your car's surface. Don't forget car wash soap, a sponge, and warm water for cleaning up afterward.
Next, choose a cool, shaded area to work in. This prevents the heat from the sun from hardening the tar further, making the removal process much more challenging.
Inspect your vehicle thoroughly to identify all affected areas. Look closely to verify you don't miss any spots, as overlooking even a small area can lead to a patchy finish.
Familiarize yourself with the instructions of the tar removal product you'll be using. Understanding how to apply it effectively will yield ideal results.
Finally, prepare your workspace by organizing your materials. Having everything in its place will streamline the preparation for removal and help you avoid unnecessary delays.
With these steps in place, you'll be ready to tackle the job efficiently.
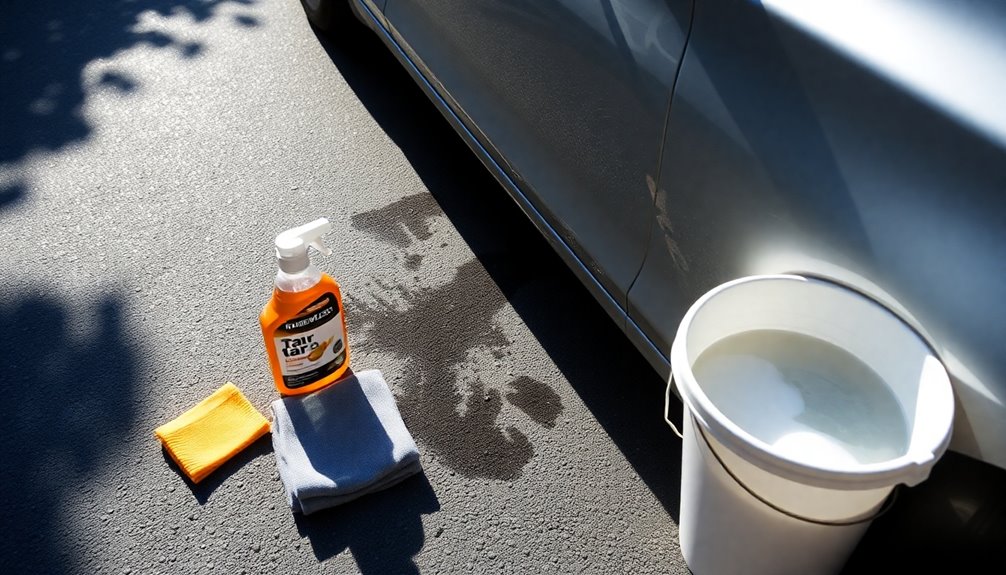
Recommended Removal Products
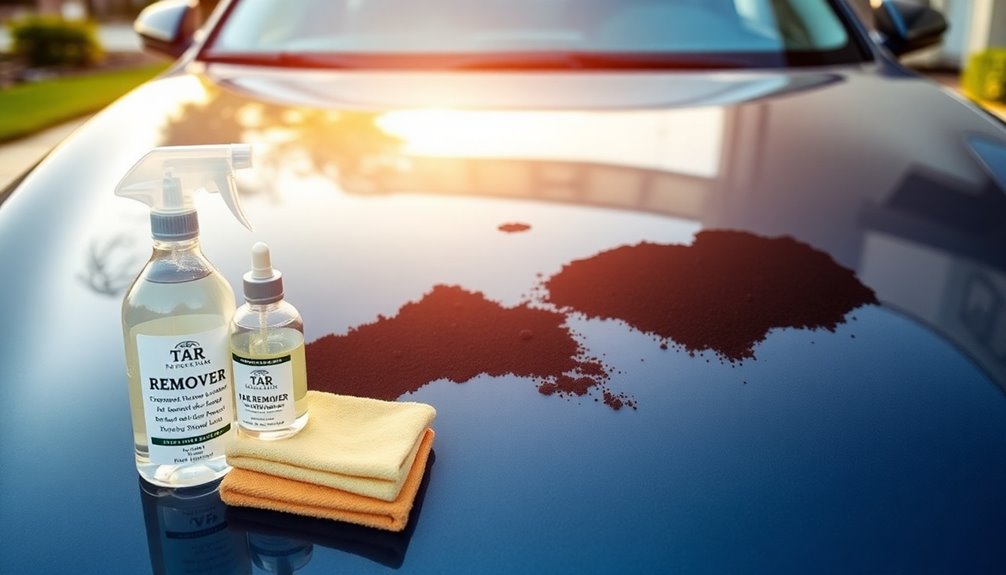
When it comes to removing tar from your car, using the right products can make all the difference. Specialized tar removal products like Stone Car Care Tarminator and Chemical Guys Bug and Tar Remover are excellent choices. These products are specifically formulated to dissolve tar without damaging your car's paint, ensuring a safe clean-up.
Another versatile option is WD-40 to remove tar. Simply spray it on the affected areas, let it sit for about 10 minutes, and then wipe it off for effective results.
Griots Garage Tar & Sap Remover is also recommended, as it's safe for various surfaces, including plastic components of your vehicle.
If you're in a pinch, you might consider some household products like peanut butter. The oil in peanut butter can help separate tar molecules, but keep in mind it mightn't be as effective as commercial tar removal products.
For tougher tar residue, Prep-Sol can work wonders, but be cautious as it can strip wax and potentially damage your car's paint if not used carefully.
Choose your products wisely for the best outcome!
Step-by-Step Removal Techniques

Getting rid of tar from your car can seem intimidating, but with the right techniques, it's manageable. Here's a step-by-step guide to help you remove the tar effectively without damaging your paint.
- Start by washing the affected area with car shampoo and water. This helps remove surface dirt, so make sure your car is parked in a shaded area to prevent the tar from hardening.
- Apply a specialized tar removal product, like WD-40 or another commercial option, directly onto the tar spots. Let it sit for 10 to 30 minutes to break down the tar.
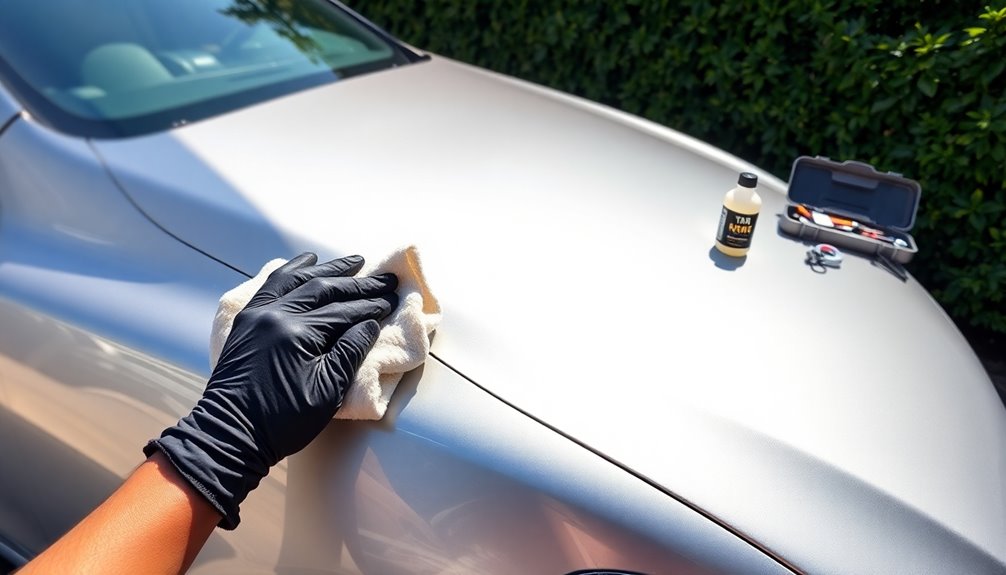
- Using a plastic scraper or a credit card, gently wipe to lift the tar off the surface. Work on small sections at a time to avoid scratches.
- Wipe the area clean with a microfiber cloth to remove any residual tar and product, then rinse with warm water.
- Finally, apply a protective wax or sealant to restore shine and guard against future tar buildup.
| Step | Action | Notes |
|---|---|---|
| 1 | Wash | Remove surface dirt |
| 2 | Apply | Use a tar removal product |
| 3 | Scrape | Gently lift the tar |
| 4 | Wipe | Clean with a microfiber cloth |
| 5 | Protect | Apply protective wax |
Cautions During Removal
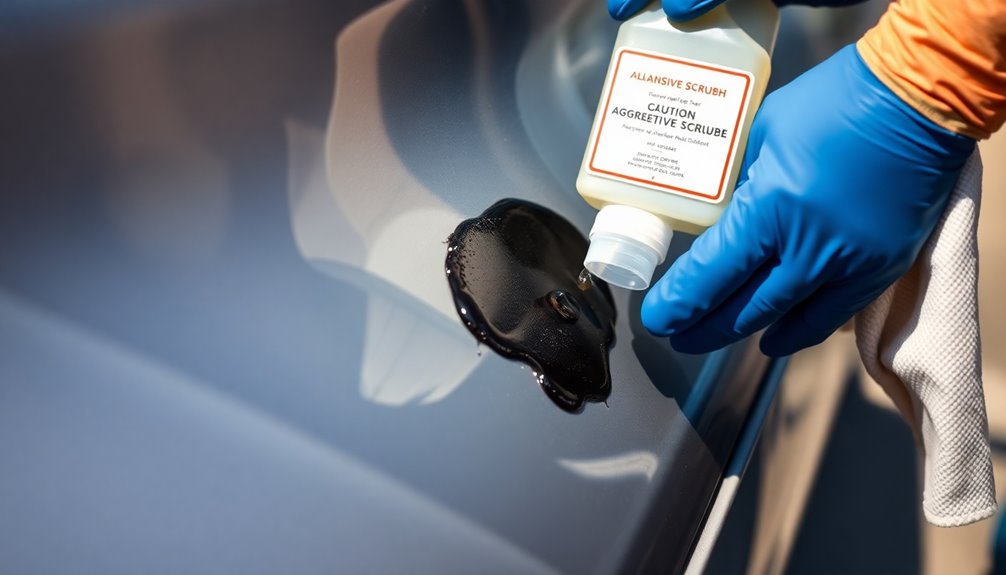
Removing tar from your car requires careful consideration to prevent damage. While it's crucial to eliminate that pesky tar, using the wrong products or methods can lead to serious issues with your car's paint. Here are some cautions you should keep in mind:
- Avoid gasoline: It poses a significant risk of flammability and can damage your car's paint finish.
- Conduct a patch test: Before using any tar removal product, test it on an inconspicuous area to verify it won't cause adverse reactions or damage to the paint.
- Be cautious with strong cleaners: Products like oven cleaners can lead to hazing or degradation of the paint if not used correctly.
Always follow the manufacturer's instructions for any tar removal products you choose. This guarantees safe and effective use while minimizing risks to your vehicle's surface.
Finally, remember to wear protective gloves when handling chemical removers to prevent skin irritation. By taking these cautions, you can effectively remove tar without compromising your car's appearance.
Preventing Future Tar Buildup
To keep road tar from sticking to your car in the first place, consider applying a wax every three months.
Installing mudflaps can also help redirect debris away from your vehicle.
Additionally, using protective coatings like ceramic can create a barrier that repels tar and dirt effectively.
Regular Wax Application
Regularly applying wax is crucial for protecting your car's paint from road tar and other contaminants. A good wax creates a protective barrier, making it harder for tar on your car to stick to the surface. If you wax your vehicle every three months, you can greatly reduce tar buildup while enhancing the integrity of the car paint.
To get the most out of your waxing routine, follow these steps:
- Clean the Car: Thoroughly wash your vehicle to remove dirt and grime before applying wax.
- Apply in Shade: Wax in a cool, shaded area to prevent the product from drying too quickly.
- Buff Evenly: Verify even coverage by buffing the wax, which maximizes protection and provides a glossy finish.
Using high-quality wax products with polymers can further prevent tar accumulation and offer a hydrophobic surface. Not only does regular waxing protect against tar, but it also improves the overall appearance of your vehicle.
Install Mudflaps
Installing mudflaps is a smart way to protect your vehicle from future road tar buildup. These handy accessories act as a barrier between your tires and the road surface, markedly reducing the amount of tar that splatters onto your car. By choosing high-quality, durable mudflaps specifically designed for your vehicle model, you'll guarantee a proper fit, maximizing their effectiveness in preventing tar accumulation.
Mudflaps also protect vulnerable areas of your car, such as the wheel wells and lower body panels, from not just tar but also rocks and other debris that can cause damage. This added layer of defense helps maintain your vehicle's paint and overall appearance.
Don't forget about maintenance! Regularly inspect your mudflaps to guarantee they remain intact and functional. If they show signs of wear or damage, replace them promptly to continue providing ongoing protection against tar and other contaminants.
Use Protective Coatings
When you apply a high-quality wax or sealant to your car, you're not just enhancing its shine; you're also creating a protective barrier that makes it harder for road tar and other contaminants to stick.
To maintain this barrier and prevent future tar buildup, consider the following strategies:
- Use Ceramic Coatings: These advanced coatings provide hydrophobic properties that repel water and dirt, greatly reducing the chances of road tar adhering to your vehicle's surface.
- Regularly Waxing: Make it a habit to wax your car every three months. This helps maintain the protective layer, ensuring that any tar or grime that does accumulate is easier to clean off.
- Utilize a Car Cover: When parked, using a car cover can protect your vehicle from loose tar particles and other debris, especially if you're near freshly paved roads. Additionally, applying advanced technology can enhance your vehicle's protective features, further minimizing tar adhesion.
Post-Removal Care
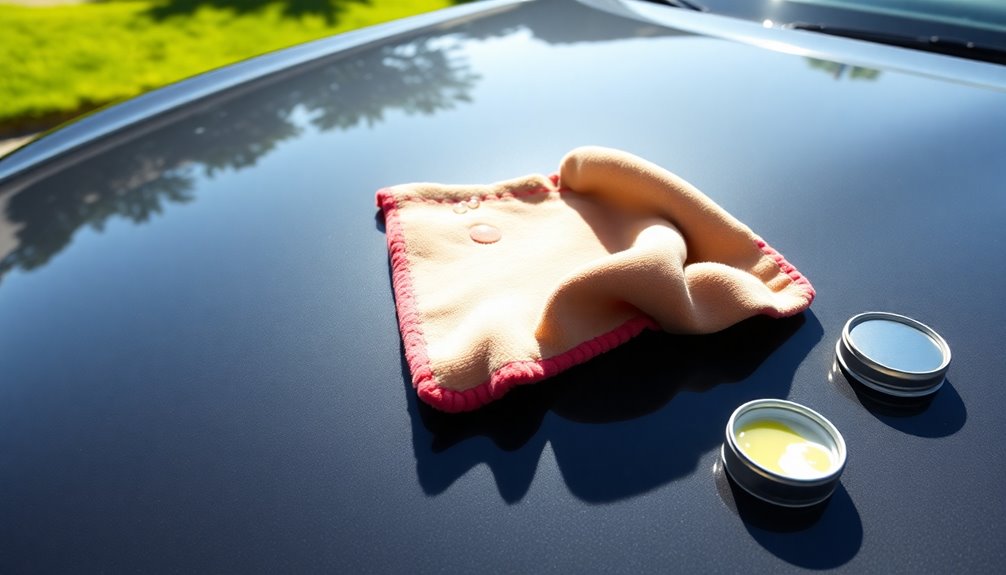
After you've removed the tar, it's essential to apply a high-quality wax to protect your car's paint and enhance its shine.
Regularly inspecting your vehicle can help you catch any new tar spots early, making future clean-ups much easier.
Wax Application Importance
Applying wax after removing road tar is vital for maintaining your car's finish. This step restores the protective barrier on your car's paint, preventing future tar adhesion and damage.
Wax not only enhances the appearance of your vehicle but also serves essential protective functions. Here are three key benefits of a good wax application:
- Hydrophobic Layer: Wax creates a hydrophobic barrier that repels water and contaminants, making it easier to clean your car in the future.
- Micro-Scratch Filling: A high-quality car wax can fill in micro-scratches that may have occurred during the tar removal process, improving the overall look of your vehicle.
- Longevity: Regular waxing, ideally every three months, prolongs the life of your car's paint and maintains its aesthetic appeal.
Using a high-quality car wax specifically designed for automotive finishes will guarantee ideal protection and shine.
Remember, taking the time to apply wax after tar removal isn't just about looks; it's about safeguarding your investment for years to come.
Regular Inspection Practices
Maintaining your car's exterior doesn't stop with waxing; regular inspections are key to catching any new road tar spots before they become a bigger problem. After driving on newly paved roads or through construction areas, take a moment to check your vehicle.
Use a microfiber cloth to gently wipe down surfaces, which helps catch small tar speckles before they adhere firmly to the paint.
Implement a routine of checking your vehicle at least once a month for road contaminants like tar, especially during warmer months when paving activities are more frequent. When inspecting, pay close attention to areas prone to tar buildup, such as the lower sections of your car.
After removing any tar, inspect the affected areas for any remaining residue or potential paint damage that may need further attention. Regular inspections allow you to maintain your car's appearance and prevent larger issues down the line.
Don't forget to regularly apply a protective wax or sealant, as this not only enhances shine but also makes it easier to spot and remove any new tar spots or dirt buildup. Consistent care guarantees your vehicle stays in top condition.
Frequently Asked Questions
How Do You Get Dried Road Tar off a Car?
To tackle dried road tar on your car, start by applying a specialized tar remover or WD-40 directly to the affected areas.
Let it sit for about 10 to 30 minutes, allowing it to penetrate the tar.
Next, gently scrape off the softened tar using a plastic scraper or credit card.
Wipe the area with a clean microfiber cloth to remove any residue, then wash the spot with car shampoo and warm water for a thorough clean.
Does Road Tar Damage Car Paint?
Yes, road tar can damage your car's paint. Its sticky nature causes it to adhere strongly, leading to potential scratches and swirls when you try to remove it.
If left untreated, tar can harden and trap dirt, worsening the situation. Over time, long exposure can cause discoloration or dullness, impacting your vehicle's appearance and value.
Will Dawn Dish Soap Remove Tar From Car?
Think of trying to clean a greasy pan with just water; it's not going to cut it.
When it comes to removing tar, using Dawn dish soap might help lift some dirt, but it won't tackle the sticky tar effectively.
You'll find that it could leave you needing stronger methods later.
For the best results, reach for specialized tar removers or household items like peanut butter or WD-40 to get the job done right.
What Is the Best Product to Remove Tar From a Car?
When it comes to removing tar from your car, specialized tar removal sprays like Stone Car Care Tarminator or Chemical Guys Bug and Tar Remover are your best bet. They dissolve tar effectively without harming your paint.
If you prefer household solutions, try WD-40 or Goo Gone; just make certain to let them soak for a bit.
Always do a patch test first to guarantee the product won't damage your vehicle's finish.
Conclusion
So, you might think that road tar is just a pesky nuisance that'll ruin your car's finish. But here's the truth: if you tackle it promptly and use the right techniques, you can keep your vehicle looking pristine. By following these steps and being mindful of prevention, you can save yourself from future headaches. Remember, a clean car not only looks good, but it also maintains its value. Don't let road tar take away your ride's shine!