Breaking the tire’s bead isn’t as tough as it seems once you use the right technique. Start by applying steady pressure with a bead breaker tool or tire lever near the rim edge, making sure to keep the tire and rim protected. Work slowly around the circumference, focusing on weak spots, and avoid rushing. If you want to learn the simple trick to make bead breaking easier, keep going for expert tips that can help you do it smoothly.
Key Takeaways
- Use a rim protector and apply steady, perpendicular force around the tire’s circumference to break the bead easily.
- Position the tire on a stable surface with the valve stem away from your working area for better access.
- Work slowly with tire levers, keeping them apart to distribute pressure evenly and prevent rim or bead damage.
- Lubricate the bead with water or a lubricant spray to reduce resistance during bead breaking.
- For stubborn beads, gently lift the tire at weak spots after loosening to avoid unnecessary damage.
Why Breaking the Tire Bead Is Difficult: And How to Do It Easily

Breaking the tire bead can be be a tough task because it requires overcoming a strong seal between the tire and rim. This seal, created during manufacturing, guarantees the tire stays inflated under pressure. Bead seating is vital for a secure fit, but it also makes breaking the bead challenging. When you attempt to loosen the bead, the tire often stubbornly clings to the rim. This is where tire patching experience helps—you learn how to apply enough force without damaging the rim or tire. Using proper techniques can make the process easier, saving you time and effort. Remember, patience is key. With the right approach, you’ll find breaking the bead becomes much simpler, and you’ll be ready for repairs or replacements without frustration. Additionally, understanding the contrast ratio of your tools can help you gauge the effectiveness of your method and ensure a successful bead break. Knowing the proper tools and techniques can streamline the process further and reduce the risk of damage. Proper hand and body positioning also plays a crucial role in applying force efficiently and safely during the process. Developing a clear understanding of tire bead material properties can further improve your technique and prevent unnecessary damage during removal. Moreover, selecting the correct air pressure can assist in loosening the bead more effectively.
The Tools You Need to Break the Bead Without Hassle
To make bead-breaking easier, you need the right tools designed for the job. A good bead breaker tool or a sturdy pry bar helps loosen the tire from the rim without damaging it. Ensuring proper tire pressure is essential; slightly deflating the tire reduces resistance, making it easier to break the bead. You might also want a rubber mallet or hammer to gently tap the tool and free the bead. Keep in mind, wheel alignment is critical after removing and reinstalling the tire, so handle the wheel carefully to maintain proper alignment. Having these tools and tips at hand guarantees a smoother, hassle-free bead-breaking process, saving you time and effort while keeping your tire and wheel in good shape.
How to Break the Tire Bead Effortlessly: A Simple Step-by-Step Guide

To break the tire bead effortlessly, start by gathering the right tools and positioning the tire correctly on a flat surface. Then, use your bead breaker with the proper technique to apply steady pressure around the tire’s edge. Follow these steps carefully to make the process smooth and easy. Ensuring you understand tire maintenance techniques can help you make informed decisions if you consider alternative methods for tire work or other projects.
Gather Essential Tools
Before you start the bead-breaking process, gather all the essential tools to make the job easier and safer. Having the right gear guarantees you can work efficiently and avoid unnecessary damage. Here are the must-haves:
- Tire iron or pry bar – to gently lift the bead away from the rim.
- Air compressor with hose – to adjust tire pressure and help seat or break the bead.
- Water or lubricant spray – to ease the bead’s release from the rim.
- Wheel chocks or blocks – to stabilize the wheel and maintain proper wheel alignment.
- Ensuring your tools are compatible with electric bikes can help prevent damage during the process.
These tools help you control tire pressure and keep the wheel steady, making the bead-breaking smoother and reducing risk of damage. Proper preparation sets the foundation for a quick, effective tire change. Proper tool selection ensures safety and efficiency during the process.
Position Tire Properly
Positioning the tire correctly is essential for a smooth bead-breaking process. Start by placing the tire on a stable, flat surface, ensuring it’s secure. Focus on proper tire positioning so the bead is accessible and easy to work with. Align the bead carefully, making sure it sits evenly in the proper position. Good bead alignment prevents slipping and reduces the force needed to break the bead. If the tire has a valve stem, position it away from your working area to avoid interference. Keep the tire steady as you prepare for bead breaking. Proper tire positioning not only makes the process easier but also minimizes the risk of damaging the rim or tire. Understanding the tire bead involved in the process can help ensure the most effective technique. Taking your time to correctly position the tire can significantly improve safety and efficiency during removal. Being aware of the best tools for bead breaking can make your task even easier. Additionally, using appropriate equipment designed specifically for bead breaking can further streamline the process.
Apply Bead Breaker Technique
Applying the bead breaker correctly is key to breaking the tire’s bead with minimal effort. To do this effectively, guarantee you protect the rim by using rim protection tools and avoid scratching the surface. Maintaining proper air pressure in the tire—less pressure makes the bead easier to break—can significantly reduce the force needed. Follow these steps:
- Position the bead breaker tool close to the rim edge for optimal leverage.
- Apply steady force, keeping the tool perpendicular to avoid rim damage.
- Work around the tire’s circumference, focusing on weak spots. Remember, proper technique is essential for safety and efficiency.
- Check for looseness before moving to the next section, guaranteeing even pressure distribution.
- Ensuring the correct tire pressure helps make the bead-breaking process smoother and safer.
- Remember that understanding modern tire technology can help you choose the right tools and techniques for easier tire removal. Knowing how tire construction impacts bead removal can further improve your approach. Additionally, being aware of bead design can assist in selecting the most effective method for your specific tire type.
This method reduces unnecessary effort and prevents rim damage. Proper technique and attention to rim protection and air pressure make bead breaking safer and easier.
Removing the Tire After the Bead Is Broken: Tips and Tricks

Once the bead is broken, carefully work tire levers around the rim to remove the tire without damaging it. Loosen the remaining bead gradually, working around the edges to make the process smoother. Keep your movements controlled to avoid pinching the tube or scratching the rim. For optimal vehicle performance, ensure the tire is properly seated during reinstallation to maintain proper contact and handling.
Use Tire Levers Carefully
After breaking the bead, carefully slipping the tire off the rim is essential to avoid damaging the tire or tube. Use tire levers gently, especially around the bead seat, to prevent pinching or tearing. Here are key tips:
- Insert tire levers at a 45-degree angle to avoid damaging the bead seat.
- Work slowly and steadily, lifting the tire over the rim edge without forcing.
- Keep the tire levers apart to distribute pressure evenly.
- Always check for sharp edges or debris that could puncture the tube as you remove the tire.
- Being aware of tire bead and its placement can help prevent damage during removal. Additionally, understanding car leasing options and their terms can be beneficial if you’re considering vehicle upgrades or replacements, ensuring you choose the best option for your needs.
Loosen Remaining Bead
When the bead is broken, the next step is to loosen the remaining bead from the rim so you can fully remove the tire. To do this, work your way around the tire, gently prying the bead away from the rim using your hands or tire levers. Be mindful of bead seating, ensuring you don’t damage the bead or the rim. Once the bead is loosened, deflate the tire further if needed—this makes removal easier. Keep in mind that properly seating the bead during tire inflation is essential for a secure fit and safety, so handle the bead carefully. Loosening the remaining bead takes patience but isn’t complicated. With the bead free from the rim, you’re ready to fully remove the tire and prepare for the next steps.
Work Around Tire Edges
With the bead loosened, you can now work your way around the tire edges to remove it from the rim. Carefully lift the tire at one point, then gently work your fingers or a tire tool around the circumference, focusing on the tire edges. This helps break the bead seating and frees the tire from the rim. Keep these tips in mind:
- Start at a low point to reduce resistance.
- Use even pressure to avoid damaging the bead or rim.
- Work slowly to prevent pinching the tube or damaging the bead seating.
- Maintain steady, consistent force to gradually free the tire without tearing it.
Common Mistakes That Make Bead Breaking Harder: And How to Avoid Them
One of the biggest mistakes that can make bead breaking more difficult is using too much force or improper tools. Many people fall into the trap of applying excessive pressure, which can damage the tire, rim, or bead itself, making removal harder. Avoiding pitfalls starts with understanding the right techniques and tools. Using the wrong tools, like a flat pry bar instead of a bead breaker or misusing a hammer, can also complicate the process. Additionally, rushing or not properly securing the tire can lead to slipping and increased effort. Familiarize yourself with common mistakes, such as overexerting or neglecting to lubricate the bead area, to make bead breaking easier. Staying patient and using correct methods will save you time and prevent unnecessary damage.
Troubleshooting Bead Breaking Problems and When to Seek Help
Ever wonder why your bead breaking attempts keep failing despite following all the tips? Troubleshooting tips can help identify issues early. First, check if the tire is properly positioned and the bead is accessible; improper placement often causes failure. Second, ensure you’re applying enough force without risking damage—sometimes, patience is key. Third, examine if your tool is in good condition; worn or broken equipment reduces effectiveness. Fourth, consider if rust or dirt is preventing the bead from breaking free. If these steps don’t work, it’s time to seek help. Don’t force it or keep trying blindly. Know when to seek help to avoid injury or damage. Sometimes, a professional has the experience and tools necessary to get the job done safely and efficiently.
Frequently Asked Questions
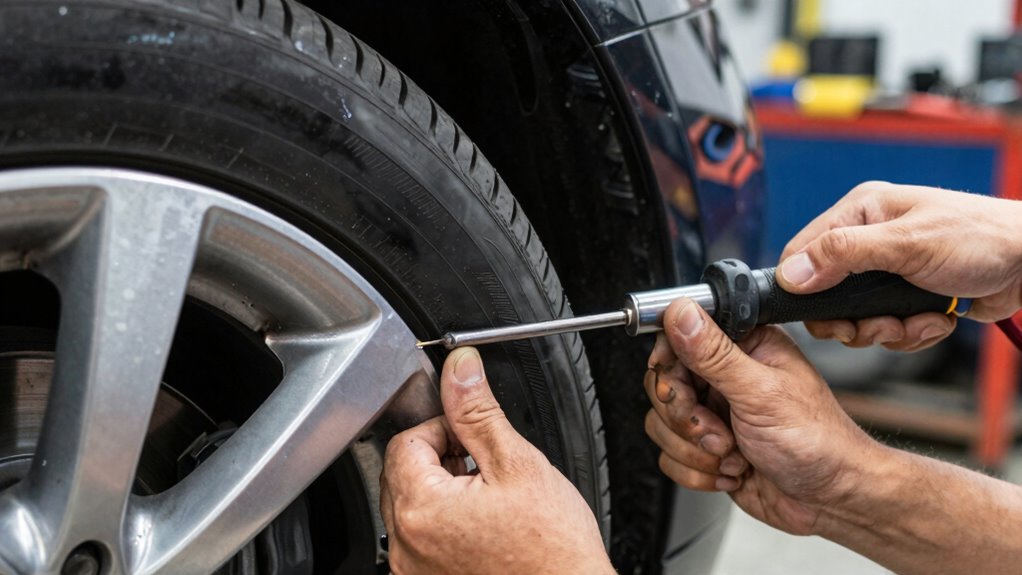
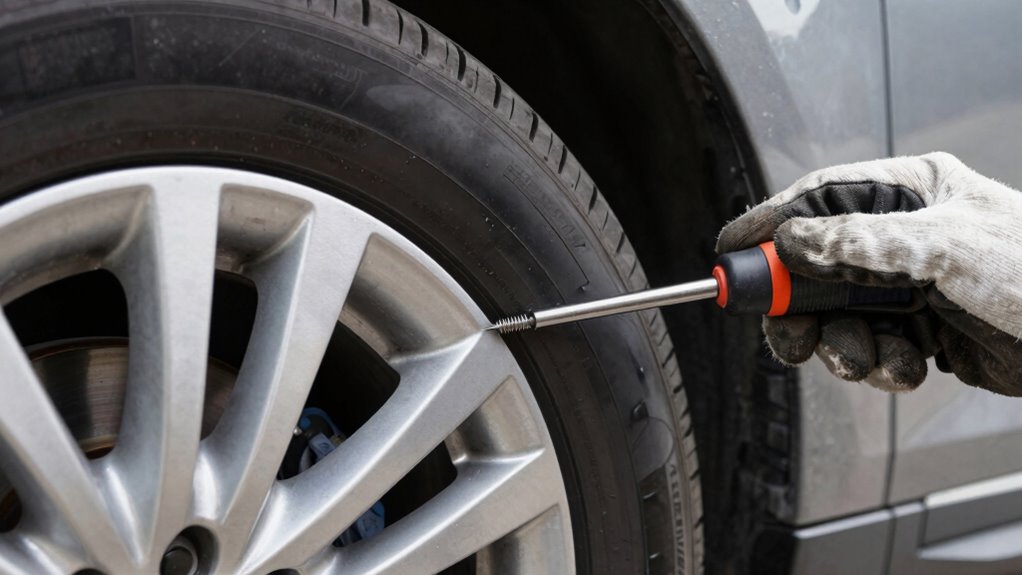
Can I Break the Bead on a Tubeless Tire Without Special Tools?
Yes, you can break the bead on a tubeless tire without special tools. Use DIY tips like a sturdy flathead screwdriver or a tire lever as tool alternatives. Carefully insert the tool between the tire and rim, then apply leverage to loosen the bead. Just be gentle to avoid damaging the rim or tire. With patience, you can successfully break the bead and save time and money on your tire repair.
What Safety Precautions Should I Take During Bead Breaking?
You should wear personal protective gear like gloves and safety glasses to protect yourself during bead breaking. Make certain your workspace is well-ventilated and free of clutter, with stable support for the tire. Keep a firm grip on tools and stay alert to avoid slips or sudden releases. By taking these precautions, you minimize risks and make the process safer and more efficient.
How Do Temperature and Weather Affect Bead Breaking Difficulty?
Like a master alchemist, you’ll find that ambient temperature and weather considerably influence bead breaking. Cold weather causes tire rubber to stiffen, making it harder to separate the bead, especially if tire pressure is low. Warmer temperatures soften the rubber, easing the process. To make it easier, confirm your tire’s pressure is ideal and work in a moderate climate. Understanding these factors helps you avoid frustration and achieve smooth bead breaking.
Is It Possible to Repair a Broken Bead Without Replacing the Tire?
Yes, you can often repair a broken bead without replacing the tire. Start with a thorough tire repair, sealing any punctures or damage. Then, carefully re-seat the bead by applying soapy water or a bead sealer around it, and use an air compressor to reinflate the tire quickly. Proper bead re-seating guarantees the tire holds air effectively, extending its lifespan and avoiding costly replacements.
How Long Does the Bead-Breaking Process Typically Take for a Beginner?
You might be surprised how quickly you can master the bead-breaking process—usually within 10 to 15 minutes if you’re a beginner. But don’t rush; a proper bead break helps preserve your tire’s lifespan and ensures your wheel stays aligned. With patience and the right technique, you’ll avoid damage and get back on the road faster, confident in your new skills. Just stay focused and take your time!
Conclusion
Breaking a tire bead might seem tricky at first, but with the right tools and technique, it becomes a straightforward task. Think of it like gently prying apart two stubborn puzzle pieces—once you find the right spot and apply steady pressure, it clicks into place effortlessly. Remember, patience and proper tools are your best friends. Before long, you’ll be changing tires like a pro, making what once felt intimidating suddenly feel simple and even satisfying.