TL;DR

Get business pricing on garage and car supplies
- Business-only prices and quantity discounts
- Tax-exempt purchasing
- Multiple users, one account, clear invoices
An off-road LED light bar is an auxiliary lamp made from LEDs, optics, a housing, and thermal-management parts. Choose spot, flood, or combo coverage to match your terrain, compare measured beam data instead of headline lumens, install it with suitable wiring and a fuse, and check local road-use rules before switching it on.
A brighter light bar can make a dusty trail harder to see. When its beam hits dust, rain, or snow, some of that light scatters back toward you, turning the air into a glowing veil.
That’s why choosing an off-road LED light bar isn’t a contest to find the biggest number on a box. You’ll get more from matching the beam to your terrain, checking real performance, and choosing a mounting spot that gives you useful light without glare.
This guide covers what light bars are, how spot and flood patterns differ, what to check before buying, and how to think about wiring and road legality. Whether you’re fitting a compact bar to a bumper or a long one above a windshield, the aim is the same: see the trail clearly and use the light responsibly.
Match spot, flood, or combo coverage to your terrain and driving speed.
Treat raw lumen claims as only one clue; compare beam shape and measured finished-light data when available.
Check mounting position for glare, vibration, wind noise, and exposure to trail debris.
Use wiring, connectors, fuse, and switching matched to the light’s specifications; get professional help if vehicle wiring is outside your experience.
Check local rules before using an off-road bar on public roads, and switch it off around other road users.
What an LED light bar does—and what its lumen number misses
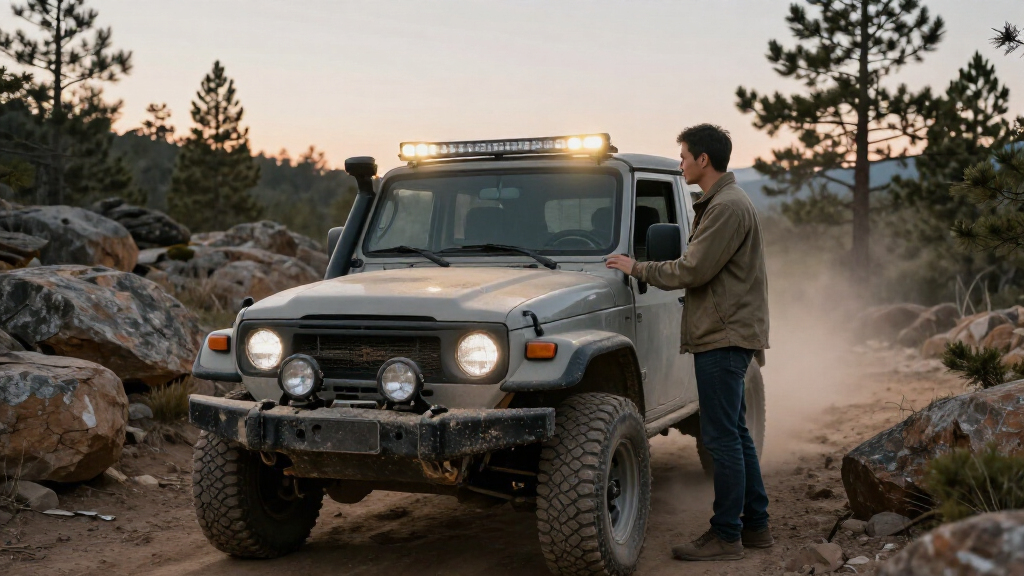
An off-road LED light bar is a row or array of light-emitting diodes mounted in a housing, usually attached to a vehicle’s grille, bumper, roof, or roll bar. The LEDs turn electrical energy into light, while optics shape the beam and a heat sink carries heat away from the electronics. The whole assembly—not the diode count alone—decides what reaches the ground.
That distinction matters when a product page leads with a huge raw lumen figure. Raw lumens may be calculated from LED specifications, rather than measured from the finished lamp. Lenses and reflectors, heat, and electrical limits all affect usable output. Think of it like a garden hose: a high flow rating tells you little about where the water lands if the nozzle sprays in the wrong direction.
For example, a driver crawling along a tight wooded track may benefit more from a broad, even patch of light than from a long beam that shoots past the next bend. Compare photometric data, beam shape, and measured distance when available; one headline number cannot tell that story.
Useful product details include housing material, lens and seal construction, connectors, thermal design, and how performance was tested. If a listing says only “super bright” and gives no clear beam or test information, treat the claim as advertising—not a complete description.
As an affiliate, we earn on qualifying purchases.
Pick a beam pattern that suits the trail in front of you
Off-road LED light bars are most useful when their beam pattern matches your speed and surroundings: spot reaches farther, flood spreads wider nearby, and combo patterns try to do both. The right choice depends on whether you need to spot distant terrain, see obstacles close to your wheels, or cover a mix of both.
A spot beam concentrates light ahead, which can help on an open track where you need more time to respond to dips or branches. A flood beam throws a wider pool at shorter range, making it easier to see the trail edges, a stump beside the vehicle, or a friend guiding you around a tight turn. A combo beam combines broad and narrow coverage, though the exact pattern varies by design.
Picture a night drive on a narrow, rutted forest trail. A spot beam may show the next rise, but leave the muddy trench beside your front tire dark. A broad beam helps with that trench, but if it throws too much light into airborne dust, the view can become milky. In fog, rain, snow, and dust, more light is not always better.
| Pattern | Best fit | Tradeoff |
|---|---|---|
| Spot | Seeing farther on open terrain | Narrower nearby coverage |
| Flood | Seeing trail edges and close obstacles | Less reach ahead |
| Combo | Mixed terrain and varied use | Beam balance depends on the design |
| Driving or auxiliary | Shaped illumination ahead | Road approval and legal use vary |
Before you buy, imagine where you drive most often: a wide desert track calls for different coverage than a slow, tree-lined route. Let that real scene—not the word “combo” on a carton—guide your choice.
Compare real beam performance, not just LED count
Off-road LED light bars should be compared by how they distribute light, not simply by their number of LEDs or claimed wattage. Look for measured output, beam shape, beam distance, and candela where a manufacturer provides them, while checking whether the testing method is explained.
These numbers answer different questions. Lumens describe the amount of light, while candela helps describe how strongly the beam sends light in a particular direction. A focused beam may reach farther than a broad beam with a higher lumen claim. But brands do not always use the same test methods, so figures may not line up neatly.
Say two bars both claim 20,000 lumens. One may send a concentrated beam down a long, open road; the other may spread light around the vehicle. If your route winds through brush, the wider pattern may help more. If you travel over open ground, distance might matter more. Beam shape is part of performance, not a decorative detail.
When available, check complete photometric information and independent measurements rather than treating a single figure as a promise. Ask how the number was obtained, and look for information about the finished light rather than only the LEDs inside it. This is a practical way to sort useful specifications from a dazzling marketing label.
Choose a mounting spot that controls glare and vibration
Off-road LED light bars work best when their mount points the beam at the intended area without shining into your eyes or other trail users’ eyes. A bumper, grille, roof, and roll bar each change the beam’s reach and spread, as well as exposure to vibration, wind, and airborne debris.
A roof-mounted bar can cast light over a wide area, but light from a high position can bounce off dust, rain, or snow and scatter back toward the driver. It can also add wind noise and aerodynamic drag. A lower bumper mount may reduce that high-angle glare, although it can face more mud, rocks, and water thrown up from the trail. Check that the mount suits the vehicle and location.
For example, imagine following another vehicle on a dry dirt track. A roof bar aimed too high can turn the dust cloud between you into a bright screen. Lowering or re-aiming the light, using a narrower beam, or switching it off when close to others may give you a clearer view. Aim carefully in a safe setting and follow the maker’s instructions.
A rigid housing, secure brackets, suitable corrosion resistance, and well-sealed lens and connectors all matter on rough or wet routes. An IP rating describes protection under specified test conditions; it does not promise survival through every pressure wash, impact, vibration, or immersion. Check the rating and care instructions, then inspect mounts and seals after demanding trips.
Install the bar without overloading its wiring
You can install many off-road LED light bars by following the manufacturer’s instructions and matching the wiring and protection to the light’s voltage and current draw. A sound setup uses suitable wire, connectors, a fuse, and a switch or relay appropriate for the load; a loose connection or undersized wire can cause voltage drop, unreliable operation, or overheating.
Before starting, check the vehicle’s electrical system and the bar’s specifications. Don’t assume that a similar-looking model has the same current draw. If you’re unsure about vehicle-specific wiring, have a qualified automotive professional handle the installation instead of guessing.
- Read the product instructions. Confirm voltage range, current draw, approved mounting points, and required components.
- Plan the route. Keep wiring secure and clear of hot, sharp, and moving parts.
- Use suitable protection and switching. Match wire, connectors, fuse, and switch or relay to the manufacturer’s directions and electrical load.
- Test and inspect. Check operation, connections, mounting, and beam aim before heading onto a trail.
For instance, a bar that works during a quick driveway test may still flicker later if a connector loosens on washboard gravel. Secure routing and a careful post-installation check can prevent a dark stretch of trail from becoming an avoidable problem. A bar draws power while switched on; battery impact depends on its draw, run time, battery condition, and charging system.
Check road rules before you drive with the bar on
An off-road LED light bar may not be legal to use on public roads, even if it fits neatly on your vehicle. Rules vary by location and may cover approval, color, position, aiming, covers, switching, and when the light can be on. Check local regulations before buying or using a bar on-road.
A label or approval mark does not automatically settle the question for every place and use. The same lamp might be allowed on a private trail but restricted on a public highway, or require a cover or separate switch under local rules. Ask the relevant transport or vehicle authority if the requirements are unclear.
Consider a driver leaving a trail after sunset and joining a public road. The bar that helped reveal rocks and ruts off-road could dazzle an oncoming driver if left on. Switch it off around other road users and use the vehicle’s road-approved lighting as required.
Also think about how the light behaves around other people on the trail. Aim it to illuminate the route rather than another driver’s windshield, and use a cover where regulations or the manufacturer’s guidance call for one. Off-road usefulness does not equal road approval; keep those two questions separate.
Make a short checklist before you buy
You can narrow your options quickly by matching the light to your route, vehicle, and local rules before comparing brands. Start with where you drive most, then check whether the beam, physical size, mounting position, measured performance, and electrical requirements fit that use.
For example, a compact bumper bar on a small 4×4 may suit a narrow wooded trail better than a long roof bar that creates extra wind noise. A driver crossing open ground at night may value a more distant beam, while someone crawling around rocks needs to see close obstacles and the edges of the route.
- Route: Is your regular terrain open, tight, dusty, wet, or a mix?
- Beam: Do you need reach, nearby width, or both?
- Space: Does the bar fit the chosen mount without blocking other equipment?
- Evidence: Does the seller explain measured output and beam performance?
- Durability: Are the housing, seals, connectors, and brackets suitable for your conditions?
- Electrical fit: Can you meet the specified voltage and wiring requirements?
- Rules: Do local laws allow the bar’s installation and use?
This checklist keeps a tempting discount or outsized lumen claim from making the decision for you. A well-matched bar is easier to use, easier to aim, and less likely to create glare or installation headaches.
Frequently Asked Questions
Are off-road LED light bars legal on public roads?
It depends on local rules, the light’s approval, mounting, aiming, and how you use it. Many bars are intended for off-road use only, so check the relevant local regulations and switch the bar off around other road users.
Should I choose a spot, flood, or combo beam?
Choose spot for distance, flood for nearby width, and combo for a blend of both. The best pattern depends on your terrain: open ground favors reach, while tight trails often call for more light around the vehicle.
How many lumens do I need?
There is no single lumen target that suits every vehicle or route. Beam shape, measured output, placement, and weather all affect what you can see; compare complete performance details instead of relying on a raw lumen claim.
Are LED light bars waterproof?
Some bars carry water- and dust-protection ratings based on specified tests. Check the rating and the manufacturer’s instructions, but don’t treat it as a guarantee against every immersion, pressure wash, impact, or damaged seal.
Can I install an LED light bar myself?
Many owners can install one by following the product instructions and using wiring, connectors, a fuse, and switching suited to the load. If you’re unsure about the vehicle’s electrical system or the installation steps, ask a qualified automotive professional.
Why does my light bar create glare in dust or fog?
Light scatters off particles in dust, fog, rain, or snow, and some can bounce back toward you. A lower, narrower, or less intense beam may work better in those conditions; try a safe adjustment and avoid using the bar around other drivers.
Conclusion
Choose the bar that helps you read your actual trail—not the one with the flashiest lumen claim. Match its beam to your terrain, check mounting and wiring carefully, and learn the local rules before you use it.
The best light is the one that shows you the next obstacle without turning dust into a white wall or another driver’s windshield into a spotlight.
Fall Picks
fall essentials
As an affiliate, we earn on qualifying purchases.