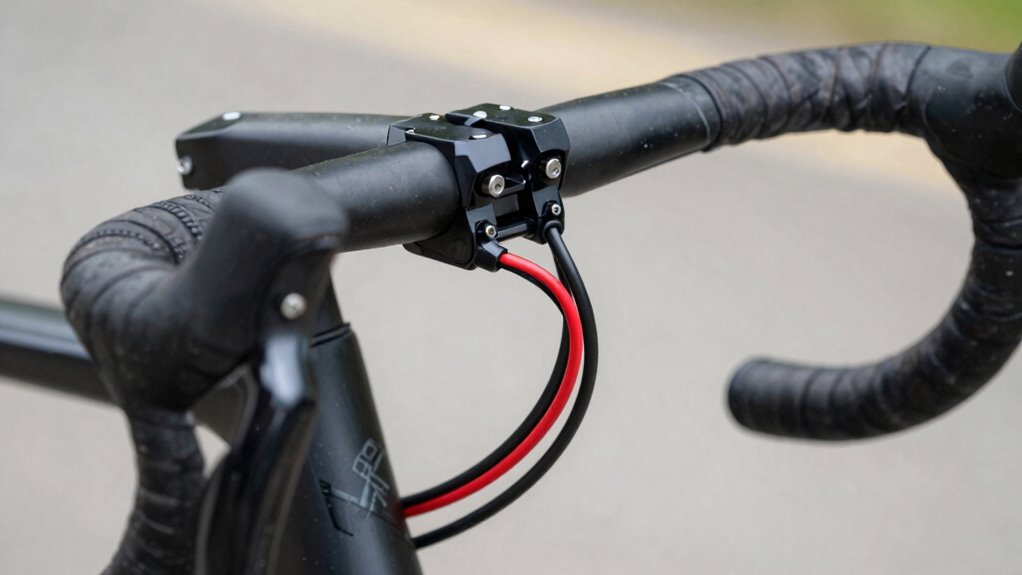
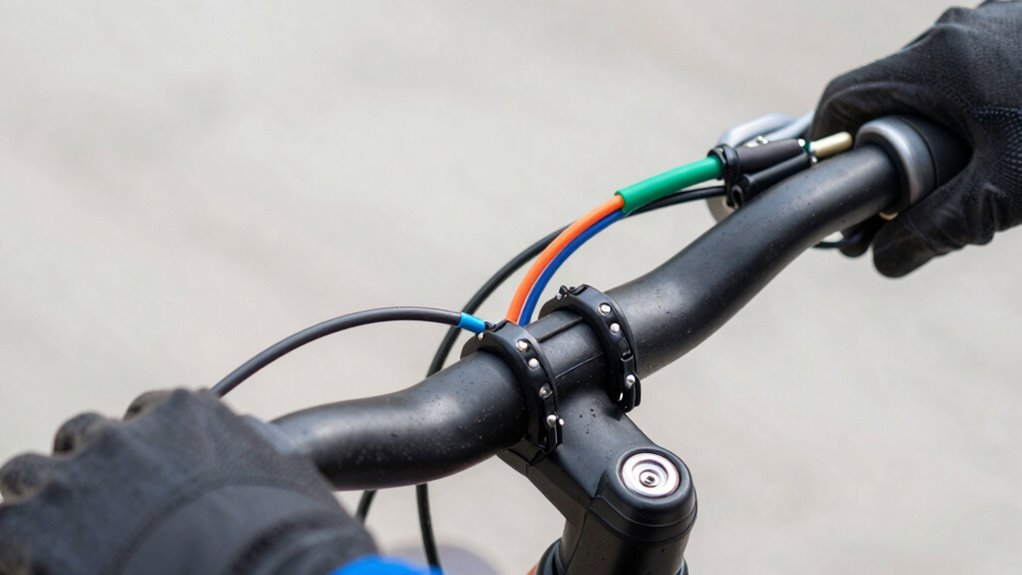
To route wires on handlebars without pinching them, start by planning the cable path along the frame or inside existing grooves. Use cable ties or clips to secure the wires neatly, avoiding tight bends or sharp angles that could damage them. Keep the wires close to the frame and away from moving parts or sharp edges. Properly secured and organized cables will last longer and ensure safety—further tips can help you perfect this process.
Key Takeaways
- Thread wires close to the frame and inside handlebar grooves to minimize slack and prevent pinching.
- Use cable ties or clips at regular intervals to secure wires firmly along the handlebar.
- Avoid sharp bends by routing wires with gentle curves, not tight angles, to prevent internal damage.
- Keep wires away from moving parts and sharp edges to reduce the risk of pinching or abrasion.
- Regularly inspect and adjust wire routing to ensure they remain secure and free from pinching over time.

YERGOFE 20Pcs Bike Cable Clips, 360° Rotating S-Hook Housing Guides for MTB Road Bicycle, Anti-Drop S Clips for Ebike Cable Management, Fits 4mm/5mm Brake Derailleur Shift Lines (Black10+Red10)
- 360° Rotating S-Hook: Adjusts with handlebar movement for smooth rides
- Optimized for Ebike Wiring: Organizes complex brake and electronic cables
- Universal Fit for 4mm/5mm Housings: Secures cables on MTB, road, and folding bikes
As an affiliate, we earn on qualifying purchases.
As an affiliate, we earn on qualifying purchases.
Why Proper Handlebar Wiring Prevents Damage and Safety Risks

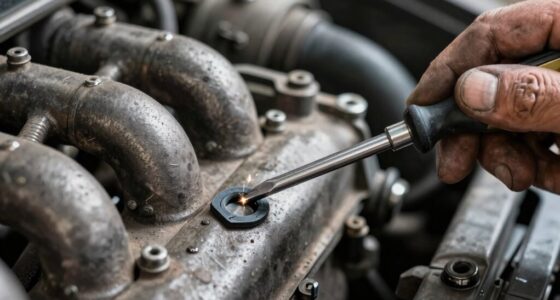
Proper handlebar wiring is essential because it directly impacts both the durability of your motorcycle and your safety. Using the correct wire gauge guarantees your wires can handle the current without overheating or breaking, reducing the risk of electrical failures. Thin wires may save space but can cause shorts or fires if they can’t handle the load, while thicker wires add unnecessary bulk. Color coding is equally important; it helps you quickly identify circuits and prevents accidental wiring mistakes that could cause malfunctions or hazards. Correct gauge and clear color coding make maintenance easier and safer, preventing damage to your motorcycle’s electrical system. In the long run, maintaining proper wiring standards protects both your bike and yourself from costly repairs or accidents. Innovative European Cloud Servers for Sustainable and Secure Solutions Additionally, understanding smart home automation concepts can inspire safer and more efficient wiring practices for complex setups.
Preparing Your Wires and Handlebar Setup for Routing
Before you start routing your wires along the handlebars, it’s important to prepare both your cables and the setup to guarantee a smooth process. Check your wire gauge to make certain it matches the handlebar components and offers enough flexibility for routing. Use the appropriate connector types for seamless connections and to prevent future issues. Organize your wires neatly, removing any tangles or excess slack that could cause pinching or interference. Label the wires if needed, so you know their functions later. Secure loose ends and verify that all connectors are compatible with your setup. Additionally, considering the input lag is crucial for responsive performance during rides. Ensuring proper cable management helps prevent damage and maintains a clean appearance. Incorporating professional services can also ensure that your wiring is done safely and efficiently. Proper planning and understanding of pool wiring principles can greatly facilitate a successful installation. Being aware of digital asset management strategies can also help in organizing your electronic components effectively. By preparing your cables and handlebar setup carefully, you’ll make the routing process easier and reduce the risk of damaging your wires during installation.
How to Route Handlebar Wires Without Pinching or Damaging Them

To route handlebar wires without pinching or damaging them, start by carefully threading each cable along the handlebar, keeping it close to the frame to prevent unnecessary slack. Good wire management guarantees the cables stay secure and reduces the risk of pinching when turning or handling the handlebars. Use cable ties or clips to keep wires neatly aligned and prevent them from rubbing against sharp edges or moving parts. When concealing cables, consider routing them inside the handlebar or along existing grooves to maintain a clean look. Avoid tight bends or sharp angles, which can cause internal damage over time. Proper cable concealment not only improves aesthetics but also protects your wires from accidental damage, ensuring reliable performance and easier future adjustments. Incorporating proper wire routing techniques can further enhance cable longevity and safety during use, especially when considering cable flexibility to accommodate movement without stressing the wires. Additionally, paying attention to cable management best practices helps in maintaining a neat and safe setup that lasts longer. Ensuring that cables are securely fastened throughout their route prevents any accidental disconnections or wear from movement.
Securing and Protecting Wires for Long-Term Durability
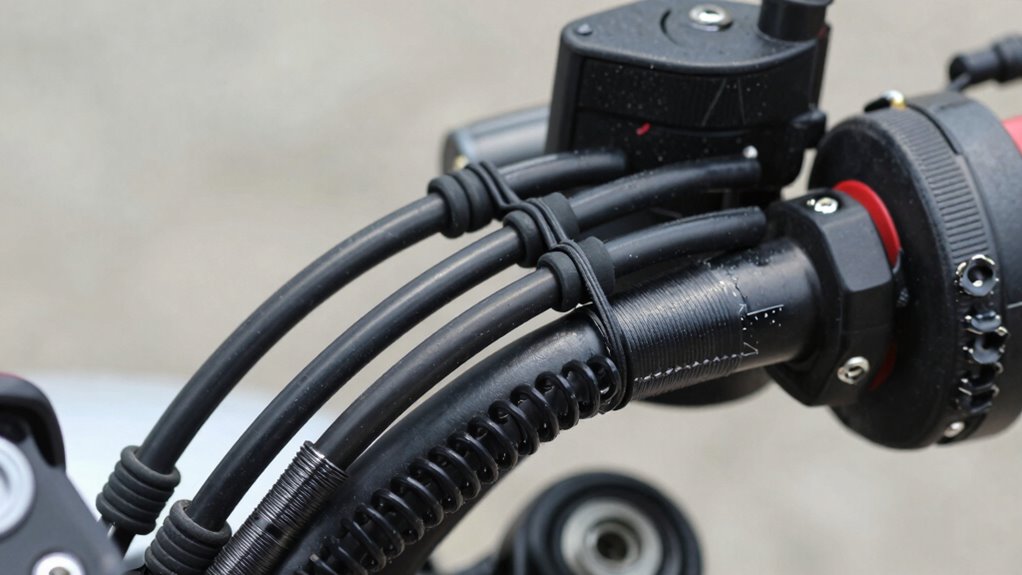
Once you’ve routed your handlebar wires neatly, securing and protecting them guarantees they stay in place and last over time. Effective wire management prevents movement that can cause wear or damage, while proper cable protection shields wires from environmental elements like moisture and dirt. To achieve this, consider using high-quality zip ties or Velcro straps to firmly secure wires along the handlebar. Additionally, apply protective sleeves or spiral wrap around exposed cable sections for extra durability. Keep wires away from sharp edges and moving parts to avoid abrasion. Regularly inspect your wiring for signs of wear or looseness. Properly secured and protected wires ensure reliable performance and extend their lifespan, maintaining a clean and professional look for your handlebar setup. Understanding wire durability helps in choosing the best protective measures for long-term use. Incorporating material quality considerations when selecting protective gear can also significantly enhance the longevity of your wiring. Using cable routing techniques can further prevent unnecessary strain on the wires, ensuring they remain intact over time. Additionally, choosing the right clamp types can help distribute pressure evenly and reduce stress on the cables.
Troubleshooting Common Handlebar Wiring Problems
Handling wiring issues on your handlebars can be frustrating, but most problems stem from simple causes like loose connections, damaged cables, or improper routing. First, check your wire gauge; using the correct gauge guarantees flexibility and durability, preventing pinching or breakage. Next, inspect connector types—make sure they fit securely and are free of corrosion or dirt. Loose connectors can cause intermittent signals or power loss, so reseat or replace them if needed. Look for damaged cables or exposed wiring, which can lead to shorts or failures. When troubleshooting, test the wiring with a multimeter to identify faults. Proper routing and secure connections are key to avoiding future issues. Additionally, consulting detailed wiring diagrams can help ensure your setup is correct and safe. Ensuring proper cable management can prevent accidental pinching or damage over time. Paying close attention to connection integrity during installation will help maintain a reliable electrical system and avoid troubleshooting headaches later. Moreover, regularly inspecting your wiring and using protective conduits can extend the lifespan of your handlebar wiring and prevent issues before they arise. Implementing best wiring practices based on industry standards can further reduce the risk of wiring failures. Addressing these common problems quickly keeps your handlebar wiring reliable and safe.
Frequently Asked Questions
What Tools Are Best for Routing Handlebar Wires?
You should use a wire loom or cable conduit to keep your handlebar wires protected and neatly managed. A wire stripper helps prepare the cables for routing, while zip ties or velcro straps secure the wires in place, ensuring proper wire management. For cable concealment, consider using a handlebar cover or clip-on cable guides. These tools help prevent pinching, reduce clutter, and give your bike a clean, professional look.
How Can I Customize Wire Lengths for a Neat Setup?
To achieve a tidy handlebar setup, you’ll want to carefully customize wire lengths, avoiding excess slack that can clutter your space. Use precise cutting tools, then secure wires with cable protectors and zip ties for ideal wire management. This approach not only keeps your wires looking neat but also safeguards them from damage, ensuring a smooth ride. Remember, a well-managed cable setup enhances both safety and style.
Are There Specific Wire Types Recommended for Handlebars?
You should choose wires with durable insulation that resists wear and tear, ensuring safety and longevity. For handlebars, a wire gauge of 16 or 18 usually works well, providing flexibility without sacrificing strength. Opt for wires specifically designed for handlebar routing, which often have smooth insulation to prevent pinching. By selecting the right wire gauge and insulation type, you’ll achieve a neat, secure setup that’s easy to manage and maintain.
How Do I Troubleshoot if My Handlebars Feel Stiff After Wiring?
You should first check if the wire insulation is too thick or if the cable connectors are pinching the wires, causing stiffness. Investigate whether the wires are routed too tightly or if there’s unnecessary friction. Loosen any tight bends and ensure cables have enough slack. Properly inspecting and adjusting the wiring can restore smooth handlebar movement, preventing stiffness caused by pinched or improperly installed wires.
Can I Upgrade Handlebar Wiring Without Removing the Handlebars?
Yes, you can upgrade handlebar wiring without removing the handlebars. Start by carefully loosening cable management clips and using a wire puller if needed. Keep an eye on the wire insulation to avoid damage, and gently guide the new wiring through existing routes. This approach minimizes hassle and helps maintain a clean, organized look, ensuring your handlebars stay comfortable and functional without the need for full removal.
Conclusion
By paying close attention to how you route your handlebar wires, you gently steer clear of potential issues before they arise. With a little care and patience, you can guarantee your wires stay safe and secure, letting you enjoy smooth rides without unexpected surprises. Think of it as giving your bike a subtle hug—protecting its essential connections so they can serve you reliably, mile after mile. Keep this in mind, and your setup will thank you.