
Ensuring you tighten your pannier rack bolts to the correct torque is key to preventing trail failures. Over-tightening can crack or deform your bike frame, especially with carbon or aluminum, while under-tightening risks the rack coming loose during rides. Using a torque wrench and following manufacturer specs helps maintain safe, even tension. Properly torqued bolts keep your rack secure and your ride smooth. Keep these tips in mind, and you’ll be ready to avoid common mistakes that compromise safety and gear longevity.
Key Takeaways
- Over-tightening bolts can crack or deform the bike frame, especially with carbon or aluminum materials.
- Under-tightening causes pannier racks to loosen or detach during rides, risking trail failure.
- Using incorrect torque settings leads to uneven pressure distribution, damaging mounting points or racks.
- Failing to follow manufacturer torque specifications increases stress on bolts, resulting in potential breakage.
- Regularly checking and maintaining proper bolt tension prevents loosening and ensures riding safety.

Nilight 12 Inch 72W Spot Flood Combo Led Light Bar 2Pcs 4Inch 18W Flood LED Pods Fog Lights Off Road with Wiring Harness Kit-3 Leads for Van Camper Car Pickup Golf Cart ATV UTV SUV Truck Boat 4x4
BRIGHTER BEYOND EXPECTATION: High-quality LED chips, super bright and powerful white light to let you see the forward...
As an affiliate, we earn on qualifying purchases.
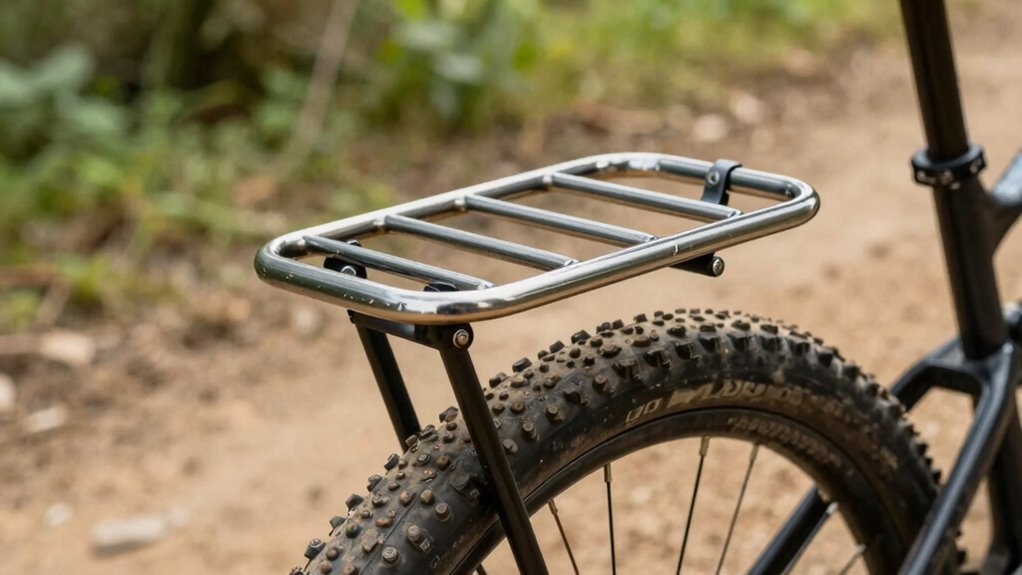
Why Proper Bolt Torque Keeps Your Pannier Rack Safe

Proper bolt torque is essential for keeping your pannier rack secure and safe. When you tighten bolts correctly, you ensure compatibility with your bike frame, preventing damage or misalignment. Over-tightening can crack or deform the frame, while under-tightening risks the rack coming loose. The right torque helps maintain the rack’s weight capacity, so it can handle your gear without failure. Different bike frames require specific torque settings to avoid stress points that could cause failure during rides. Using a torque wrench ensures you apply the correct pressure, protecting both your bike and gear. Proper torque not only keeps your pannier rack stable but also prolongs its lifespan and enhances safety on every ride. Additionally, utilizing energy-efficient tools like torque wrenches aligns with sustainable practices, reducing waste and preventing damage caused by improper tightening.
Nilight LED Light Bar Set, 12 Inch 300W Triple Row Spot Flood Combo Work Driving Lamp, 2 Pcs 4 inch 60 W with Wiring Harness for Off road ATV Boat Lighting, Year Warranty
High Waterproof Performance: This triple row led light bars feature IP67 waterproof rate dust-proof quake-proof anti-explosion Durable to...
As an affiliate, we earn on qualifying purchases.
How to Find the Right Torque Settings for Your Rack
Finding the correct torque settings for your pannier rack starts with checking your bike’s manufacturer specifications. These specs often vary based on your bike frame materials, such as aluminum, carbon, or steel, which influence recommended torque values. Additionally, consider your rack’s mounting style—whether it’s bolt-on or quick-release—as each requires different torque levels to ensure stability without damage. Consult the user manual or contact the manufacturer directly for specific torque numbers. Proper torque guarantees your rack stays secure without risking frame damage or bolt stripping. Always verify these settings before installation to prevent over-tightening or under-tightening, which can lead to trail failures. Understanding torque specifications and how they relate to your bike’s build is key to finding the right torque that keeps your gear safe and your ride smooth. Recognizing correct torque levels can help prevent common installation mistakes and prolong the life of your components. Applying the correct torque also helps avoid damaging delicate parts such as the body jewelry materials, which can be compromised by excessive force. Following proper torque procedures is crucial for preventing damage and maintaining your bike’s integrity.
Nilight ZH408 52Inch 783W Curved Triple Row Flood Spot Combo Beam Led Bar 78000LM Driving Lights with 12AWG Heavy Duty 12V 5Pin Rocker Switch Wiring Harness Kit-1 Lead,waterproof
SUPER BRIGHTNESS: Combo beam with triple row and nest reflector cup design in the middle for extreme light...
As an affiliate, we earn on qualifying purchases.
Tools Needed to Tighten Your Rack Bolts Correctly

To tighten your rack bolts correctly, you’ll need the right tools on hand. Proper mounting techniques depend on using tools suited for your rack materials and bolt sizes. First, grab a torque wrench to apply precise force, preventing over-tightening. Second, have a socket set with various sizes to fit different bolt heads snugly. Third, keep a hex key or Allen wrench ready if your rack uses Allen bolts, ensuring secure fitting. Fourth, a screwdriver may be necessary for certain mounting brackets. Using these tools ensures you don’t strip bolts or damage delicate rack materials. Accurate torque application with the right tools maintains mounting integrity, avoiding trail failures caused by loose or overtightened bolts. Proper tools simplify achieving adequate mounting techniques every time.

NAOEVO 12 Inch LED Light Bar and 4PCS 4 Inch LED Pod Lights, 54000LM LED Fog/Driving/Off Road Lights, Triple Row Spot Flood Combo LED Light Bar for Truck Car UTV ATV Boat, 1 Year Warranty
[Ultra Bright LED Lights for Car] - 12INCH LED light bar and 4 PCS 4INCH cube LED pod...
As an affiliate, we earn on qualifying purchases.
Step-by-Step: How to Tighten Your Pannier Rack Bolts

Start by gathering all the necessary tools to guarantee you can tighten the bolts correctly. Next, follow the specified torque settings to avoid over- or under-tightening. It’s also helpful to use a torque wrench to ensure precise tightening according to the recommended specifications. Proper application of tightening techniques can prevent common mistakes that lead to trail failures. Finally, check the tightness thoroughly to confirm your pannier rack is secure and properly installed.
Gather Necessary Tools
Before you begin tightening your pannier rack bolts, gather the necessary tools to guarantee a smooth process. Having the right bike accessories makes trail maintenance easier and prevents mistakes. First, grab a torque wrench to ensure proper tightness. Second, find a set of Allen wrenches or hex keys suited to your rack bolts. Third, pick up a screwdriver if your rack uses screws that require one. Fourth, have a clean cloth or rag on hand to wipe away dirt and debris. These tools will help you tighten bolts accurately and avoid over-tightening, which can cause trail failures. Additionally, understanding bolt torque is essential for securing your rack without causing damage, so always use a torque wrench for precise measurement. Proper application of torque ensures the rack is secure without risking damage to your bike frame or equipment. Using the correct torque values helps prevent damage to components and extends the lifespan of your gear. It’s also helpful to familiarize yourself with manufacturers’ torque specifications to ensure proper tightening. Making sure you have everything at your fingertips streamlines the process and helps prevent damage, keeping your bike ready for the trail and your rack secure for carrying gear.
Follow Torque Specifications
Once you’ve gathered your tools, focus on following the manufacturer’s torque specifications for your pannier rack bolts. Check the recommended torque values carefully, as they vary depending on the bolt pattern and rack material. For lightweight carbon racks, use lower torque settings to avoid damage, while aluminum or steel racks may require slightly more. Use a torque wrench to apply the correct amount of force, ensuring even tightening across all bolts. Follow a crisscross pattern if specified, tightening each bolt gradually to distribute pressure evenly. Never guess or tighten bolts beyond the recommended torque, as over-tightening can strip threads or crack the rack material. Precision during this step helps prevent trail failures caused by loose or damaged bolts.
Check Tightness Properly
To guarantee your pannier rack stays secure during rides, you need to check the tightness of the bolts properly. Start by examining the bolt patterns, ensuring all bolts are evenly spaced and aligned with the rack materials. Next, follow these steps:
- Use a torque wrench set to the manufacturer’s recommended specification.
- Tighten bolts in a crisscross pattern to distribute pressure evenly.
- Apply steady, consistent force to avoid over-tightening.
- Double-check each bolt after initial tightening to confirm none loosened. Additionally, understanding the materials used in your rack can influence the appropriate torque settings and handling techniques. Recognizing material properties is essential for selecting the correct torque and preventing damage. Properly handling different rack materials can help prevent damage caused by improper torque application. Paying attention to different rack materials, as some require gentler handling to prevent damage, is crucial for maintaining overall durability. Properly checking tightness ensures your rack remains secure, preventing trail failures caused by loose bolts. Using the correct tools and techniques, such as a torque wrench, is fundamental to applying the right amount of force and avoiding damage. Moreover, knowing how material expansion responds to temperature changes can help avoid over-tightening in varying conditions.
How to Spot Loose or Over-Tightened Bolts

How can you tell if your pannier rack bolts are loose or over-tightened? Start with a thorough bolt inspection. If bolts feel wobbly or move easily, they’re likely loose. Over-tightened bolts might feel overly stiff or cause the rack to bend slightly. To confirm, use a torque wrench to check each bolt’s torque adjustment against manufacturer specifications. Proper bolt tension is essential to ensure safety and durability during rides, as improper tension can lead to trail failures. Regularly inspecting and maintaining your bolts can prevent issues caused by improper bolt tension, which is especially important when riding in rugged terrains. Additionally, understanding the importance of bolt torque and how it impacts the overall integrity of your bike components can help you better assess the stresses on your pannier rack during different riding environments. Keeping an eye on these factors can help prevent stress-related damage and prolong your rack’s lifespan.
Risks of Improper Torque During Installation

When you improperly torque pannier rack bolts during installation, you risk compromising the entire setup. Incorrect torque can cause damage depending on your bike frame materials, whether aluminum, carbon, or steel. It can also affect different pannier rack styles, from lightweight racks to heavy-duty carriers. Misapplied torque may lead to:
Improper torque during installation risks damaging your bike and compromising your rack’s security.
- Cracked or bent bike frames, especially with fragile materials like carbon
- Worn or stripped bolt threads, making future adjustments impossible
- Loosened racks that wobble or detach unexpectedly
- Increased stress on mounting points, risking failure during rides
Applying too much or too little torque weakens the connection, leading to trail failures and potential accidents. Proper torque guarantees your rack stays secure, regardless of your bike’s design or material.
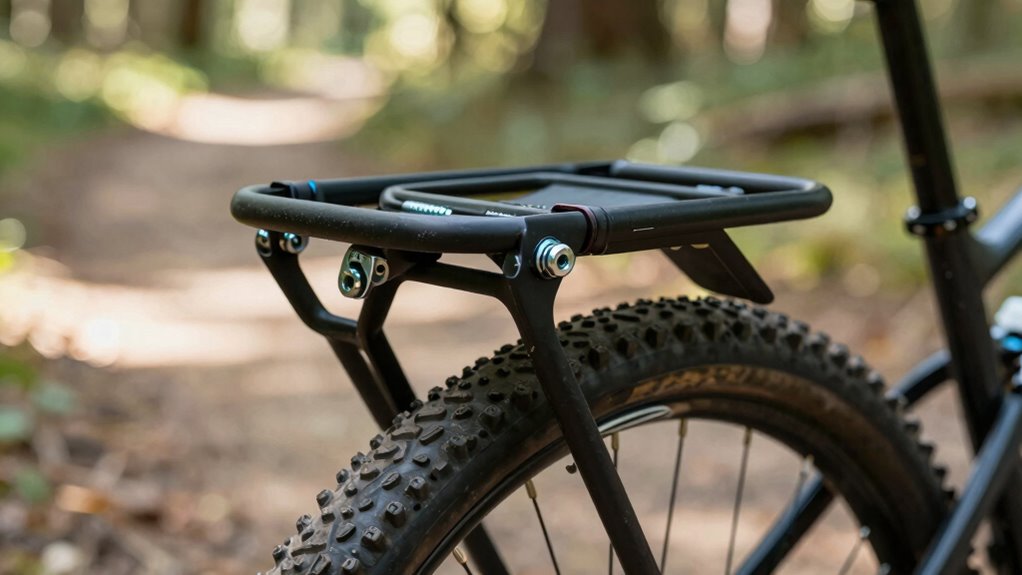
Tips for Maintaining Your Rack’s Tightness Over Time

Maintaining your pannier rack’s tightness over time is essential to guarantee it stays secure during rides. Regular bike maintenance helps prevent loose bolts that can lead to trail failures or accidents. Check your rack’s mounting points before each ride, ensuring all bolts are tight but not over-tightened. Use a torque wrench periodically to verify correct bolt tension, especially after rough trails or long rides. Keep the bolts clean and free of dirt or corrosion, which can weaken their grip. Applying a small amount of grease on bolts helps prevent seizing and makes future adjustments easier. Sustaining proper bolt tension ensures your rack remains secure, enhancing trail safety and avoiding unexpected failures. Consistent checks and adjustments are simple steps that preserve your gear and keep your rides safe.
Troubleshooting: What to Do If Your Bolts Keep Coming Loose
If your bolts keep coming loose despite regular tightening, it’s time to identify underlying issues that may be causing the problem. First, check the mounting surfaces for dirt, grime, or damage, which can prevent proper grip. Second, consider the bolt materials—some metals are more prone to loosening under vibration, so upgrading to stainless steel or titanium might help. Third, verify if you’re using the correct torque; over-tightening can weaken the bolt, while under-tightening leaves it loose. Fourth, inspect for compatibility issues between bolts and threaded holes, ensuring threads are clean and undamaged. Addressing these factors helps create a secure fit, preventing your pannier rack from failing during rides. Properly matching bolt materials and ensuring clean mounting surfaces are key to lasting tightness.
Frequently Asked Questions
Can Weather Affect the Torque Needed for My Rack Bolts?
Yes, weather can affect the torque needed for your rack bolts. Cold temperatures cause bolt corrosion and make materials contract, requiring more torque to tighten properly. Hot weather leads to weather-related expansion, which can loosen bolts if not checked. Always guarantee bolts are properly torqued, especially after extreme weather changes, to prevent trail failures caused by loose or corroded bolts. Regular maintenance keeps your rack secure and safe.
Are There Alternative Methods to Secure Pannier Racks Besides Torque?
When it comes to securing your pannier rack, don’t put all your eggs in one basket. Besides torque, consider clamp mounting for a snug fit, especially on irregular frames. Adhesive solutions like strong, bike-specific glue can add an extra layer of security, preventing slippage. Combining these methods gives you peace of mind and keeps your gear safe without relying solely on bolt torque.
How Often Should I Check the Torque on My Pannier Rack Bolts?
You should check the torque on your pannier rack bolts every few rides or monthly, especially after long or rough trips. Regular bolt maintenance helps prevent loosening that can cause trail failures. Always verify your rack is compatible with your bike and avoid over-tightening, which can damage components. Consistent inspections keep your gear secure, ensuring safe, reliable rides while maintaining proper rack compatibility and avoiding unnecessary repairs.
Do Different Rack Materials Require Different Torque Settings?
Yes, different rack materials do require different torque specifications. For example, aluminum racks need less torque to avoid cracking, while steel racks can handle higher torque without damage. Always check the manufacturer’s recommended torque specifications for your specific rack material to guarantee secure mounting and prevent trail failures. Using the correct torque helps maintain rack integrity and safety, so don’t guess—verify the proper settings for your gear.
What Are Signs of Damage Caused by Over-Tightening Rack Bolts?
If you’ve over-tightened your rack bolts, you might notice bolt deformation or cracked mounts. These signs indicate excessive force, which weakens the mounting points and can lead to failure during a ride. You may also see visible stress marks or hear creaking sounds. To prevent this, always torque bolts to the manufacturer’s specifications, and avoid the temptation to tighten bolts beyond recommended levels, ensuring your rack stays secure and safe.
Conclusion
Remember, proper torque keeps your pannier rack secure, your rides smooth, and your gear safe. Check your bolts regularly, tighten them to the right specs, and avoid the pitfalls of over- or under-tightening. Stay vigilant, maintain consistent torque, and troubleshoot early. By doing so, you’ll prevent trail failures, prolong your rack’s life, and enjoy confident cycling adventures every time you hit the trail. Keep these tips in mind, and ride worry-free.