This guide provides clear instructions for installing common off-road vehicle accessories such as roof racks, skid plates, winches, and lights. It is designed for vehicle owners with basic mechanical skills who want to enhance their off-road vehicle’s capabilities. Completing these installations correctly improves safety, durability, and functionality during off-road adventures. Follow each step carefully to ensure proper fit and operation.

2PCS Adjustable Shovel Holder Mounts for Roof Racks and Off-road Vehicles
- ✔ Material: Thermoplastic rubber
- ✔ Size Range: 1-1.5 inches (25-38 mm)
- ✔ Quantity: 2 pieces

Badass Moto Jeep Fire Extinguisher Mount – Offroad Roll Bar Holder for Jeep Wrangler, Gladiator, Bronco, and More
- ✔ Material: Polyester oxford fabric
- ✔ Fits Fire Extinguisher Size: Standard 2.5 lb
- ✔ Compatibility: Jeep Wrangler, Gladiator, Bronco

Nilight 2 Pack 3/4" D-Ring Shackle 4.75 Ton Capacity with 7/8" Pin for Off-Road Recovery
- ✔ Capacity: 4.75 Ton (9500 lbs)
- ✔ Pin Size: 7/8"
- ✔ Material: Powder coated steel
Difficulty: Intermediate | Time: 2-4 hours
What You’ll Need
Tools & Materials:
- Socket set and ratchet
- Wrenches (various sizes)
- Screwdrivers (flat and Phillips)
- Drill with drill bits
- Measuring tape
- Torque wrench
- Rubber mallet
Knowledge:
- Basic mechanical skills
- Vehicle safety procedures
- Understanding of accessory-specific installation instructions
Review each accessory’s specific instructions before starting. Wear safety gear, including gloves and eye protection. Ensure the vehicle is on a flat surface and parked securely with the parking brake engaged.

2PCS Shovel Holder,Adjustable Shovel Mount for Roof Rack from 1"-1.5" in Diameter Tools & Equipment,Universal Quick Release Clamp Kit for Off-road Vehicles UTVs ATVs
🔩 Superior Rubber Material: This quick release clamp is made of superior thermoplastic rubber material, which is strong...
As an affiliate, we earn on qualifying purchases.
2PCS Adjustable Shovel Holder Mounts for Roof Racks and Off-road Vehicles
This set of adjustable rubber clamp mounts excels at securely holding shovels and other tools with diameters ranging from 1 to 1.5 inches. Unlike fixed mounts, their adjustability makes them compatible with various tools and vehicle types, including trailers and boats. Compared with other mounts that might require permanent installation, these are designed for quick release and flexible positioning, making them suitable for users who need adaptable storage solutions. The main tradeoff is the need for drilling into your vehicle or rack, which could be a concern for those hesitant about permanent modifications. Their durability and load capacity make them a reliable choice for off-road tool storage, but size compatibility must be checked carefully before purchase.
Pros:
- Durable thermoplastic rubber construction
- Adjustable size for multiple tools
- Easy to install with quick release
- Suitable for various environments and vehicles
Cons:
- Requires drilling for installation
- Size must be verified for compatibility
Best for: Off-road enthusiasts who want flexible, secure tool storage without sacrificing versatility
Not ideal for: Casual users preferring no drilling or those with tools outside the specified size range
Bottom line: A flexible, durable choice for off-road tool storage, best suited for users comfortable with installation effort.
“A flexible, durable choice for off-road tool storage, best suited for users comfortable with installation effort.”

Badass Moto for Jeep Fire Extinguisher Mount. Offroad Roll Bar Extinguisher Holder. Off Road Vehicle Accessories Wrangler Camping Kit Gear. Fits 1965-2025 Jeep JL JK JKU TJ CJ JL Bronco and Gladiator
SECURE YOUR FIRE EXTINGUISHER: No more fire extinguisher rolling around under seats! Our Badass Moto fire extinguisher mount...
As an affiliate, we earn on qualifying purchases.
Badass Moto Jeep Fire Extinguisher Mount – Offroad Roll Bar Holder for Jeep Wrangler, Gladiator, Bronco, and More
This fire extinguisher mount is specifically designed for roll bars, making it an excellent safety addition for Jeep and similar off-road vehicles. Its tool-free installation and adjustable straps ensure quick setup without any drilling, which is ideal for owners who want a hassle-free upgrade. Made from weather-resistant materials, it stands up well against the elements, ensuring your extinguisher remains accessible and in place during muddy, wet, or sunny conditions. However, its compatibility is limited to standard 2.5 lb extinguishers and vehicles with roll bars—if your setup differs, this mount may not fit. Its focus on safety makes it a smart choice for serious off-roaders prioritizing quick access during emergencies.
Pros:
- Securely holds 2.5 lb fire extinguishers
- No tools or drilling required
- Weather and UV resistant for durability
- Adjustable straps for a customizable fit
Cons:
- Limited to 2.5 lb extinguishers
- Designed specifically for roll bars
Best for: Jeep owners and off-road adventurers seeking a reliable, easy-to-install safety accessory
Not ideal for: Users with non-standard extinguisher sizes or vehicles without roll cages
Bottom line: A straightforward, weather-resistant safety mount ideal for Jeep and roll cage-equipped vehicles.
“A straightforward, weather-resistant safety mount ideal for Jeep and roll cage-equipped vehicles.”

Nilight 2 Pack 3/4" D-Ring Shackle 4.75 Ton (9500 Lbs) Capacity with 7/8" Pin Heavy Duty Off Road Recovery Shackle with Isolators & Washer Kit for Jeep Truck Vehicle, Red (90053B)
【 UNIVERSAL D RING SHACKLES 】 - 3/4" d-ring shackles 4.75 Ton (9,500 Lbs),with an Industry Standard 7/8"...
As an affiliate, we earn on qualifying purchases.
Nilight 2 Pack 3/4" D-Ring Shackle 4.75 Ton Capacity with 7/8" Pin for Off-Road Recovery
These heavy-duty D-ring shackles are built for demanding recovery scenarios, rated at an impressive 4.75 tons. Their corrosion-resistant powder coating ensures longevity in mud, water, and rough terrain. The inclusion of isolators and washers protects your vehicle’s finish and reduces noise during recovery operations. Compared to lighter shackles, these provide a massive towing capacity, making them suitable for larger trucks and serious trail recovery. The main consideration is their size; they’re bulkier than standard shackles, which might be a concern for smaller vehicles or storage space. These shackles are indispensable for those who plan to tackle challenging terrains or need reliable recovery gear.
Pros:
- High recovery capacity of 4.75 tons
- Corrosion-resistant powder coating
- Includes isolators and washers for vehicle protection
- Suitable for trucks, trailers, and large vehicles
Cons:
- Bulky size may be inconvenient for smaller vehicles
- Requires proper handling for safe use
Best for: Off-roaders who need robust recovery gear for trucks, jeeps, or trailers
Not ideal for: Casual trail riders or those with limited space for bulky recovery gear
Bottom line: An essential, heavy-duty recovery shackle set ideal for serious off-road recovery needs.
“An essential, heavy-duty recovery shackle set ideal for serious off-road recovery needs.”
As an Amazon Associate we earn from qualifying purchases.
Before You Start
Verify compatibility of accessories with your vehicle model. Gather all tools and parts beforehand. Clear the workspace around your vehicle to avoid accidents. If installing electrical accessories, disconnect the vehicle battery to prevent shorts.
Step-by-Step Instructions
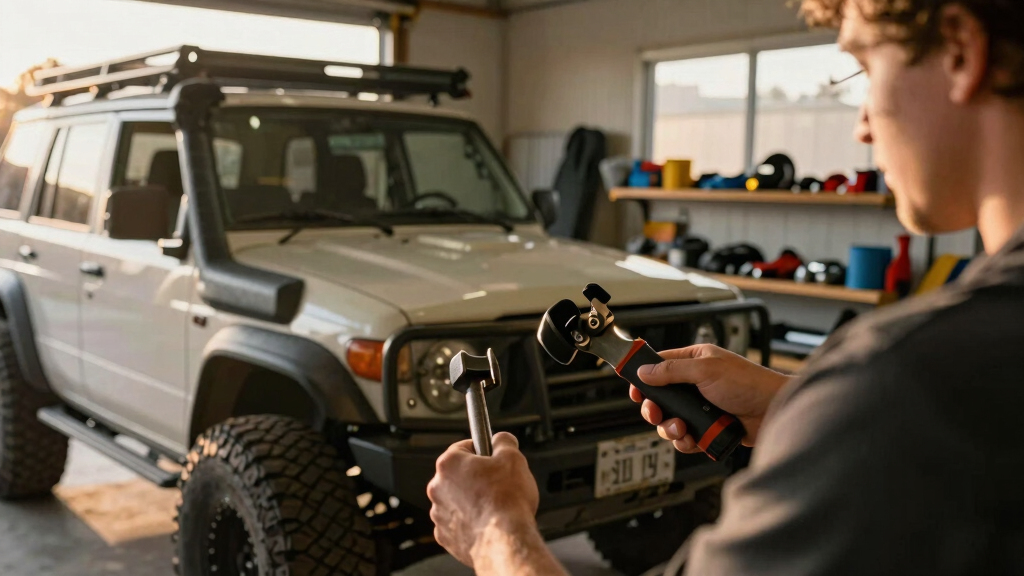
Step 1: Prepare the Vehicle
Park the vehicle on a flat, stable surface. Engage the parking brake and turn off the ignition. Disconnect the negative terminal of the battery to prevent electrical shorts during installation.
Tip: Use wheel chocks to prevent vehicle movement. Double-check that the vehicle is securely parked before proceeding.
Check: Vehicle is stable, and the battery is disconnected, preventing accidental electrical contact.
Step 2: Gather and Organize Accessories and Tools
Lay out all accessories, hardware, and tools needed for the installation. Refer to the accessory instructions to confirm all parts are present.
Tip: Arrange tools and parts in order of use to streamline the process and avoid missing components.
Check: All parts and tools are organized, and nothing is missing.
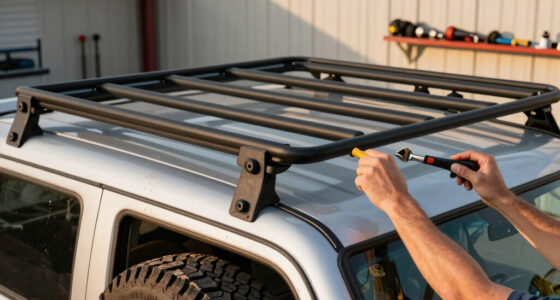
Step 3: Install the Roof Rack
Position the roof rack on top of the vehicle’s roof, aligning mounting brackets with existing roof rails or designated mounting points. Use a measuring tape to ensure even placement on both sides.
Tip: Use a helper to hold the rack in place if necessary. Check manufacturer instructions for specific alignment points.
Check: Roof rack is securely positioned, evenly aligned, and ready for fastening.
Step 4: Secure the Roof Rack
Tighten all mounting bolts and clamps according to the manufacturer’s torque specifications. Use a torque wrench for precise tightening.
Tip: Avoid over-tightening, which can damage the mounting points or rack. Refer to torque specs in the accessory manual.
Check: All bolts are tightened to specified torque, and the rack is firmly attached without wobbling.
Step 5: Install Skid Plates
Lift the skid plates into position under the vehicle’s frame or bumper area, aligning bolt holes with existing mounting points. Secure with the provided hardware.
Tip: Use a jack or lift if necessary to access underside components safely. Verify alignment before tightening all fasteners.
Check: Skid plates are snugly fitted and securely attached, providing protection as intended.
Step 6: Install Winch and Mounting Plate
Attach the winch to the mounting plate, following the manufacturer’s instructions. Mount the assembly onto the vehicle’s bumper or frame using bolts and a torque wrench.
Tip: Ensure the winch is oriented correctly and that all bolts are tightened evenly to prevent misalignment.
Check: Winch is firmly mounted, with no movement or wobbling, and ready for use.
Step 7: Install Off-Road Lights
Mount the light brackets on the vehicle’s front bumper or roof rack. Connect wiring harnesses according to the manufacturer’s wiring diagram.
Tip: Secure all wiring with zip ties to prevent damage during off-road use. Test lights before finalizing connections.
Check: Lights turn on correctly, are securely mounted, and wiring is neat and protected.
Step 8: Reconnect the Battery and Test
Reconnect the negative terminal of the vehicle’s battery. Test each installed accessory to confirm proper operation.
Tip: Check for any unusual noises or loose fittings during testing. Address any issues immediately.
Check: All accessories function correctly without interference or abnormal behavior.
Common Mistakes to Avoid
- Over-tightening bolts, causing damage to mounting points or accessories. — Use a torque wrench and follow manufacturer specifications for torque values.
- Incorrect wiring connections, leading to malfunction or electrical shorts. — Follow wiring diagrams closely, and double-check connections before powering on.
- Not securing accessories properly, resulting in loose parts during off-road use. — Tighten all fasteners to specified torque and verify stability before driving.
Troubleshooting
Problem: Accessory does not activate after installation.
Solution: Check wiring connections, fuse status, and switch operation. Rewire if necessary.
Problem: Unusual noises or vibrations during operation.
Solution: Ensure all fasteners are tight and aligned correctly. Verify no loose wiring or mounting parts.
Problem: Wiring appears damaged or frayed.
Solution: Replace damaged wiring and protect connections with protective covers or conduit.
What Success Looks Like
The accessories are securely mounted, aligned properly, and fully functional. The vehicle’s appearance is improved, and accessories operate without issues during testing. No loose parts or abnormal noises are present.
Next Steps
Periodically inspect all accessories for tightness and wear before off-road trips. Clean and maintain accessories regularly. When upgrading further, review compatibility and installation procedures. Seek professional help for complex electrical or structural modifications.
Frequently Asked Questions
How do I know if an accessory fits my vehicle?
Check the manufacturer’s specifications and compatibility list for your vehicle model before purchasing or installing accessories.
Can I install accessories myself if I have basic tools?
Yes, with careful adherence to instructions and safety precautions, most accessories can be installed by a DIY enthusiast. For complex electrical work, consider professional assistance.
How often should I inspect my accessories after installation?
Inspect accessories before each off-road trip and periodically during regular vehicle maintenance, at least every 3-6 months depending on usage.
What safety precautions should I take during installation?
Wear protective gear, work on a stable surface, disconnect the vehicle battery during electrical work, and follow all manufacturer instructions carefully.