To record clear audio on a helmet, use a wind sock to block wind noise and improve sound quality. Choose a wind sock that fits well and attach it securely over your microphone, positioning it near your mouth without contact. Regularly inspect and replace the sock when needed. Proper placement and maintenance make a big difference, and if you keep exploring, you’ll discover even more tips for perfect outdoor recordings.
Key Takeaways
- Properly position the microphone close to the mouth, avoiding contact, to reduce wind noise and enhance clarity.
- Use a well-fitted wind sock made of compatible material to shield the mic from wind interference.
- Secure the wind sock firmly with appropriate fasteners like elastic bands or clips to prevent slipping.
- Regularly inspect and replace worn or damaged wind socks to maintain optimal noise reduction.
- Test recordings outdoors to fine-tune microphone placement and ensure effective wind noise mitigation.

Phinus 10 Pack Lapel Microphone Windscreen, Headset Windscreen, Mic Foam Covers Lavalier Microphone Windscreen for Variety of Headset Microphone, Tough Sponge Material, Noise Reduction, Black
[🎸 CLEAN & SANITARY] – Lapel microphone windscreen can protect the microphone from dust, humidity, and human saliva,…
As an affiliate, we earn on qualifying purchases.
As an affiliate, we earn on qualifying purchases.
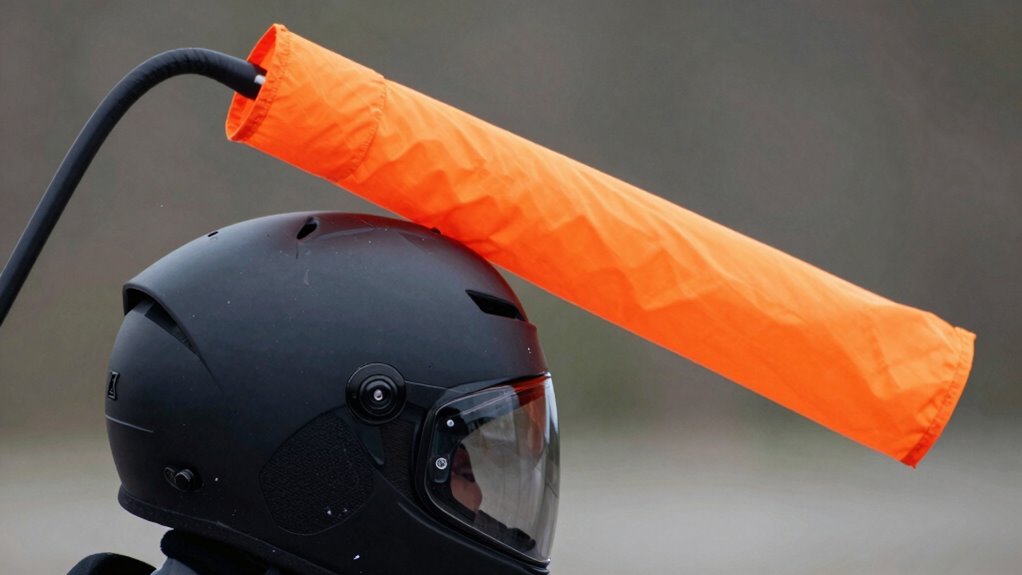
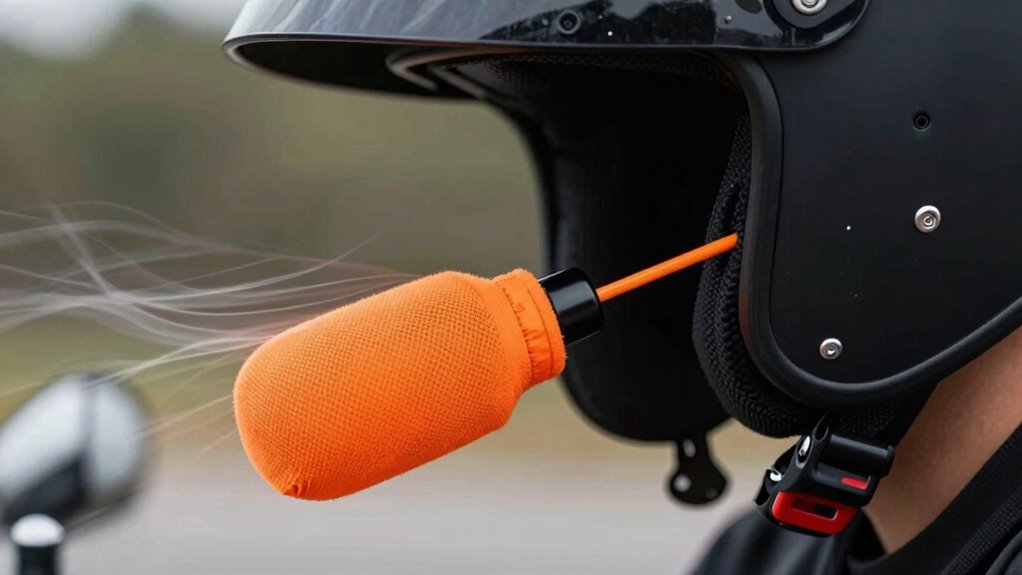
Why Wind Noise Ruins Helmet Audio: and How a Wind Sock Can Help
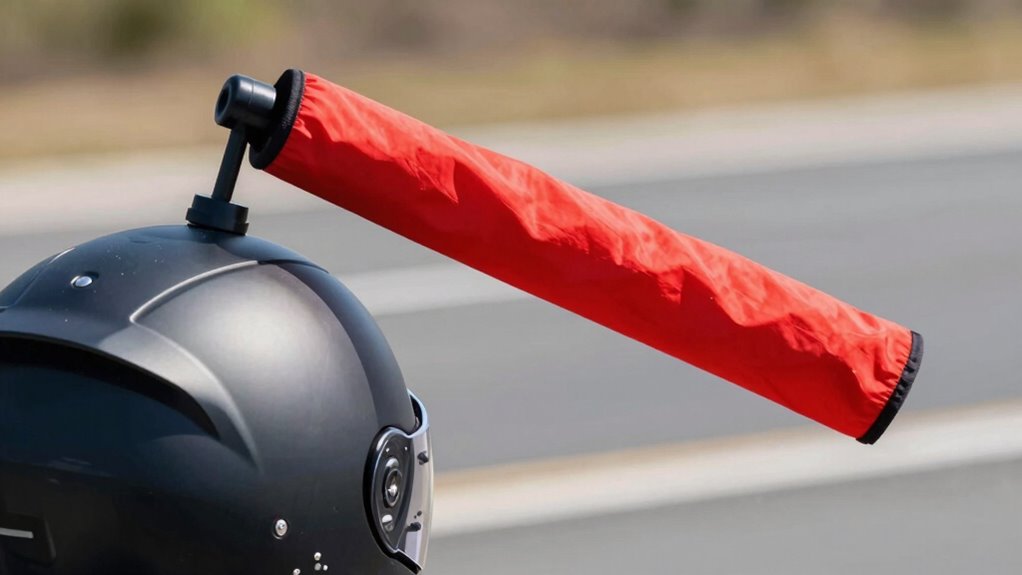
Wind noise is one of the biggest challenges when trying to record clear audio on a helmet. It can overpower your voice, making it hard to hear or understand what you’re saying. The main culprit is wind noise, which occurs when air hits the microphone directly. Microphone placement plays a vital role in minimizing this issue. If the microphone is too exposed, wind can create loud, distracting sounds. Proper placement involves positioning the mic close to your mouth and shielding it from the wind’s direct impact. This helps reduce the amount of wind noise captured. Without addressing wind noise and optimizing microphone placement, your recordings will be filled with unwanted sounds, making your audio hard to decipher. That’s where a wind sock comes into play, but we’ll discuss that next. Understanding audio systems can help you choose the best setup for your helmet. Additionally, using noise reduction techniques can further improve audio clarity by minimizing residual wind noise and environmental sounds. Incorporating Suprem fabric materials into your helmet setup can also enhance sound insulation and comfort, making your recordings clearer and more professional. Moreover, selecting appropriate microphone types designed for outdoor use can significantly improve your audio quality in windy conditions. Using wind shields can provide an extra layer of protection against wind interference, resulting in cleaner recordings.
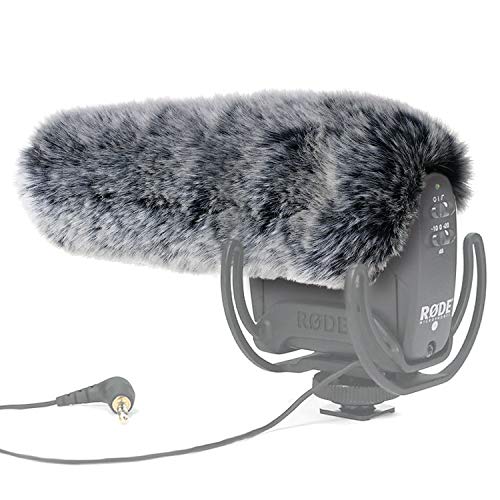
YOUSHARES Deadcat Windscreen for Rode VideoMic Pro Camera Microphone – Outdoor Wind Shield Mic Windshield Muff Fur Custom Fit for Rode VideoMic Pro Camera Mics
Professional Windscreen – Deadcat Windscreen specially is a furry wind cover designed for VideoMic Pro On-Camera Microphone as…
As an affiliate, we earn on qualifying purchases.
As an affiliate, we earn on qualifying purchases.
How to Choose the Right Wind Sock for Your Helmet Microphone
When selecting a wind sock, you need to consider material compatibility to guarantee it won’t damage or interfere with your microphone. Size and fit are also essential to make sure it stays secure without muffling your audio or causing unwanted noise. Paying attention to these points will help you choose a wind sock that effectively reduces wind noise while maintaining clear sound. Additionally, understanding microphone design can help ensure you select a wind sock that complements your specific equipment for optimal performance. For outdoor or high-heat environments, choosing a thermal behavior-resistant material can extend the lifespan of your wind sock and maintain its effectiveness. Being aware of material compatibility can further ensure your wind sock performs well without causing damage or degradation over time. Incorporating modern materials designed for durability and performance can also enhance your microphone’s protection in diverse conditions. Recognizing wind noise reduction techniques can further optimize your audio clarity in challenging outdoor environments.
Material Compatibility Tips
Choosing the right wind sock for your helmet microphone starts with ensuring material compatibility. You want a wind sock that won’t damage your microphone or interfere with sound quality. Here are four essential tips:
- Check that the material is compatible with your microphone’s coating to prevent corrosion or deterioration.
- Opt for breathable fabrics that reduce wind noise without muffling audio.
- Consider alternative mounting methods if traditional adhesives don’t suit your helmet or microphone design.
- Test different materials to see which best reduces wind noise while maintaining audio clarity.
- Additionally, selecting materials that are resistant to environmental factors like moisture and temperature changes can enhance durability and performance. Material durability is critical for consistent results during outdoor recordings. Ensuring your materials are environmentally resistant can also prevent degradation over time, maintaining sound quality longer. For outdoor use, choosing weather-resistant fabrics can significantly extend the lifespan of your wind sock and ensure reliable performance across various conditions. Incorporating materials with UV resistance can further protect your equipment from sun damage, especially during long outdoor sessions. Moreover, selecting fabrics with moisture-wicking properties can help keep your microphone dry and functional in humid or rainy environments.
Size and Fit Considerations
Selecting a wind sock that fits your helmet microphone properly is essential for effective noise reduction and clear audio. An ill-fitting sock can cause muffled sound or unwanted noise. To choose the right size, consider your helmet size and microphone fit. Measure the microphone diameter and compare it to the wind sock’s dimensions. Ensuring the proper fit is crucial for optimal performance. Additionally, a well-fitting wind sock can help minimize wind noise, leading to better audio quality during recordings. Ensure the wind sock snugly covers the microphone without slipping. A proper fit minimizes wind noise while maintaining audio clarity. Always double-check measurements to match the sock size accurately with your helmet and microphone. Achieving a secure fit not only improves audio quality but also prolongs the lifespan of your equipment. Good fit and auditory clarity are crucial for successful recordings.

Bubblebee Industries Mic Hiding Starter Kit for Lapel & Lavalier Microphones – Hiding Microphone Tape, Noise & Wind Reduction Covers for Content Creators, Videographers, Audio Engineers & Filmmakers
DISCREET MIC PLACEMENT & PRO AUDIO – Built for lapel and lavalier mics up to 8mm in diameter,…
As an affiliate, we earn on qualifying purchases.
As an affiliate, we earn on qualifying purchases.
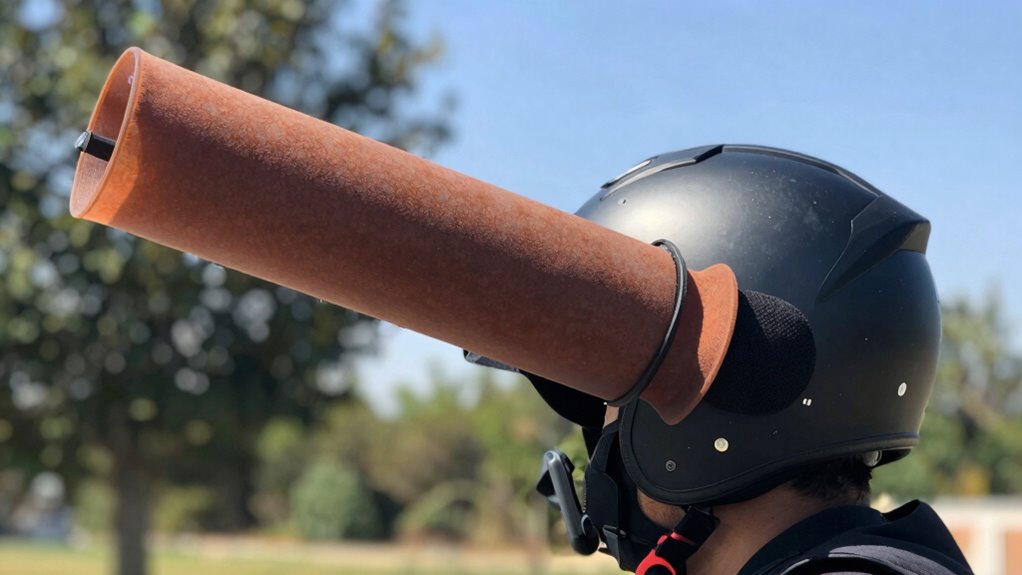
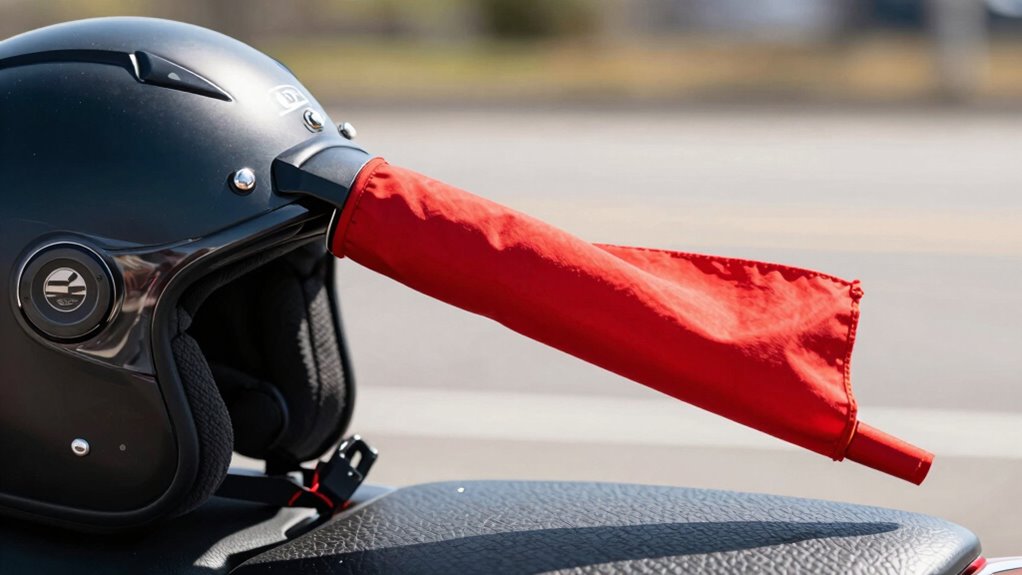
How to Attach a Wind Sock to Your Helmet Microphone
Attaching a wind sock securely to your helmet microphone is key for clear audio. Make certain you choose the right size and type so it fits snugly without slipping. Then, adjust the microphone and wind sock to guarantee ideal sound quality during your recordings. Ensuring a proper fit can also help reduce noise and improve the overall effectiveness of your equipment. Additionally, selecting appropriate accessories designed specifically for helmet microphones can enhance durability and comfort during use. Proper attachment techniques can also prevent unwanted movement that might cause sound distortion or interference. Using correct attachment methods can further improve stability and ensure consistent audio quality throughout your recording sessions. For optimal results, always verify that your setup complies with relevant safety practices and manufacturer guidelines.
Choosing the Right Wind Sock
To guarantee your helmet microphone captures clear audio, it’s essential to pick the right wind sock. The right choice reduces wind noise and ensures your recordings stay crisp. Consider these key factors:
- Material Quality: Opt for dense foam or fur for maximum wind noise reduction.
- Size & Fit: Ensure it snugly covers your helmet microphone without obstructing sound.
- Compatibility: Confirm it’s designed for helmet microphones to avoid poor fit or extra noise.
- Durability: Select a wind sock that withstands weather conditions and repeated use, so you’re always prepared.
Choosing the correct wind sock makes all the difference in capturing professional-quality audio, even in windy environments. It’s a small investment that dramatically improves your helmet microphone’s performance.
Securing the Microphone Properly
Ensuring your wind sock stays securely attached to your helmet microphone is essential for consistent audio quality. Proper microphone placement prevents unwanted noise and ensures your voice remains clear. Check helmet compatibility first—some helmets have curves or surfaces that make attachment tricky. Use a small, adjustable clip or adhesive mount designed for helmets to secure the microphone firmly. Wrap the wind sock tightly around the mic, then fasten it to the clip, ensuring it doesn’t slip during movement. Tighten all connections without constricting the mic’s position. Consider the following for secure attachment:
| Helmet Type | Microphone Placement | Securing Method |
|---|---|---|
| Full-face | Near mouth | Clip + adhesive |
| Half-helmet | Side of helmet | Velcro + elastic |
| Modular | Chin area | Mount + zip tie |
| Open-face | Cheek area | Clamp + tape |
| Sport | Top of helmet | Bracket + strap |
Adjusting for Optimal Sound
Once you’ve secured your microphone to the helmet, the next step is attaching the wind sock properly to achieve ideal sound quality. Ensuring the helmet fit is snug, and the microphone placement is just right, makes a huge difference. A well-placed wind sock reduces wind noise without muffling your voice.
To optimize sound:
- Confirm your helmet fit is comfortable and stable.
- Adjust the microphone placement close to your mouth without touching it.
- Secure the wind sock firmly over the microphone, ensuring no gaps.
- Test audio in different conditions, fine-tuning the positioning for clarity.

Half Helmet Speaker Pouch Speaker Pockets Ear Protection Pads | Professional installation of all Bluetooth Headsets and Corded Headsets | Proper Microphone Placement | Works with Narrow or Wide Straps
Enhanced Sound Experience: Our half helmet speaker pockets are expertly designed to accommodate J&M Speakers, IMC Speakers, Sena…
As an affiliate, we earn on qualifying purchases.
As an affiliate, we earn on qualifying purchases.
Installing a Wind Sock on Your Helmet: A Step-by-Step Guide
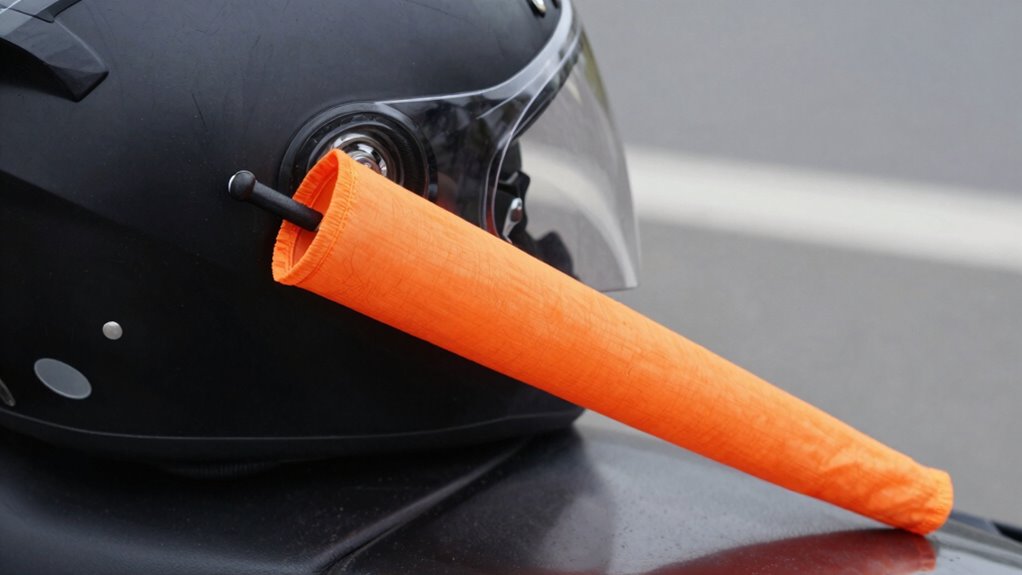
Installing a wind sock on your helmet is a straightforward way to improve audio clarity by reducing wind noise. First, choose a wind sock designed for helmet microphones, guaranteeing it fits securely without obstructing your helmet’s features. Position the wind sock over the microphone, making sure it covers the entire microphone area for maximum wind protection. Use double-sided tape or small elastic bands to keep it in place, avoiding any loose edges that could slip. Check that the microphone remains unobstructed and that the wind sock doesn’t interfere with your helmet’s fit. Once installed, test your setup by recording in windy conditions to ensure the wind noise is minimized. Proper installation enhances your helmet microphone’s performance, resulting in clearer, crisper audio.
Maintaining and Replacing Your Helmet Wind Sock

Regular maintenance of your helmet wind sock helps keep your microphone working effectively and extends its lifespan. Over time, dirt and wear can diminish its wind-reducing abilities, affecting your recordings. To guarantee ideal helmet maintenance and microphone care, check your wind sock regularly.
Here are four essential steps:
- Inspect for tears or holes—replace immediately if damaged.
- Clean gently with mild soap and water—avoid harsh chemicals.
- Keep it dry and store in a cool, dry place when not in use.
- Replace the wind sock every few months or after significant wear.
Extra Tips for Reducing Wind Noise While Recording
To effectively reduce wind noise during recordings, focus on optimizing your helmet setup and recording environment. Start by positioning your helmet microphone carefully, ensuring it’s close to your mouth and shielded from direct airflow. Use a wind sock designed for helmet microphones to further minimize wind noise, as it dampens the turbulence hitting the mic. Consider adjusting your riding position; riding behind windbreaks or in sheltered areas can considerably lessen wind impact. Secure loose straps or accessories that might flutter and create additional noise. Additionally, choose a quiet environment for recording whenever possible. These steps help your helmet microphone pick up clearer audio, reducing wind noise and ensuring your recordings are crisp and professional.
Common Mistakes to Avoid When Using a Wind Sock on Your Helmet

While wind socks are effective in reducing noise, many riders make simple mistakes that can compromise their performance. One common error is choosing a wind sock that clashes with your helmet design, making it look awkward or distracting. Second, improperly positioning the sock can block your microphone technology, resulting in muffled or distorted audio. Third, using a sock that’s too bulky may interfere with helmet fit or cause discomfort during rides. Finally, neglecting to test your setup beforehand can lead to surprises on the road, ruining your recordings. Stay attentive to how your wind sock interacts with your helmet design and microphone setup. Avoid these mistakes to ensure clear, professional audio quality without sacrificing comfort or style.
Do You Need Additional Wind Protection? Other Options to Consider
Are you wondering if a wind sock alone is enough to keep your audio clear? Sometimes, you might need extra wind protection, especially in gusty conditions. Alternative materials like foam covers or homemade wind shields can boost sound quality. Custom solutions, such as tailored foam inserts or layered fabrics, can also provide enhanced noise reduction. These options are adaptable and cost-effective, giving you more control over your setup.
| Material | Best Use |
|---|---|
| Foam Covers | Quick, disposable wind protection |
| Layered Fabrics | Customizable, reusable wind shields |
| DIY Solutions | Affordable, tailored to your helmet setup |
Troubleshooting Helmet Audio Issues After Using a Wind Sock
Using a wind sock can substantially improve audio clarity, but it can also introduce new issues if not installed or maintained properly. You might notice muffled sounds or reduced volume from your helmet microphone, frustrating your efforts to capture clear audio. To troubleshoot, consider these steps:
- Check if the wind sock is blocking the microphone’s pickup area.
- Adjust the positioning to ensure the microphone isn’t overly covered or too close to your mouth.
- Inspect for loose connections or damage in the helmet’s wiring.
- Test without the wind sock briefly to see if audio clarity improves, then modify as needed.
Taking these actions can help you regain ideal helmet microphone performance and ensure your recordings are crisp and clear.
Frequently Asked Questions
Will a Wind Sock Affect Microphone Sound Quality?
Yes, a wind sock can affect microphone sound quality, but it generally improves audio clarity by reducing wind noise. When you install a wind sock, it minimizes helmet safety risks, ensuring your microphone picks up clearer sound without interference. This simple addition helps you capture better audio during rides, making your recordings more professional. Just make sure it fits well so it doesn’t compromise your helmet safety or comfort.
Can I Use a Standard Wind Sock on Any Helmet Microphone?
You might think a standard wind sock fits any helmet microphone, but don’t be fooled. Helmet compatibility varies, and wind sock materials matter more than you’d expect. Some are too bulky or made from incompatible materials, causing muffled sound or slipping off. Always check your microphone’s specs and choose a wind sock designed for helmet use. The right fit guarantees clean audio without sacrificing comfort or performance.
How Do I Clean or Maintain My Helmet Wind Sock?
You should gently hand wash your helmet wind sock with mild soap and water, avoiding harsh chemicals that could damage the material. Make certain the wind sock is compatible with your helmet microphone, especially if your helmet is made from specialized materials. Regularly inspect the wind sock for wear or tears, replacing it when necessary to maintain ideal sound quality and guarantee it continues to fit properly on your helmet microphone.
Is It Necessary to Replace the Wind Sock Frequently?
You don’t need to replace your wind sock frequently if it maintains good wind sock durability. Check for signs of wear or damage regularly, especially around the microphone compatibility area. If it becomes torn or loses its shape, replace it to ensure peak audio quality. Proper maintenance and gentle handling extend its lifespan, keeping your microphone protected from wind noise without unnecessary replacements.
Can Wind Socks Be Used in Extreme Weather Conditions?
Did you know that 80% of wind sock failures happen in extreme weather? Yes, you can use wind socks in harsh conditions, but their durability matters. Weatherproofing wind socks enhances their resilience, making them more suitable for extreme weather. Keep in mind, though, that even the toughest wind socks can wear out faster in severe conditions, so regularly checking and replacing them guarantees consistent audio quality.
Conclusion
Using a wind sock is like giving your helmet microphone a shield against harsh winds, ensuring your audio stays clear and professional. With the right choice, proper attachment, and some extra tips, you’ll dramatically reduce wind noise and capture crisp sound. Just remember to maintain your wind sock regularly and explore additional options if needed. When you master these tricks, recording clean helmet audio becomes as easy as pie—making your rides sound just as smooth as they feel.