To properly adjust your KTM suspension without guesswork, start by setting your preload to achieve correct ride height based on rider weight and gear. Secure the spring seat and preload ring, then confirm sag matches factory specs. Next, fine-tune compression damping for terrain control and adjust rebound damping for stability. Always double-check your settings before riding. Following this precise sequence ensures consistent results—keep going for detailed steps that guarantee ideal performance.
Key Takeaways
- Always start with setting spring preload to achieve correct ride height and sag before adjusting damping.
- Verify spring seat and preload ring are properly secured to prevent movement during riding.
- Double-check sag and ride height after preload adjustments for accurate baseline setup.
- Adjust rebound damping first for stability, then tune compression for control and comfort.
- Test ride after each change, and keep notes to refine suspension settings systematically.

P1TOOLS 3/8" Drive Preload Spanner Wrench for Motorcycle Shock Adjustment
- Drive Size: 3/8 inch drive for ratchets
- Shock Adjustment: Adjusts preload and sag easily
- Durable Material: Corrosion-resistant steel construction
As an affiliate, we earn on qualifying purchases.
As an affiliate, we earn on qualifying purchases.
Why You Should Follow a Set Sequence When Tuning Your KTM Suspension
Following a set sequence when tuning your KTM suspension guarantees a systematic approach that yields predictable and ideal results. This method ensures each adjustment builds on the previous, minimizing unintended interactions between settings. Starting with preload, you establish the initial ride height, which influences compression and rebound settings. Adjusting sag first provides a baseline for how your bike responds to rider weight; neglecting this step can lead to inaccurate tuning. Once sag is set, proceed to compression damping, then rebound, ensuring each change is evaluated independently. This progression maintains consistency and reduces guesswork, allowing you to isolate the effects of each adjustment. Implementing a structured tuning process can also help you identify the optimal settings more efficiently. A proper suspension setup can significantly improve handling and comfort during rides. Adhering to this sequence enhances precision, accelerates setup time, and results in a suspension configuration optimized for your riding style and terrain. Additionally, understanding the suspension setup process can help you make more informed adjustments and achieve better overall handling. Recognizing the interaction between settings is also key to avoiding conflicting adjustments that compromise performance. Incorporating a methodical approach helps prevent over-adjusting and ensures your suspension performs reliably across different conditions.
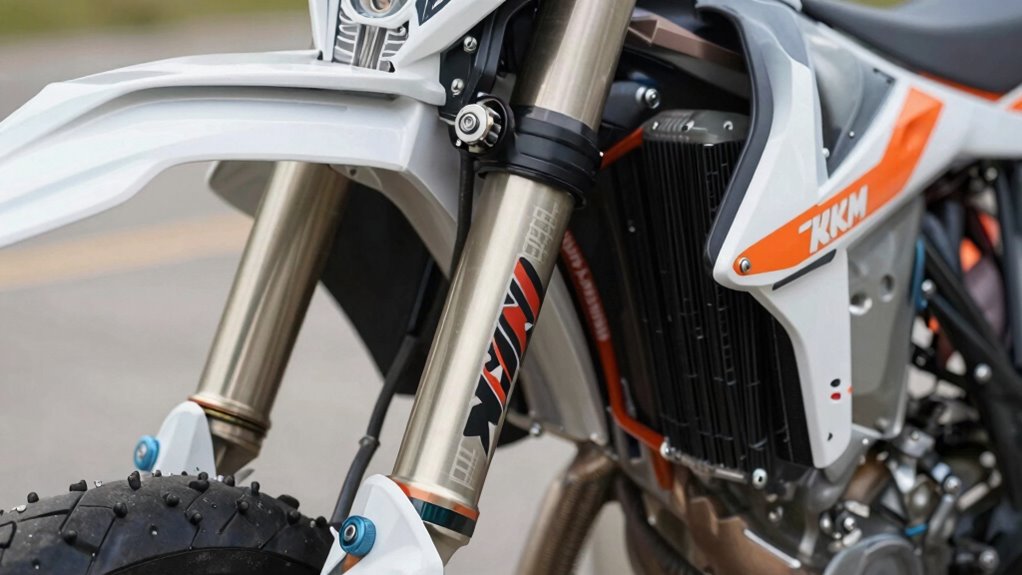
Know Your KTM Suspension Parts and How They Work

Understanding your KTM suspension requires familiarity with its key components, such as the fork, shock, and their internal parts. Each part plays a specific role in absorbing impacts and maintaining stability during rides. Adjusting settings like preload, compression, and rebound directly influences how these components respond to terrain. To optimize performance, it’s essential to understand how Free Floating affects suspension behavior and setup. Additionally, the contrast ratio of your suspension components can influence how well your bike handles different lighting and terrain conditions, especially in varied riding environments. Being aware of the spring rate helps in fine-tuning the suspension to match your weight and riding style for more precise control. Moreover, understanding the net worth of key figures in the motocross community can provide insight into the industry’s financial landscape and sponsorship opportunities. Recognizing how component durability impacts long-term maintenance can also guide better setup choices and improve overall suspension longevity.
Suspension Components Overview
Your KTM suspension system comprises several key components that work together to absorb shocks, maintain stability, and optimize handling. Understanding these parts helps guarantee proper setup and adjustments. The main components include:
- Front Forks – telescopic tubes that compress and rebound to absorb impacts from the front wheel.
- Rear Shock Absorber – a unit that dampens movement of the swingarm, controlling rear wheel response.
- Spring Assemblies – coil or air springs that provide initial support and affect ride height.
- Dampers – hydraulic or gas-based mechanisms that control the speed of suspension movement, preventing harshness or excessive softness.
Each component’s function directly influences ride quality, handling, and stability, making their proper understanding essential for effective suspension tuning.
Function of Adjustment Settings
Adjustment settings on your KTM suspension directly influence how the system responds to various riding conditions, enabling you to fine-tune its performance for ideal stability, comfort, and control. These settings modify the internal damping and spring rate, affecting how your motorcycle absorbs impacts and responds to rider inputs. Rebound adjustment controls how quickly the suspension recovers after compression, while compression damping influences how the system resists bottoming out under load. Preload adjusts the initial tension on the spring, affecting sag and rider position. Precise calibration of these parameters ensures maximum contact with the terrain, enhances handling precision, and reduces rider fatigue. Understanding each setting’s role allows you to make targeted adjustments, resulting in a suspension setup tailored to your riding style and terrain conditions. Proper suspension setup is essential for optimizing your riding experience and ensuring safety. Additionally, familiarizing yourself with the suspension parts and how they work can help you troubleshoot issues more effectively, especially when you understand the internal mechanisms involved. Recognizing the importance of cybersecurity measures can further protect your motorcycle’s digital systems from potential threats.
How to Properly Set Your Sag for Better Handling
To optimize your KTM’s handling, accurately measure your sag length with the rider seated on the bike in riding gear. Adjust the spring preload to achieve the recommended sag value, ensuring consistent suspension response. Properly setting these parameters enhances stability and control across varied terrain. Incorporating connected fitness technology can help monitor and fine-tune suspension settings for optimal performance, leading to a smoother ride and better control. Regularly checking and adjusting your suspension settings ensures you maintain correct setup, which is essential for safe and efficient riding. Understanding world time zones can also assist in scheduling maintenance or riding trips across different regions to ensure timely adjustments. Additionally, being aware of suspension maintenance tips can prolong the lifespan of your components and improve overall ride quality.
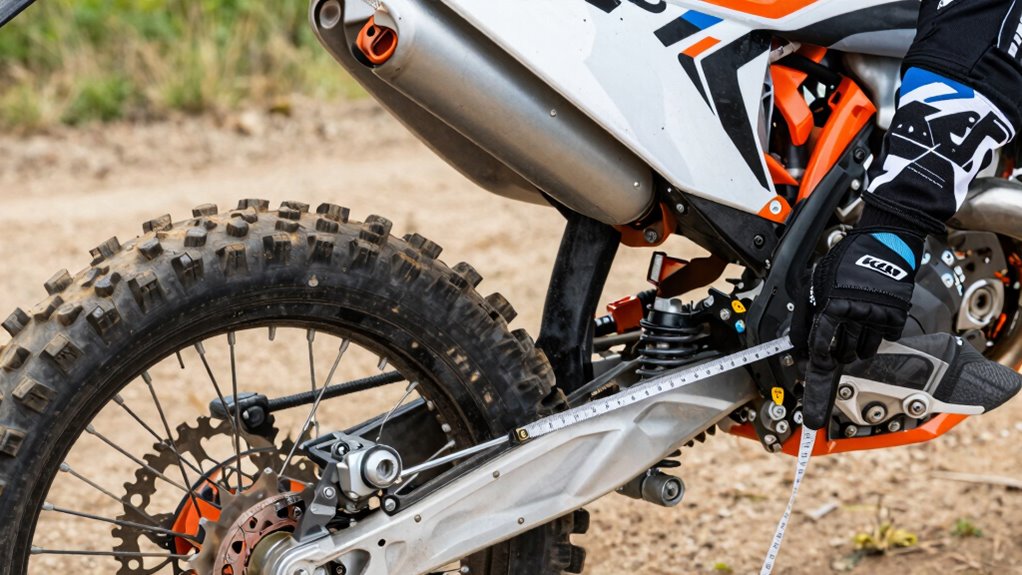
Measure Proper Sag Length
Accurately measuring sag length is essential for maximizing your KTM’s suspension performance. Precise sag measurement ensures proper suspension responsiveness and stability under load. To achieve accurate results: 1. Ensure your motorcycle is on a level surface and properly supported. 2. Measure the distance from a fixed reference point on the swingarm to a designated point on the rear axle with you off the bike—this is your static sag. 3. Have a rider sit on the bike in riding gear without compressing the suspension excessively; measure again for rider sag. 4. Subtract the static sag from the rider sag to determine the actual sag length, which should fall within factory-recommended ranges for optimal handling. Proper sag measurement is a key factor in adjusting your suspension effectively.
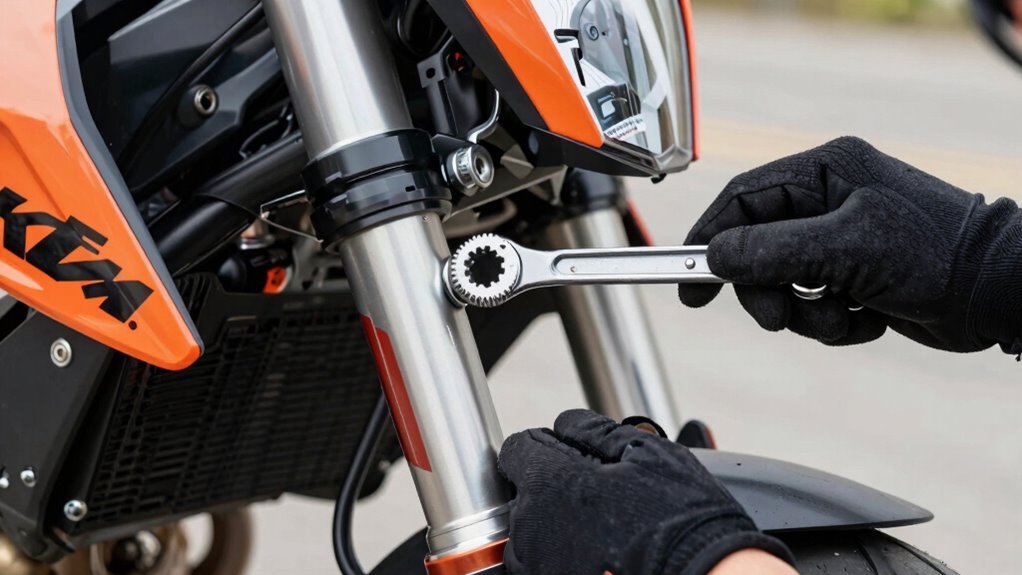
Adjust Spring Preload Correctly
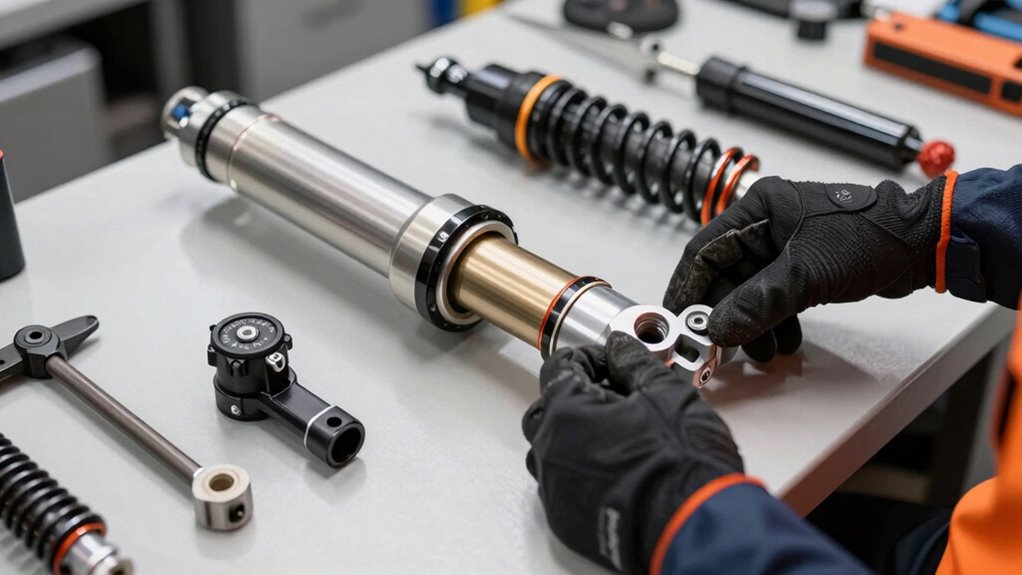
Setting your spring preload correctly is crucial for achieving the ideal sag and guaranteeing your KTM handles predictably across different terrain. To do this, measure the rider’s weight in gear and compare it to the recommended preload settings specified in your manual. Adjust the spring preload by turning the preload adjuster clockwise to increase preload or counterclockwise to decrease it. Confirm the spring is seated fully and the preload ring is properly secured. Use a sag measurement tool or your finger to verify the preload distance, aiming for the manufacturer’s specified sag range. Precise preload setting ensures the suspension responds accurately to terrain variations, prevents bottoming out, and maintains maximum traction. Proper preload adjustment is essential for modern suspension tuning and optimizing your bike’s performance. Correct preload is the foundation for effective suspension tuning and better overall handling.
Adjusting Compression Damping for Control and Comfort
Adjusting compression damping directly influences how your KTM suspension responds to bumps and rapid terrain changes. Proper adjustment ensures peak control, stability, and rider comfort by controlling the rate at which the suspension compresses under load. To fine-tune compression damping effectively, focus on these key aspects:
Fine-tuning compression damping enhances control, stability, and rider comfort during your KTM rides.
- Initial Setting: Start with manufacturer-recommended baseline values.
- Adjustment Range: Use small increments to avoid overshooting desired feel.
- Terrain Response: Increase damping for rough terrain to improve control; decrease for smoother surfaces for comfort.
- Ride Feedback: Test ride after each adjustment, noting how the suspension absorbs impacts and maintains stability.
- Adjustment Technique: Employ proper setup procedures to ensure accurate and consistent tuning results. Additionally, understanding the compression damping function helps riders make more informed adjustments. Recognizing the importance of suspension tuning allows riders to optimize performance across different conditions more effectively.
Precise tuning of compression damping balances responsiveness and comfort, providing predictable handling across diverse conditions.
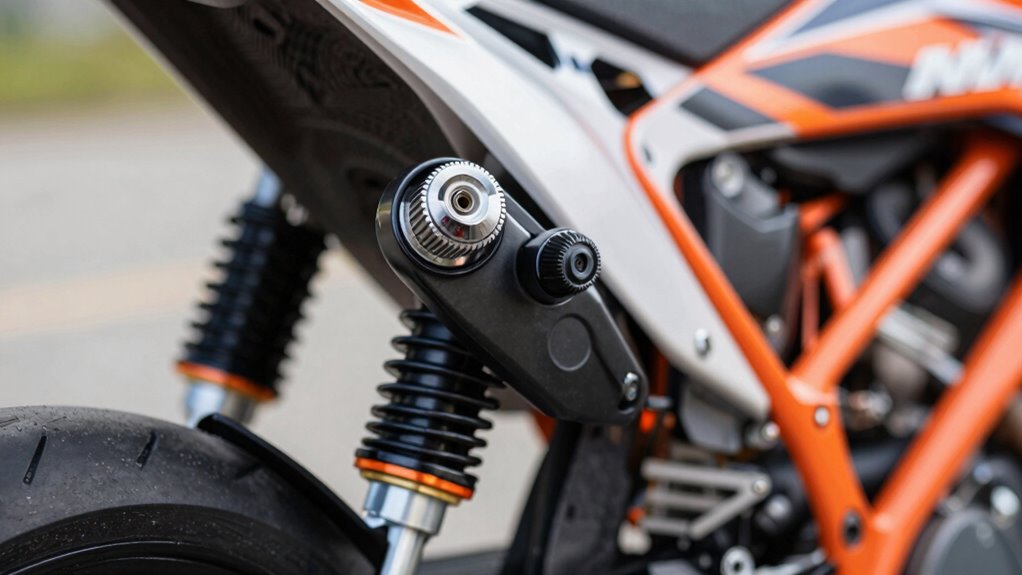
Tuning Rebound Damping to Improve Stability and Feel

Rebound damping controls the speed at which your suspension returns to its normal position after compression, considerably affecting stability and rider feel. Proper adjustment guarantees the suspension recovers quickly enough to maintain tire contact without feeling overly harsh or sluggish. To fine-tune rebound, start with the factory setting and make small adjustments, typically 1/4 turn at a time. If the bike feels unstable or bouncy after hitting a bump, increase rebound damping to slow the return. Conversely, if it feels sluggish or dives into corners, reduce rebound damping. Focus on maintaining a balanced feel: the suspension should recover swiftly yet remain controlled. Precise rebound tuning enhances overall stability, improves traction, and provides a more predictable, confident riding experience.
How to Set Spring Preload for the Perfect Ride Height
To achieve ideal ride height, you need to set your spring preload accurately, which directly influences your bike’s stance and handling characteristics. Proper preload ensures your suspension responds predictably and maintains comfort across terrain.
Setting your spring preload correctly is key to optimal ride height and handling.
- Measure rider weight and add gear to determine target sag (typically 25-30% of total travel).
- Adjust preload collars evenly to reach the desired sag, using a sag measurement tool for precision.
- Confirm ride height by sitting on the bike and checking the distance from a reference point to the axle.
- Fine-tune preload in small increments, ensuring consistent sag and optimal stance without bottoming or excessive extension.
This methodical approach guarantees a balanced, responsive ride tailored to your weight and riding style.
Fine-Tuning High and Low-Speed Compression for Different Terrains

Fine-tuning high and low-speed compression damping allows you to optimize your KTM’s suspension response for varying terrains. Adjusting high-speed compression affects how quickly the suspension resists rapid impacts, such as rocks or roots, preventing harsh bottoming. Lowering high-speed compression softens the response, increasing comfort over technical sections; increasing it enhances control and reduces dive. Conversely, low-speed compression influences chassis stability during slow movements, like cornering or braking. Softer low-speed settings improve traction on loose surfaces, while firmer settings reduce body roll and improve overall stability. To fine-tune effectively, start with baseline settings, then make incremental adjustments based on ride feedback. Use a compression gauge or test on specific terrain types to dial in the precise damping needed for optimal handling and comfort across varied conditions.
Double-Check Your Suspension Settings Before Riding

Before hitting the trail, double-check your suspension settings to guarantee peak performance and safety. Confirming proper setup prevents handling issues and reduces the risk of damage. Verify these critical parameters:
- Sag Measurement: Confirm sag is within manufacturer specs for rider weight, ensuring optimal damping.
- Preload Adjustment: Check preload settings to match sag, maintaining consistent ride height and responsiveness.
- Rebound Settings: Test rebound damping; it should allow smooth extension without bouncing.
- Compression Settings: Ensure high and low-speed compression are correctly set for terrain type, avoiding harshness or bottoming out.
Use a reliable torque wrench for adjustments, and conduct a brief test ride to verify stability. Precise calibration before riding guarantees your suspension performs as designed.
Common Mistakes to Avoid When Tuning Your KTM Suspension
When adjusting your KTM suspension, overlooking common pitfalls can lead to compromised handling and increased wear. One mistake is neglecting to record baseline settings before making adjustments, which hampers troubleshooting. Over-tightening components risks damaging threads and reducing suspension movement, while under-tightening causes looseness that affects stability. Failing to follow a systematic adjustment order can result in inconsistent tuning; adjustments should be made sequentially—starting with preload, then compression, and rebound. Ignoring manufacturer specifications for damping and spring rates can lead to suboptimal performance. Additionally, adjusting only one parameter without considering others can cause imbalance, reducing control and comfort. Always test after each change, and avoid rushing the process, as premature adjustments may mask underlying issues or lead to improper tuning.
Frequently Asked Questions
Can I Skip Steps When Adjusting My KTM Suspension?
You shouldn’t skip steps when adjusting your KTM suspension, as each step builds on the previous one for ideal performance. Skipping can lead to improper settings, affecting handling, safety, and ride comfort. Follow the correct order meticulously—start with preload, then compression, and rebound adjustments. This ensures precise tuning tailored to your riding style and terrain, preventing unnecessary trial and error and achieving a balanced suspension setup.
What Tools Are Essential for Suspension Tuning?
You’ll need a set of vital tools for suspension tuning. A torque wrench guarantees precise adjustments, while a suspension stand provides stability. A fork seal driver and a spring compressor are essential for internal tweaks, and a set of hex and Allen wrenches allows for quick access. Don’t forget oil level gauges and measuring tools for accuracy. Ironically, without these, your “perfect” suspension setup might just be a guess.
How Often Should I Revisit My Suspension Settings?
You should revisit your suspension settings after every few riding sessions, especially if you notice handling changes, new terrain, or increased rider weight. Regular adjustments, roughly every 10-15 hours of riding, help maintain ideal performance. Always reassess when switching riding conditions or after significant bike modifications. Consistent tuning ensures your suspension remains aligned with your riding style and terrain, minimizing fatigue and maximizing control.
Are There Recommended Settings for Beginner Riders?
You should start with the stock factory settings, which are designed for beginners and provide a solid baseline. These settings are typically conservative, offering predictable handling and safety. As a beginner, avoid aggressive adjustments; instead, focus on small, incremental changes based on your riding style and terrain. Regularly test and fine-tune your suspension after each ride to optimize comfort and control, ensuring a safer, more confident riding experience.
How Do I Know if My Suspension Is Properly Balanced?
You’ll know your suspension is properly balanced when the bike maintains stability through various terrain without excessive dive or rebound. Test by riding over bumps and turns; if it feels overly stiff or soft, adjust accordingly. Check for consistent handling, minimal nose-diving, and controlled rebound. Use your body position and feel for uneven compression or extension, indicating whether to fine-tune damping or preload for ideal balance.
Conclusion
Now that you know the correct sequence for adjusting your KTM suspension, the real test begins. Follow each step meticulously, but remember—small changes can have big impacts. Are you ready to open up peak performance and conquer every trail? Don’t overlook the details; your ride’s precision depends on it. When properly tuned, your KTM will respond flawlessly, but one overlooked setting could still hold you back. The choice is yours—are you prepared to master your suspension?