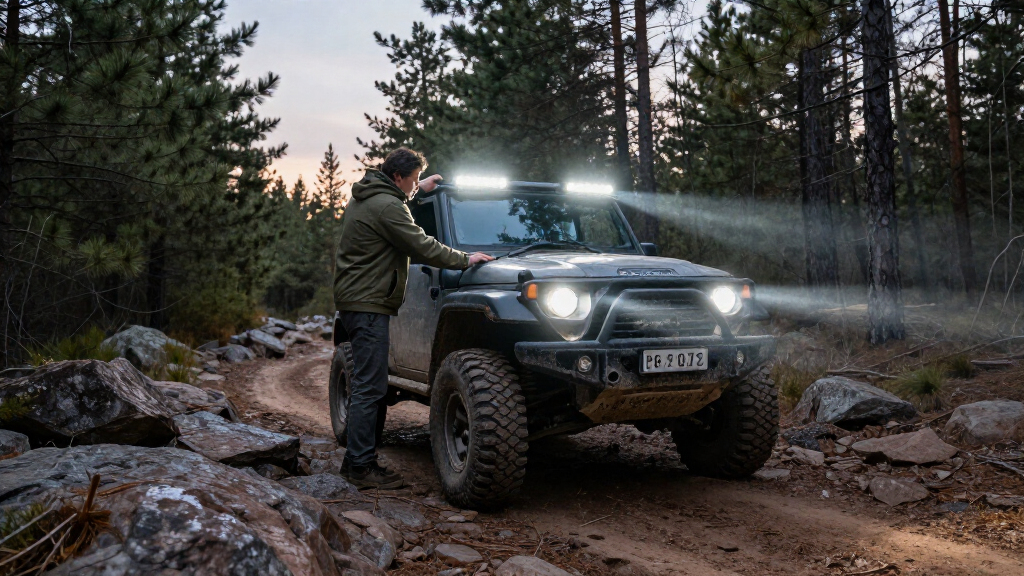
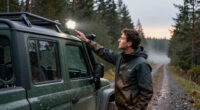
This guide helps you choose a compatible off-road LED light bar, mount it securely, wire it through a fused relay, and aim it for useful illumination. It is for vehicle owners comfortable with basic hand tools and simple 12-volt wiring. Allow 2-4 hours, more if you need to fabricate brackets or route wiring through a difficult area. If you are unsure about vehicle wiring, airbag zones, or structural mounting, have an automotive electrician or qualified installer handle that part.

Get garage and car supplies delivered free — and shop member deals
- Fast, free delivery on millions of items
- Access to Prime Big Deal Days deals on October 6–7
- Prime Video, Amazon Music and more included

Nilight 20-Inch 420W LED Light Bar with Two 4-Inch LED Pods and Wiring Harness
- ✔ Bar size: 20 inches
- ✔ Included lights: One light bar and two 4-inch LED pods
- ✔ Beam type: Spot and flood combo

NAOEVO 7-Inch LED Light Bar with Wiring Harness
- ✔ Size: 7 inches
- ✔ Listed power: 240 W
- ✔ Listed brightness: 24,000 lm

NAOEVO 12-Inch LED Light Bar with Four 4-Inch LED Pods
- ✔ Included lights: One 12-inch bar and four 4-inch LED pods
- ✔ LED chips: 180 SMD3030 chips
- ✔ Beam information: Spot and flood beams; 120-degree beam angle listed
Difficulty: Intermediate | Time: 2-4 hours
What You’ll Need
Tools & Materials:
- LED light bar and vehicle-specific or manufacturer-approved mounting brackets
- Relay wiring harness rated for the light bar’s current draw, including an inline fuse
- Socket and wrench set, screwdrivers, and the correct drill bits if drilling is required
- Multimeter or 12-volt test light
- Wire crimper, wire strippers, heat-shrink tubing, and electrical tape
- Cable ties, abrasion-resistant wire loom, and suitable grommets
- Eye protection and gloves
Knowledge:
- Basic hand-tool use
- Ability to identify the vehicle battery and follow its service manual
- Basic understanding of positive, ground, fuse, and relay connections
Check local regulations before buying or installing the bar. Many places restrict where auxiliary lights can be used on public roads, their color, and whether they must be covered or switched off. Confirm the bar’s voltage, dimensions, current draw, mounting method, and weather rating. Use a harness and fuse sized to the light’s specifications; do not guess wire or fuse ratings. Set aside the vehicle service manual and the light manufacturer’s wiring diagram.
Nilight 20-Inch 420W LED Light Bar with Two 4-Inch LED Pods and Wiring Harness
The Nilight earns our top position by combining a 20-inch triple-row spot-and-flood bar with two 4-inch pods and a wiring harness. That makes it the most straightforward choice for someone outfitting a 12V off-road vehicle who wants more than a single light but would rather not source the basic harness separately. The included harness is 12 feet long, which gives more routing flexibility than a very short lead, although vehicle layout still determines whether it reaches cleanly.Compared with the compact NAOEVO 7-inch model, this kit puts more emphasis on a wide front-mounted bar and adds two auxiliary lights. It also avoids the main setup gap in the NAOEVO 12-inch kit: that model supplies four pods but no harness. The Nilight’s IP67-rated housing is specified for water and dust protection, but the NAOEVO options list IP68 instead, so buyers prioritizing the higher stated ingress rating may prefer one of those alternatives.We would choose this kit when its 20-inch footprint suits the vehicle and the buyer values having the bar, pods, and harness together. Its tradeoff is incomplete output detail: the listing does not say how the stated 420 watts are divided among the three lights. Buyers should also confirm mounting clearance and electrical compatibility rather than assuming the headline wattage describes an installation-ready load for every vehicle.
Pros:
- Includes a 20-inch combo-beam bar, two 4-inch pods, and a wiring harness.
- Triple-row spot-and-flood design combines forward and broad coverage.
- 12-foot harness offers routing length for many vehicle layouts.
- Listed for 12V vehicle applications and has an IP67-rated housing.
Cons:
- Per-light wattage is not specified, making the overall output claim difficult to assess by component.
- The 20-inch bar needs more mounting space than either NAOEVO bar.
- Its listed IP67 rating is lower than the IP68 ratings listed for the NAOEVO models.
Best for: Drivers with a 12V truck, ATV, car, or motorcycle who have room for a 20-inch bar and want a multi-light kit with a harness included.
Not ideal for: Buyers with limited mounting space, those who need a stated wattage breakdown for each light, or those who specifically want an IP68 listing.
Bottom line: We rank the Nilight first for its useful balance of bar size, auxiliary pods, and included wiring, provided its larger footprint fits the vehicle.
“We rank the Nilight first for its useful balance of bar size, auxiliary pods, and included wiring, provided its larger footprint fits the vehicle.”
NAOEVO 7-Inch LED Light Bar with Wiring Harness
When front-end space is scarce, this 7-inch NAOEVO bar is the easiest model here to consider. It pairs a stated 15-degree spotlight with a 120-degree flood beam, giving a compact fixture both a focused and a wide-area role. Its listing also includes a 10-foot harness, 40A relay, and inline fuses, so it is better equipped for a planned installation than the larger NAOEVO kit, which leaves the harness to the buyer.Compared with the Nilight, this is a single compact bar rather than a 20-inch bar-and-pod package. That can simplify placement on a smaller vehicle or in a location where a long housing will not fit, but it does not provide the same number of separate light fixtures. The IP68 die-cast aluminum housing, adjustable bracket, and cooling fans are useful construction details for an off-road accessory, though they do not remove the need to mount and wire it correctly.The product lists 240 watts and 24,000 lumens, but we would not use those figures alone to predict illumination against the other models. As with any electrical accessory, installation must suit the vehicle’s wiring and mounting points. This is our compact pick for buyers who want a small, self-contained light-bar package, not the right answer for someone seeking broad multi-light coverage out of the box.
Pros:
- Compact 7-inch format is easier to fit where a 20-inch bar may not work.
- Combines a stated 15-degree spotlight and 120-degree floodlight.
- Includes a 10-foot harness, 40A relay, and inline fuses.
- Lists an IP68 die-cast aluminum housing, cooling fans, and a 45-degree adjustable bracket.
Cons:
- Provides one bar rather than the multi-light coverage of the Nilight or 12-inch NAOEVO kit.
- Installation and wiring still need to match the vehicle.
- Listed power and brightness figures do not by themselves establish comparative real-world performance.
Best for: Owners of smaller off-road vehicles or vehicles with tight mounting areas who want a compact bar and a harness package that includes a relay and fuses.
Not ideal for: Buyers seeking multiple separately mountable lights, a long bar for broad front coverage, or a kit needing no vehicle-specific wiring work.
Bottom line: We recommend the 7-inch NAOEVO when mounting space and an included harness matter more than having several separate lights.
“We recommend the 7-inch NAOEVO when mounting space and an included harness matter more than having several separate lights.”
NAOEVO 12-Inch LED Light Bar with Four 4-Inch LED Pods
The 12-inch NAOEVO kit stands apart through quantity and placement flexibility: it includes one light bar and four 4-inch pods, with spot and flood beams intended to pair distance reach with a broader illuminated area. Compared with the Nilight, it supplies two additional pods and uses a shorter main bar. That makes it appealing to buyers who want to distribute light across several mounting points rather than relying primarily on a single long bar.Its IP68-rated construction, aluminum housing, cooling fans, and adjustable mount are relevant to exposed off-road installations. The stated 45-degree adjustment can help aim the bar after mounting, although buyers should plan the locations and wiring for all five fixtures before ordering. Unlike both other picks, this kit does not include a wiring harness, which raises the amount of sourcing and installation planning needed. The NAOEVO 7-inch model is the simpler choice if a buyer wants a harness included and only needs one compact bar.We would be cautious about comparing its output figures with the alternatives: the listing gives conflicting color temperatures—5400 K in specifications and 6500 K in the description—and inconsistent wattage information, including 540 W and a maximum compatible light-source wattage of 200 W. Those discrepancies make the exact configuration less clear. This is still the most flexible choice for multiple light positions, but it is not our pick for buyers who want unambiguous electrical details or a ready-to-wire package.
Pros:
- Five-light layout includes a 12-inch bar and four 4-inch pods.
- Spot and flood beams are intended to balance distance and area coverage.
- Lists IP68-rated construction, aluminum housing, and cooling fans.
- Adjustable mounting allows the bar direction to be repositioned.
Cons:
- Wiring harness is not included.
- Listing conflicts on color temperature and wattage, complicating comparison and setup planning.
- Five fixtures require more mounting and wiring decisions than the single-bar NAOEVO.
Best for: Off-road vehicle owners who want a bar plus four pods for several mounting positions and are prepared to source a compatible harness.
Not ideal for: Buyers who want a complete wiring package, need consistent wattage and color-temperature specifications, or have limited room and wiring capacity for five fixtures.
Bottom line: We choose this kit for buyers who prioritize flexible, multi-point lighting and can handle the missing harness and inconsistent specifications.
“We choose this kit for buyers who prioritize flexible, multi-point lighting and can handle the missing harness and inconsistent specifications.”
As an Amazon Associate we earn from qualifying purchases.
Before You Start
Park on level ground, switch off the ignition, remove the key, and let hot engine parts cool. Keep the parking brake on. Disconnect the negative battery terminal before mounting or wiring, following the vehicle manual; some vehicles need a specific shutdown procedure or a wait period for airbag and electronic systems. Never route wires near exhaust parts, sharp edges, moving belts, steering components, or airbag deployment areas. Do not drill until you have checked both sides of the mounting surface for wiring, fuel lines, sensors, and structural parts. If the installation requires cutting or tapping factory wiring, stop and consult a qualified installer.
Step-by-Step Instructions
Step 1: Choose the bar and mounting location
Measure the available space and compare it with the bar and bracket dimensions. Choose a location on a firm, supported surface such as a suitable bumper or a manufacturer-approved roof bracket. Check that the bar will not block the radiator, grille airflow, cameras, parking sensors, license plate, or driver’s view. Confirm the light’s voltage and current draw match the vehicle supply and harness. Choose a beam pattern for the task: a wide flood pattern suits nearby trail edges, while a spot or combo pattern reaches farther.
Tip:Do not attach a heavy bar to thin trim or unsupported plastic. Roof mounting can add wind noise and may need vehicle-specific reinforcement.
Check: The bar fits with clearance for its brackets, adjustment range, wiring, and vehicle features.
Step 2: Position and mark the brackets
Hold the brackets in the chosen position and check that the bar sits level and is centered as intended. Mark the fastener locations. If using existing holes, verify they match the bracket and are not damaged. If drilling is approved and required, inspect behind the surface before making each hole, then use the specified bit and protect exposed metal from corrosion. Do not drill into a bumper beam, frame, or other structural component unless the vehicle or bracket maker permits it.
Tip:Use the supplied hardware or hardware specified by the bracket maker. Do not substitute undersized bolts or washers.
Check: The holes align with the brackets, and the proposed mounting points are clear of hidden components.
Step 3: Fasten the light bar
Attach the brackets to the bar loosely so you can still adjust its angle. Mount the assembly to the vehicle using the correct bolts, washers, and locking hardware. Tighten fasteners to the manufacturer’s torque specification with the bar supported so it cannot fall or twist. Avoid overtightening, which can damage the housing or threads. Keep enough room to tilt the bar for aiming.
Tip:If the bracket maker gives no torque value, ask the maker rather than applying an arbitrary high force.
Check: The bar is supported firmly, does not wobble by hand, and can still be aimed without binding.
Step 4: Plan and route the wiring
Identify the harness battery leads, fuse, relay, switch lead, and light connector from the wiring diagram. Route the light’s cable toward the engine bay along a protected path. Keep it away from hot, sharp, wet, and moving parts; leave enough slack for adjustment but not loops that can snag. Pass through an existing grommet where suitable. If a new body opening is permitted, fit a correctly sized grommet and seal it against water. Secure the harness with cable ties and abrasion-resistant loom.
Tip:Do not place a cable tie so tightly that it crushes the wire, and do not run a wire through a door or hood gap where it can be pinched.
Check: The harness is protected along its full route, with no pinched sections or contact with hot or moving parts.
Step 5: Connect the relay harness
Keep the battery disconnected. Connect the light bar to the harness output and connect the harness’s positive and ground leads as shown in its diagram. Mount the relay and fuse holder where they are secure, dry, and accessible. Connect the switch lead according to the harness instructions; use an ignition-controlled trigger if required by local rules or desired to prevent accidental use. Make crimps with the correct tool, cover exposed joints with heat-shrink, and keep the fuse out until the connections are checked. Do not connect the light directly to a dashboard switch unless the switch and wiring are rated for the full current.
Tip:The fuse protects the power wire. Place it as close to the battery connection as the harness maker specifies, and never install a larger fuse to stop repeated blowing.
Check: All connections match the wiring diagram, terminals are secure, and the power lead is fused at the specified rating.
Step 6: Inspect, reconnect, and test
Check every fastener, connector, ground point, and wire route. Confirm the light is switched off. Reconnect the negative battery terminal following the vehicle manual, then install the harness fuse. Turn the light on briefly and verify it illuminates. Check for flickering, unusual heat, smoke, a burning smell, warning lights, or a blown fuse. Turn it off immediately if any of these occur. Test the switch and, if fitted, confirm the light turns off with the ignition as intended.
Tip:Keep the bar off when driving on public roads unless its use is legal in your location and conditions.
Check: The bar switches on and off reliably, the wiring remains cool, and no fuse or vehicle warning appears.
Step 7: Aim the light bar
Park on level ground facing a flat wall, with the vehicle at its normal load and tire pressure. Switch on the bar and adjust its angle so the beam illuminates the needed area without shining directly into the eyes of other drivers. Tighten the aiming hardware to its specified torque, then recheck the beam. If your jurisdiction sets a maximum mounting height or beam aim, follow those requirements. Recheck the aim after the first off-road trip, since vibration can loosen hardware.
Tip:A light bar can produce glare even when aimed downward. Use it only where permitted and when it will not affect other road users.
Check: The brackets stay tight and the beam lights the intended trail area without an unsafe upward aim.
Common Mistakes to Avoid
- Choosing a mounting point that flexes, blocks airflow, or interferes with sensors. — Check support, clearances, vehicle features, and the bracket maker’s fitment guidance before drilling or fastening.
- Using an undersized harness or an incorrectly rated fuse. — Match the harness, wire, relay, and fuse to the light manufacturer’s current and wiring specifications.
- Routing wire beside exhaust parts, moving components, or sharp edges. — Inspect the full route, use loom and grommets, and secure the harness with clearance from hazards.
- Aiming the light too high or using it where road rules prohibit it. — Aim it on level ground, check local requirements, and switch it off or cover it on public roads as required.
Troubleshooting
Problem: The bar does not turn on.
Solution: Switch it off and disconnect the battery before inspecting wiring. Check the fuse, relay orientation, battery connections, ground point, switch lead, and light connector against the harness diagram. Replace a fuse only with the specified rating after correcting any short or loose connection.
Problem: The fuse blows as soon as the light is switched on.
Solution: Do not fit a larger fuse. Disconnect the battery and inspect for pinched or damaged wire, reversed or loose connections, a short to ground, or a light whose current draw exceeds the harness rating. Repair the fault or have the system checked by an automotive electrician.
Problem: The light flickers or dims.
Solution: Turn it off and inspect battery terminals, ground, crimps, connectors, and the harness rating. Clean and secure connections as directed by the vehicle and harness makers. If flicker continues, have charging voltage and current draw tested.
Problem: The bar or brackets loosen after use.
Solution: Stop using the light until the mount is secure. Inspect for incorrect hardware, damaged threads, or a flexing mounting surface. Refit and torque to the maker’s specification; replace damaged parts rather than relying on extra tightening.
What Success Looks Like
The light bar is firmly supported, its wiring is fused and protected from heat, abrasion, water entry, and moving parts, and the switch operates it consistently. The beam illuminates the intended area without hazardous glare. No fuse blows, wiring heats up, or warning lights appear during testing, and the installation follows the vehicle, light, and local road-use requirements.
Next Steps
After the first drive, inspect the brackets, fasteners, cable ties, grommet, connectors, and beam aim. Repeat the inspection after rough trips and whenever you notice movement, flicker, or damage. Clean the lens with a suitable non-abrasive cleaner and keep the light switched off or covered on public roads when required by local rules. If water enters the housing, wiring insulation is damaged, or a fuse keeps blowing, stop using the bar and get the fault repaired before reconnecting it.
Frequently Asked Questions
Can I wire an LED light bar directly to the battery?
Use the light maker’s wiring diagram and a properly rated harness with a relay and fuse. A direct battery connection without suitable overcurrent protection can leave the power wire unprotected, and a dashboard switch may not handle the light’s current. Keep the battery disconnected while making connections.
What fuse size should I use?
Use the fuse rating specified by the light or harness manufacturer, matched to the wiring and load. Do not guess or increase the rating when a fuse blows; find and repair the cause first.
Where is the best place to mount a light bar?
Choose a solid, approved mounting point with enough clearance for adjustment and wiring. Check airflow, sensors, cameras, visibility, wind exposure, and local mounting rules. A vehicle-specific bracket is usually preferable to attaching the bar to unsupported trim.
Can I use an off-road light bar on public roads?
Rules vary by location and can restrict use, color, placement, or whether the bar must be covered. Check your local vehicle and lighting regulations before installation, and switch it off whenever its use is not allowed or could dazzle other drivers.
Halloween Picks
halloween
As an affiliate, we earn on qualifying purchases.